How Can We Help?
How to Build a Regression Pipeline
Cortex is an easy-to-use platform that enables anyone to automate Machine Learning Pipelines from continuous streams of event data. In this guide, we’ll show you how to make predictions about numeric attributes using Regression pipelines in Cortex.
What are Regression pipelines?
Regression pipelines allow you to predict the value of some numeric attribute for each of your users. If you know the value of that attribute for a subset of users, you can use a Regression pipeline to leverage that information into broad insights about your entire set of users.
Note that while we’ll be using the example of predicting a user attribute, your Cortex account can be configured to make predictions about any type of object tied to your event data (e.g. commerce items, media content, home listings, etc.).
When should I use a Regression pipeline?
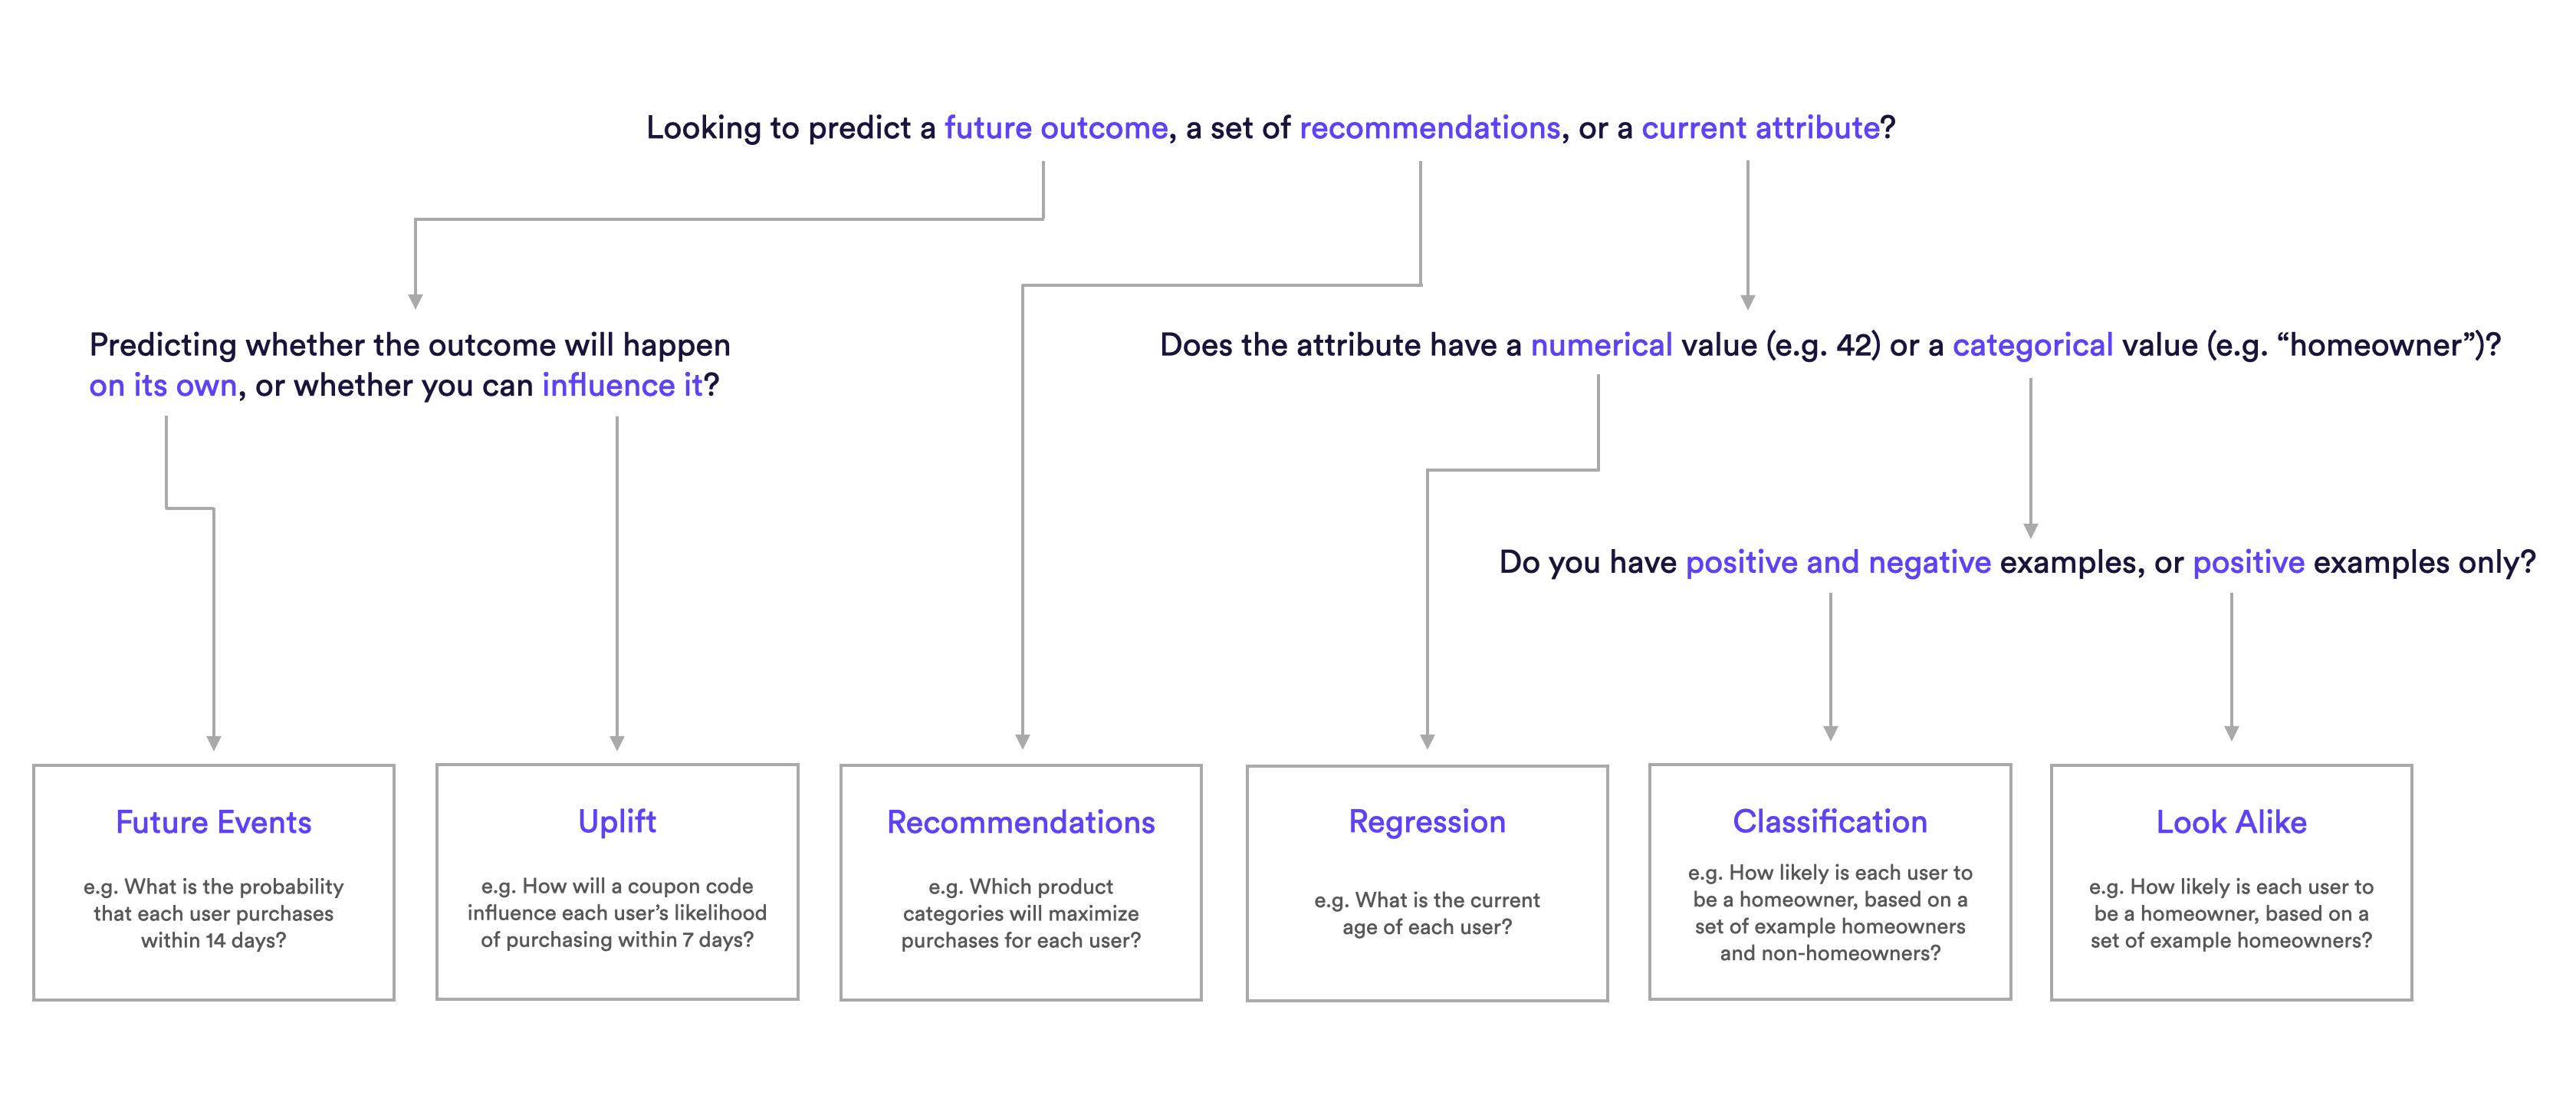
Whether to use a Regression pipeline depends on the prediction value you are looking to receive. You should use a Regression pipeline if your prediction should identify a numeric attribute for each user (e.g. “What is the age of this user?”). If you’re looking to answer “Yes/No” question about a user attribute, (e.g. “Is this user a CEO?”, use a Classification or Look Alike pipeline instead.
The following diagram will help explain which pipeline type is best suited for different predictions.
What are example Regression pipelines?
Regression Pipeline Examples
- What is the current age of each user, based on an uploaded set of known user ages?
- What is the household income of each user, based on an uploaded set of known user incomes?
How do I build these pipelines in Cortex?
Step 1: Choose Pipeline Type
Select ‘Create New Pipeline’ from your Cortex account. Make sure that the “Batch | Real-Time” toggle is set to “Batch”, and choose the Regression pipeline type.

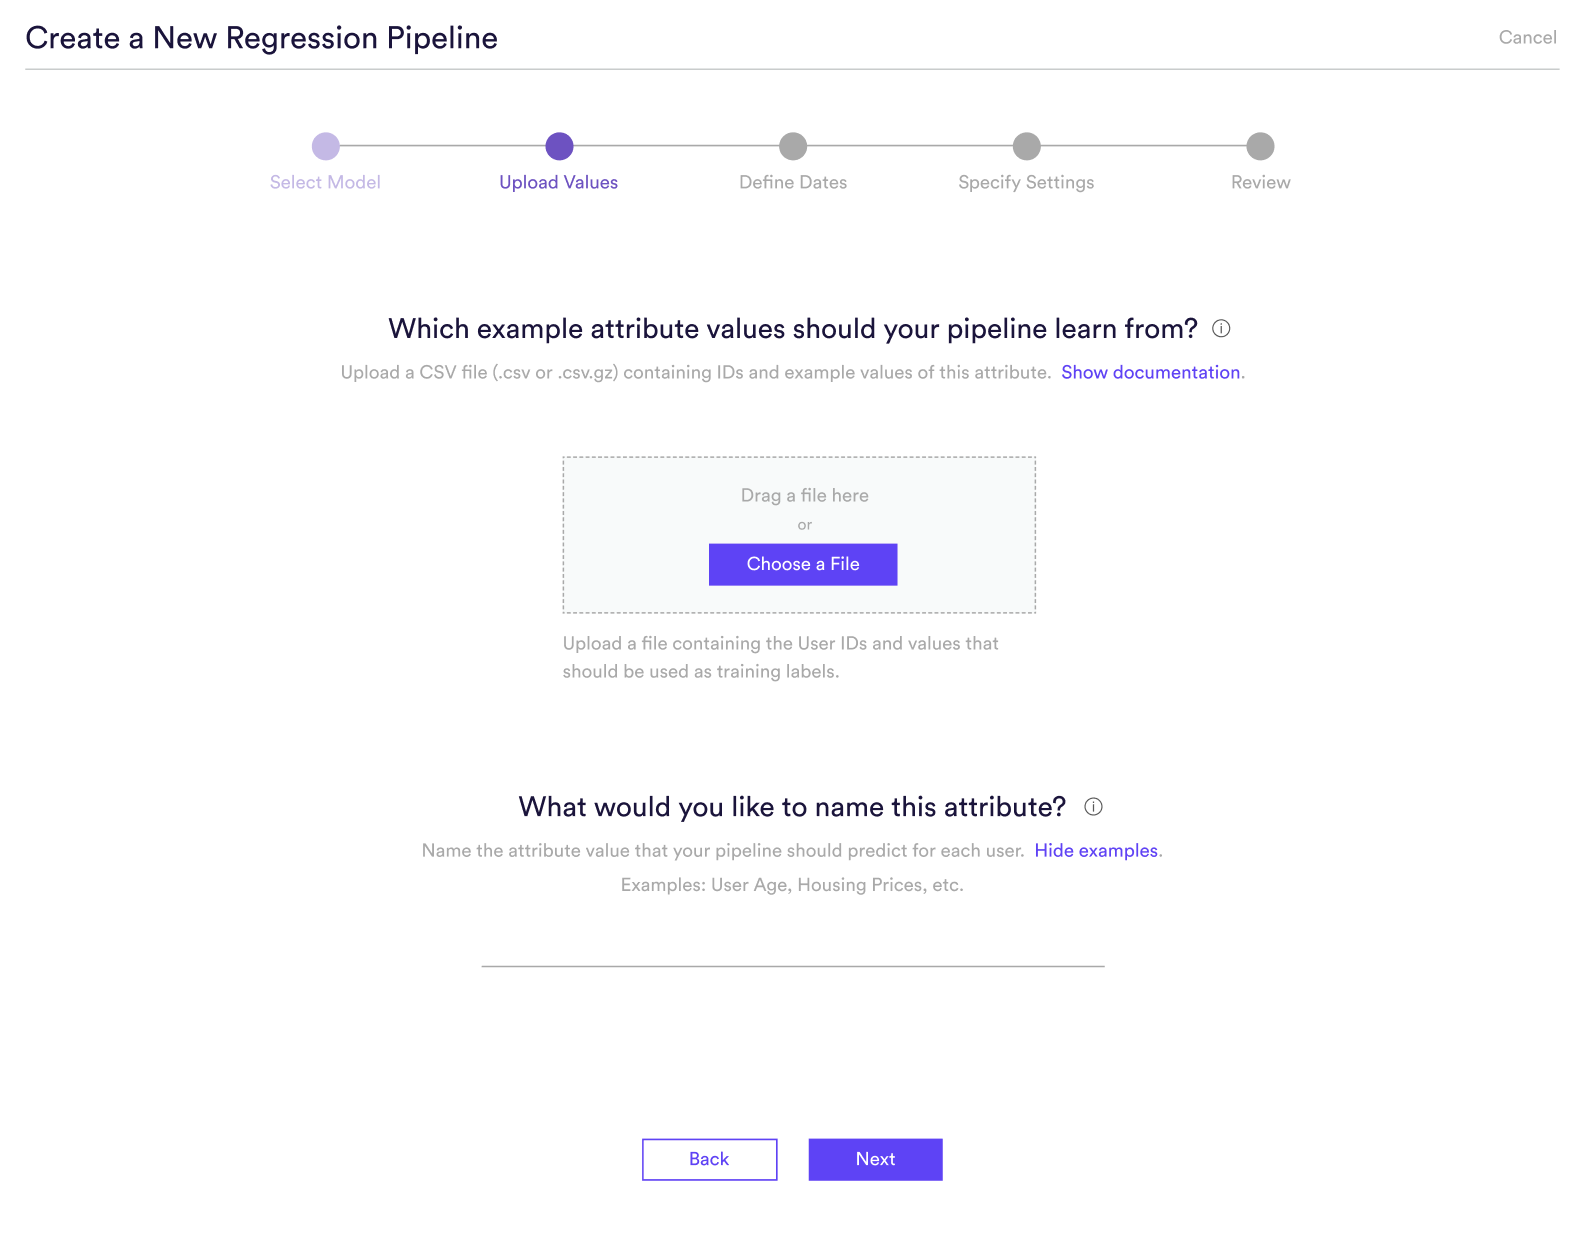
Step 2: Upload Values
Upload a CSV file containing a set of user IDs and example values of the numeric attribute that you’d like to predict. Your pipeline will train on the event data associated with these IDs in order to predict a value for each of your remaining users.
Once you’ve uploaded your file, enter a descriptive name for the attribute it contains. The name you provide will be used only to summarize your predictions in an understandable way (e.g. “predicting the value of ____”). The name won’t have any effect on what your pipeline is predicting or how it performs.
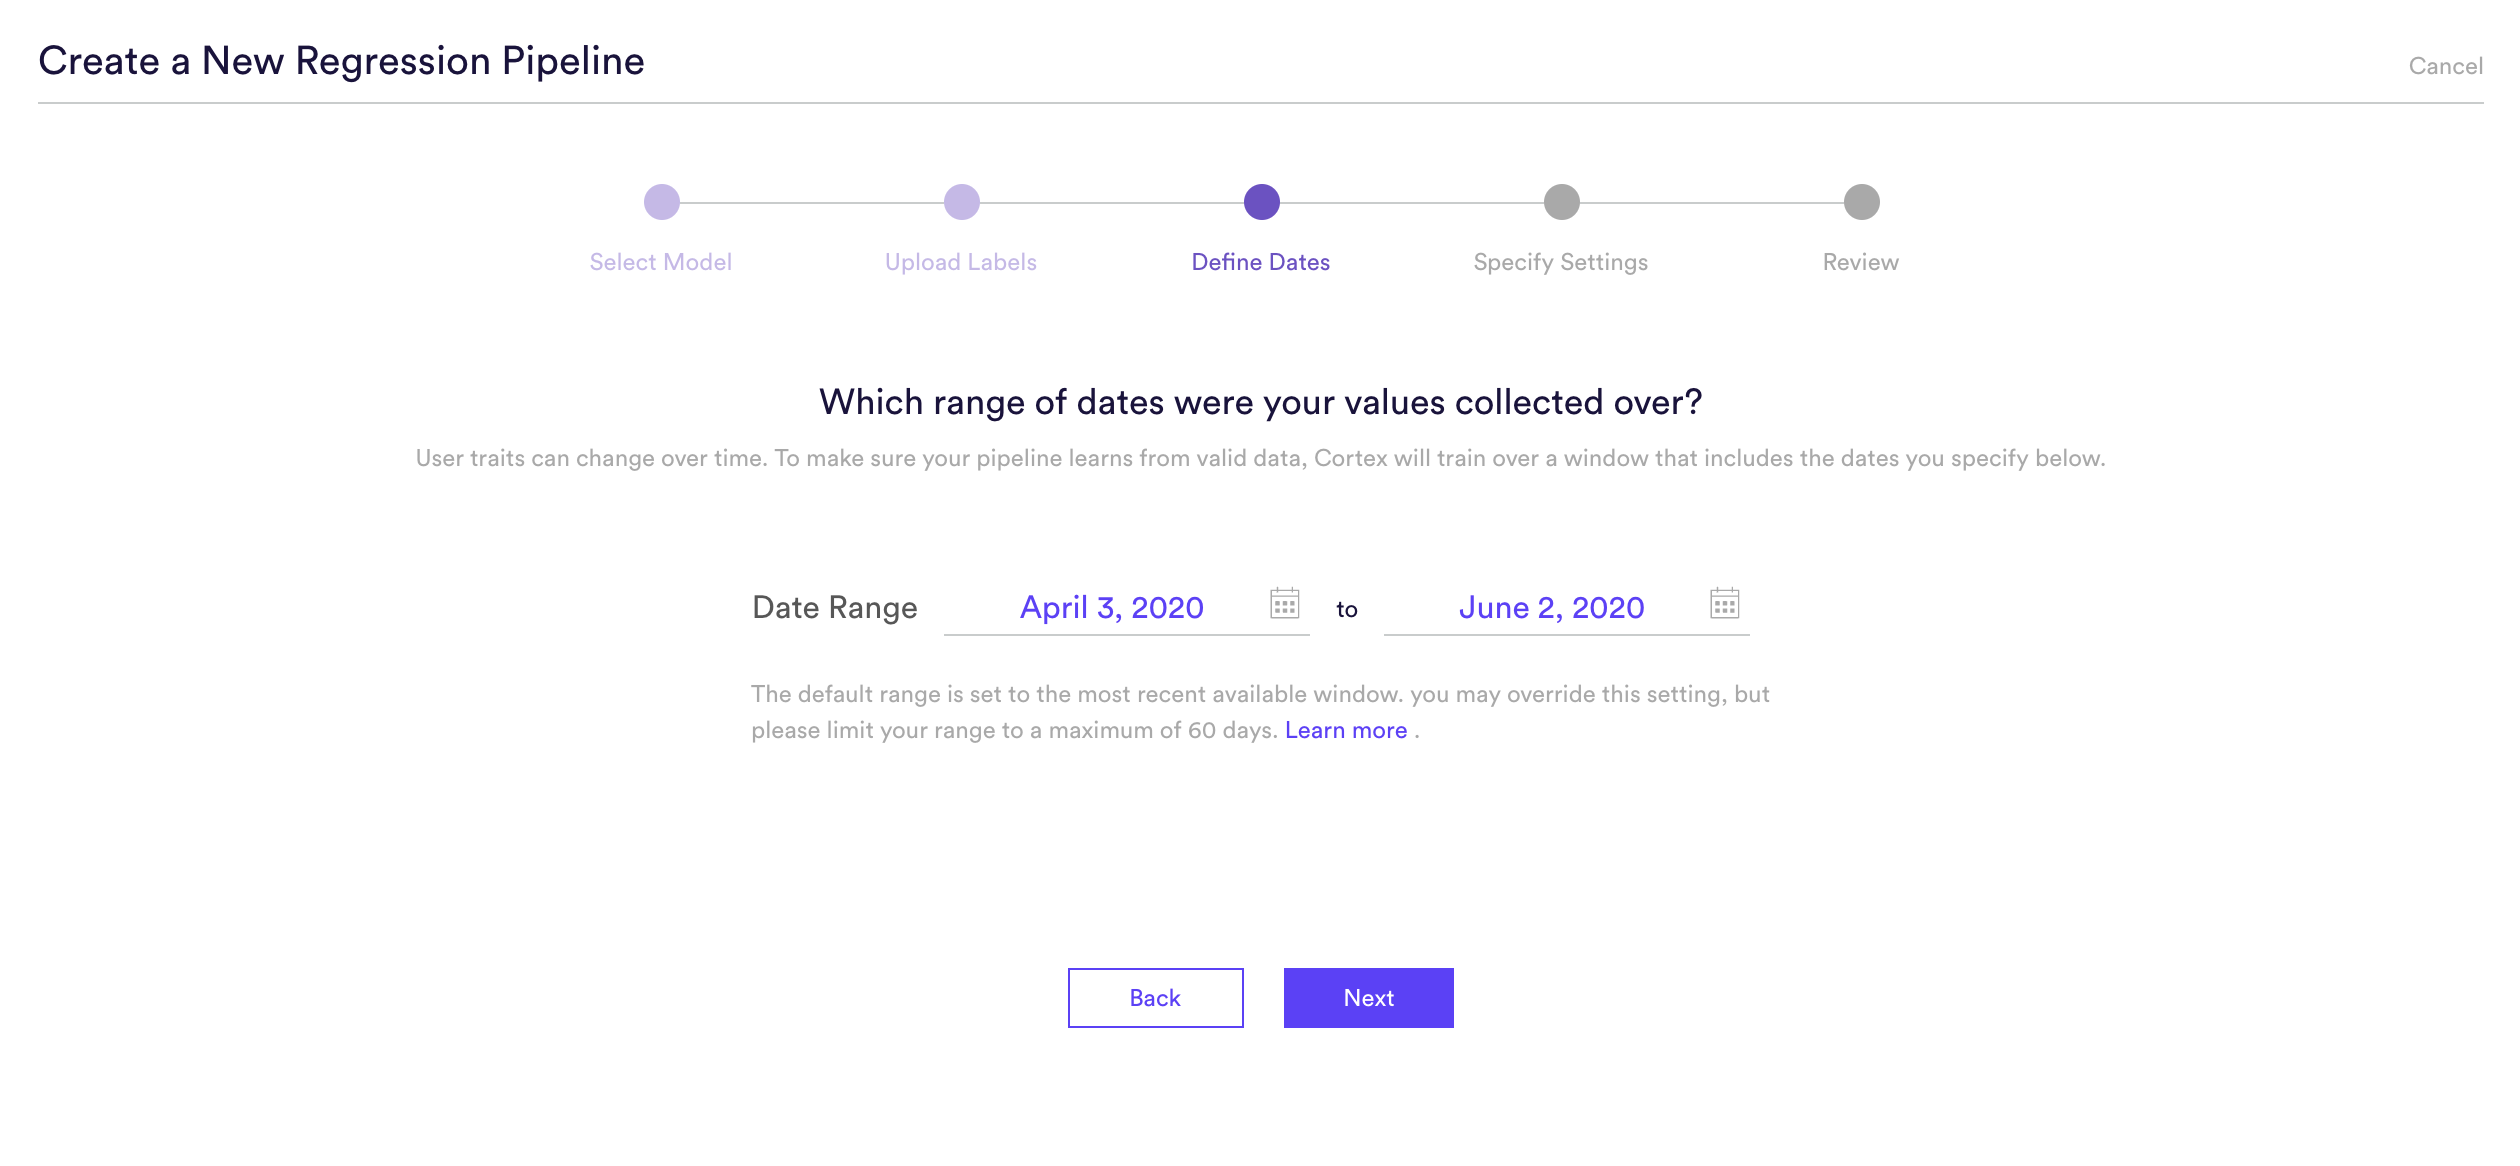
Step 3: Define Dates
Attributes can change over time. If the example values that you uploaded were collected in the past, they may be outdated today. To make sure Cortex learns from the right data, define a range of training dates during which your uploaded values were likely to be valid.
By default, your date range will be set to the most recent period. Cortex will use event data recorded between these dates in order to learn. You may want to override this default if there is another window that better satisfies the below conditions –
- Your example sets are likely to be valid. If your examples were collected in the past, sets for some users may be outdated. Find a range when the sets you uploaded are likely to have remained constant.
- Your example users are likely to be active. Cortex learns from event data associated with the IDs you uploaded. In order to provide Cortex as much data as possible, choose a range when the greatest number of your uploaded IDs were active and completing events.
Event data is likely to reflect the present. If your business’ data has changed over time or contains a lot of seasonality, you should carefully select a range that contains event patterns that are relevant going forward.
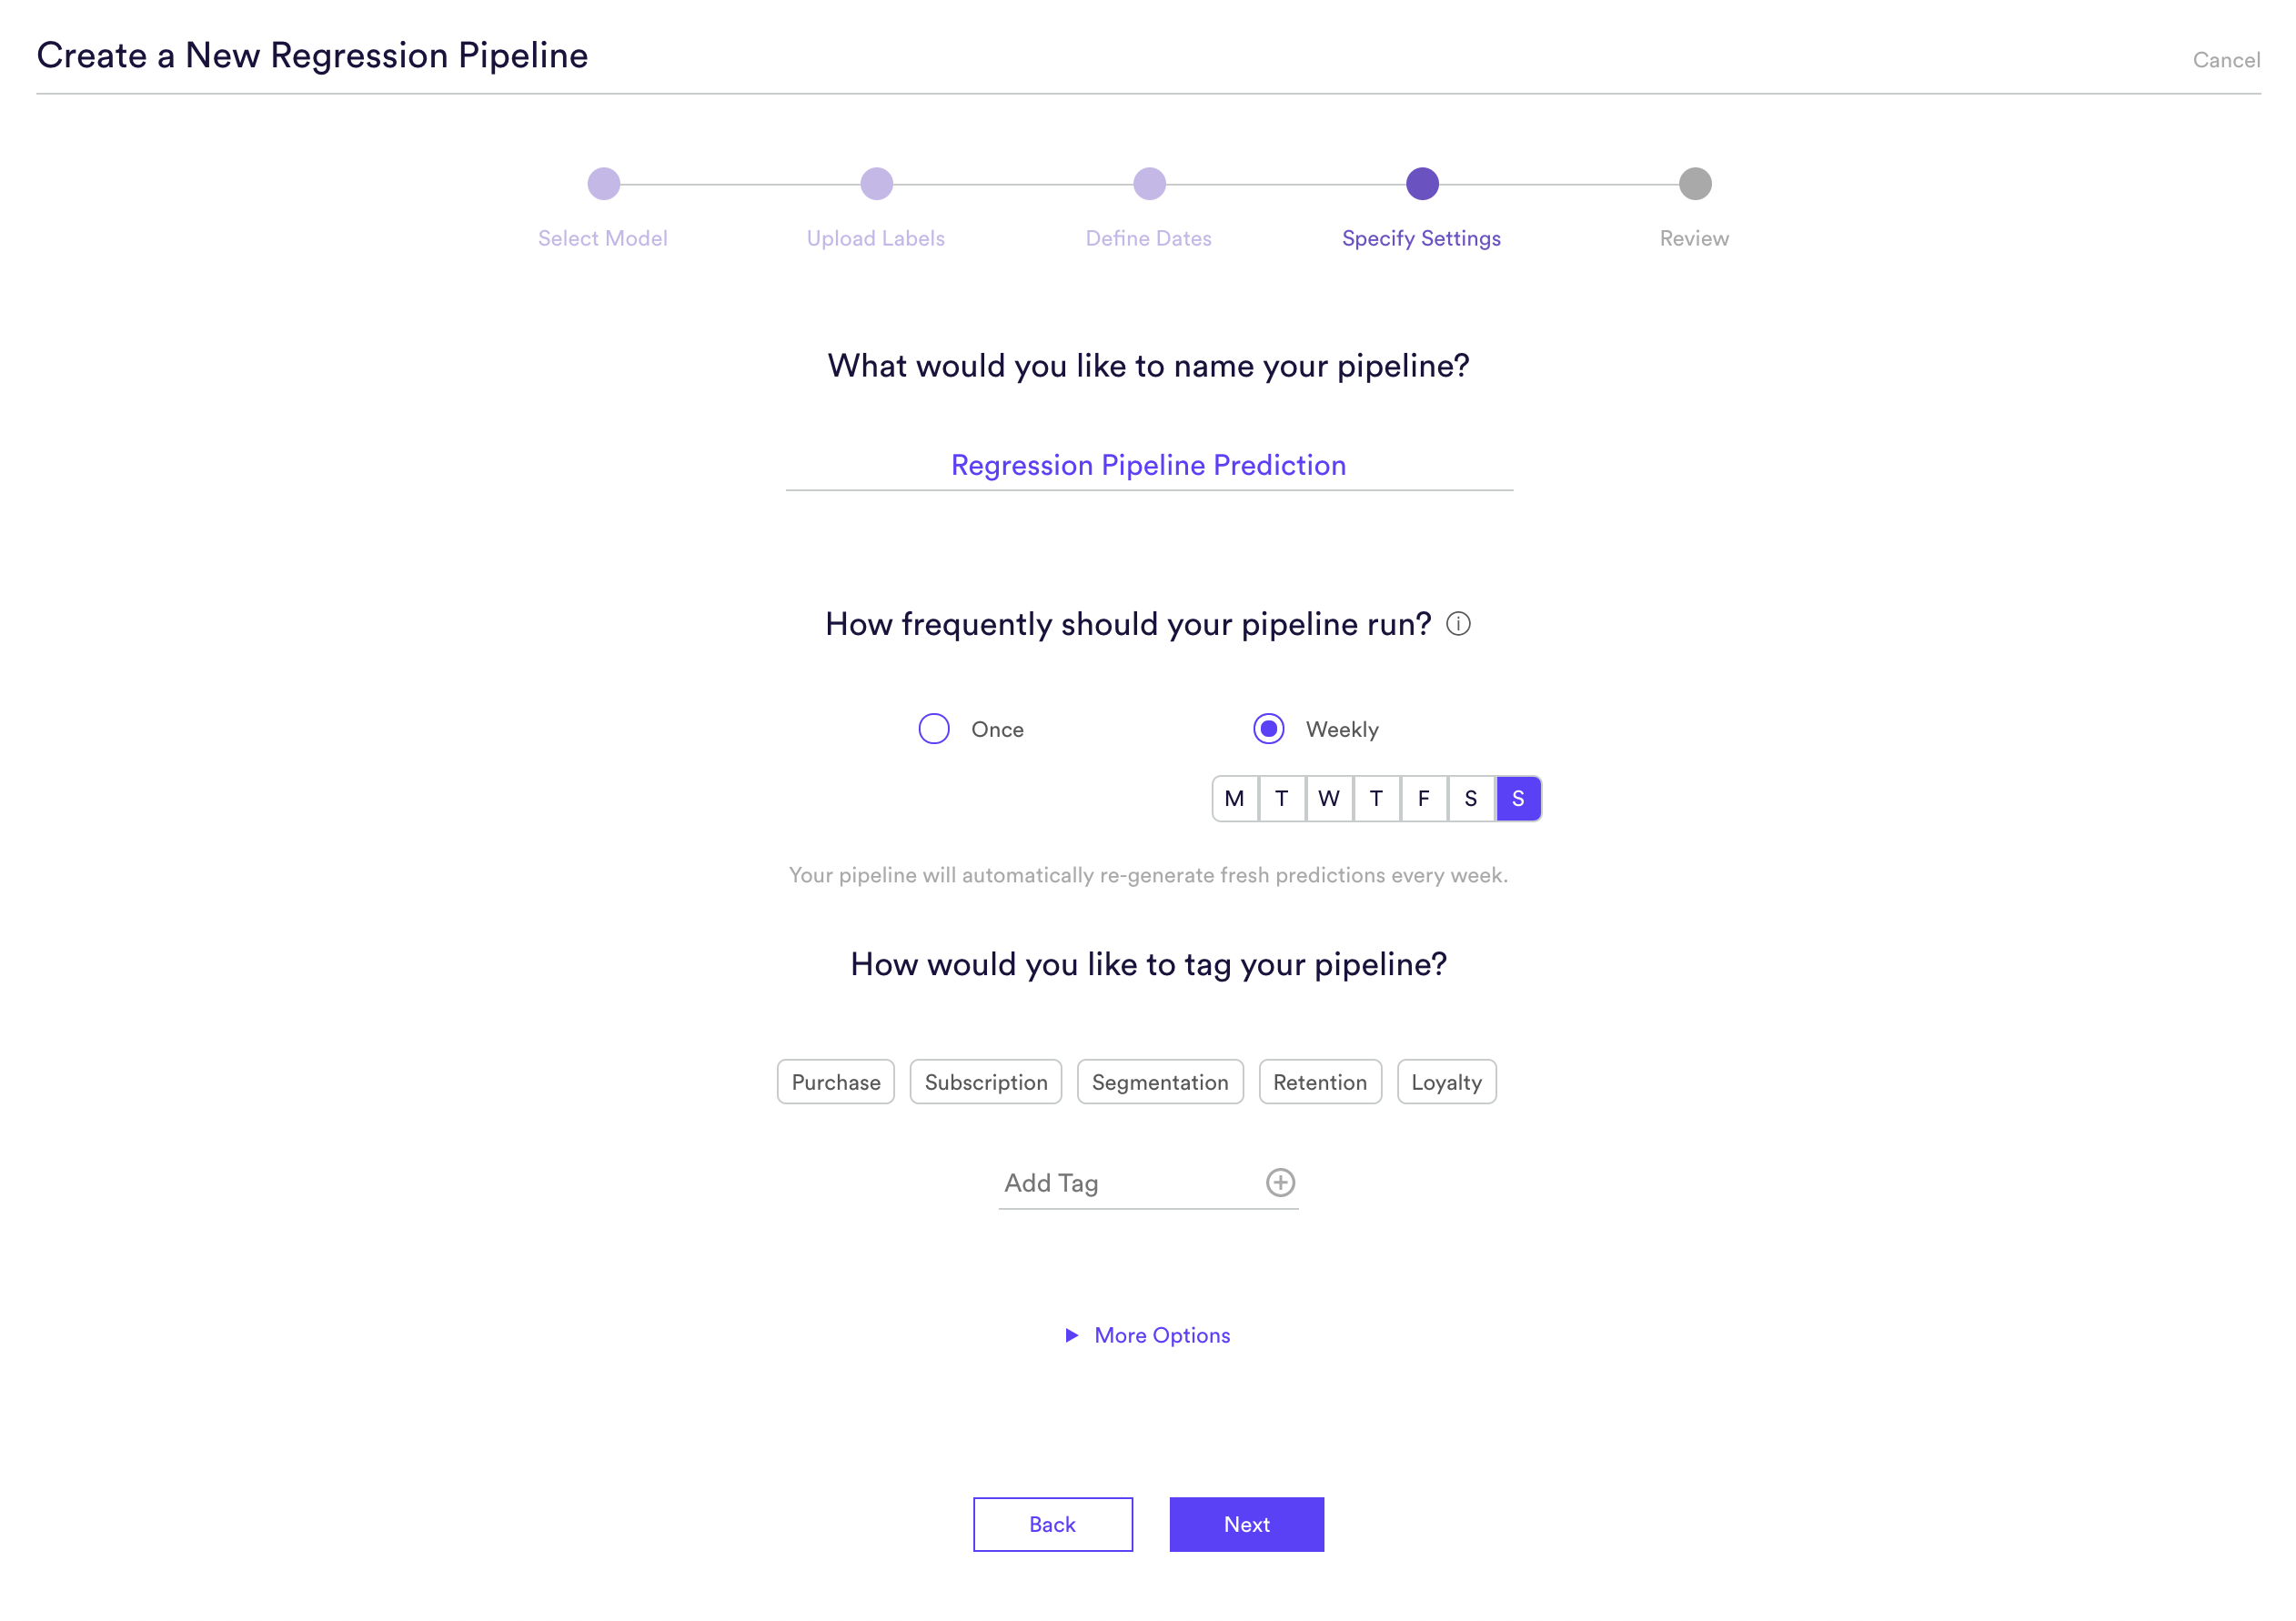
Step 4: Specify Settings
Specify settings such as your pipeline’s name, schedule, tags, and more.
Every time your pipeline runs, Cortex goes through the end-to-end process of generating fresh predictions from the latest data that’s been ingested. If you’d like to power automation based on predictions that are always up-to-date, make sure your pipeline is set to run repeatedly. If you’re just testing things out or building a pipeline for one-time use, your pipeline should only run once.
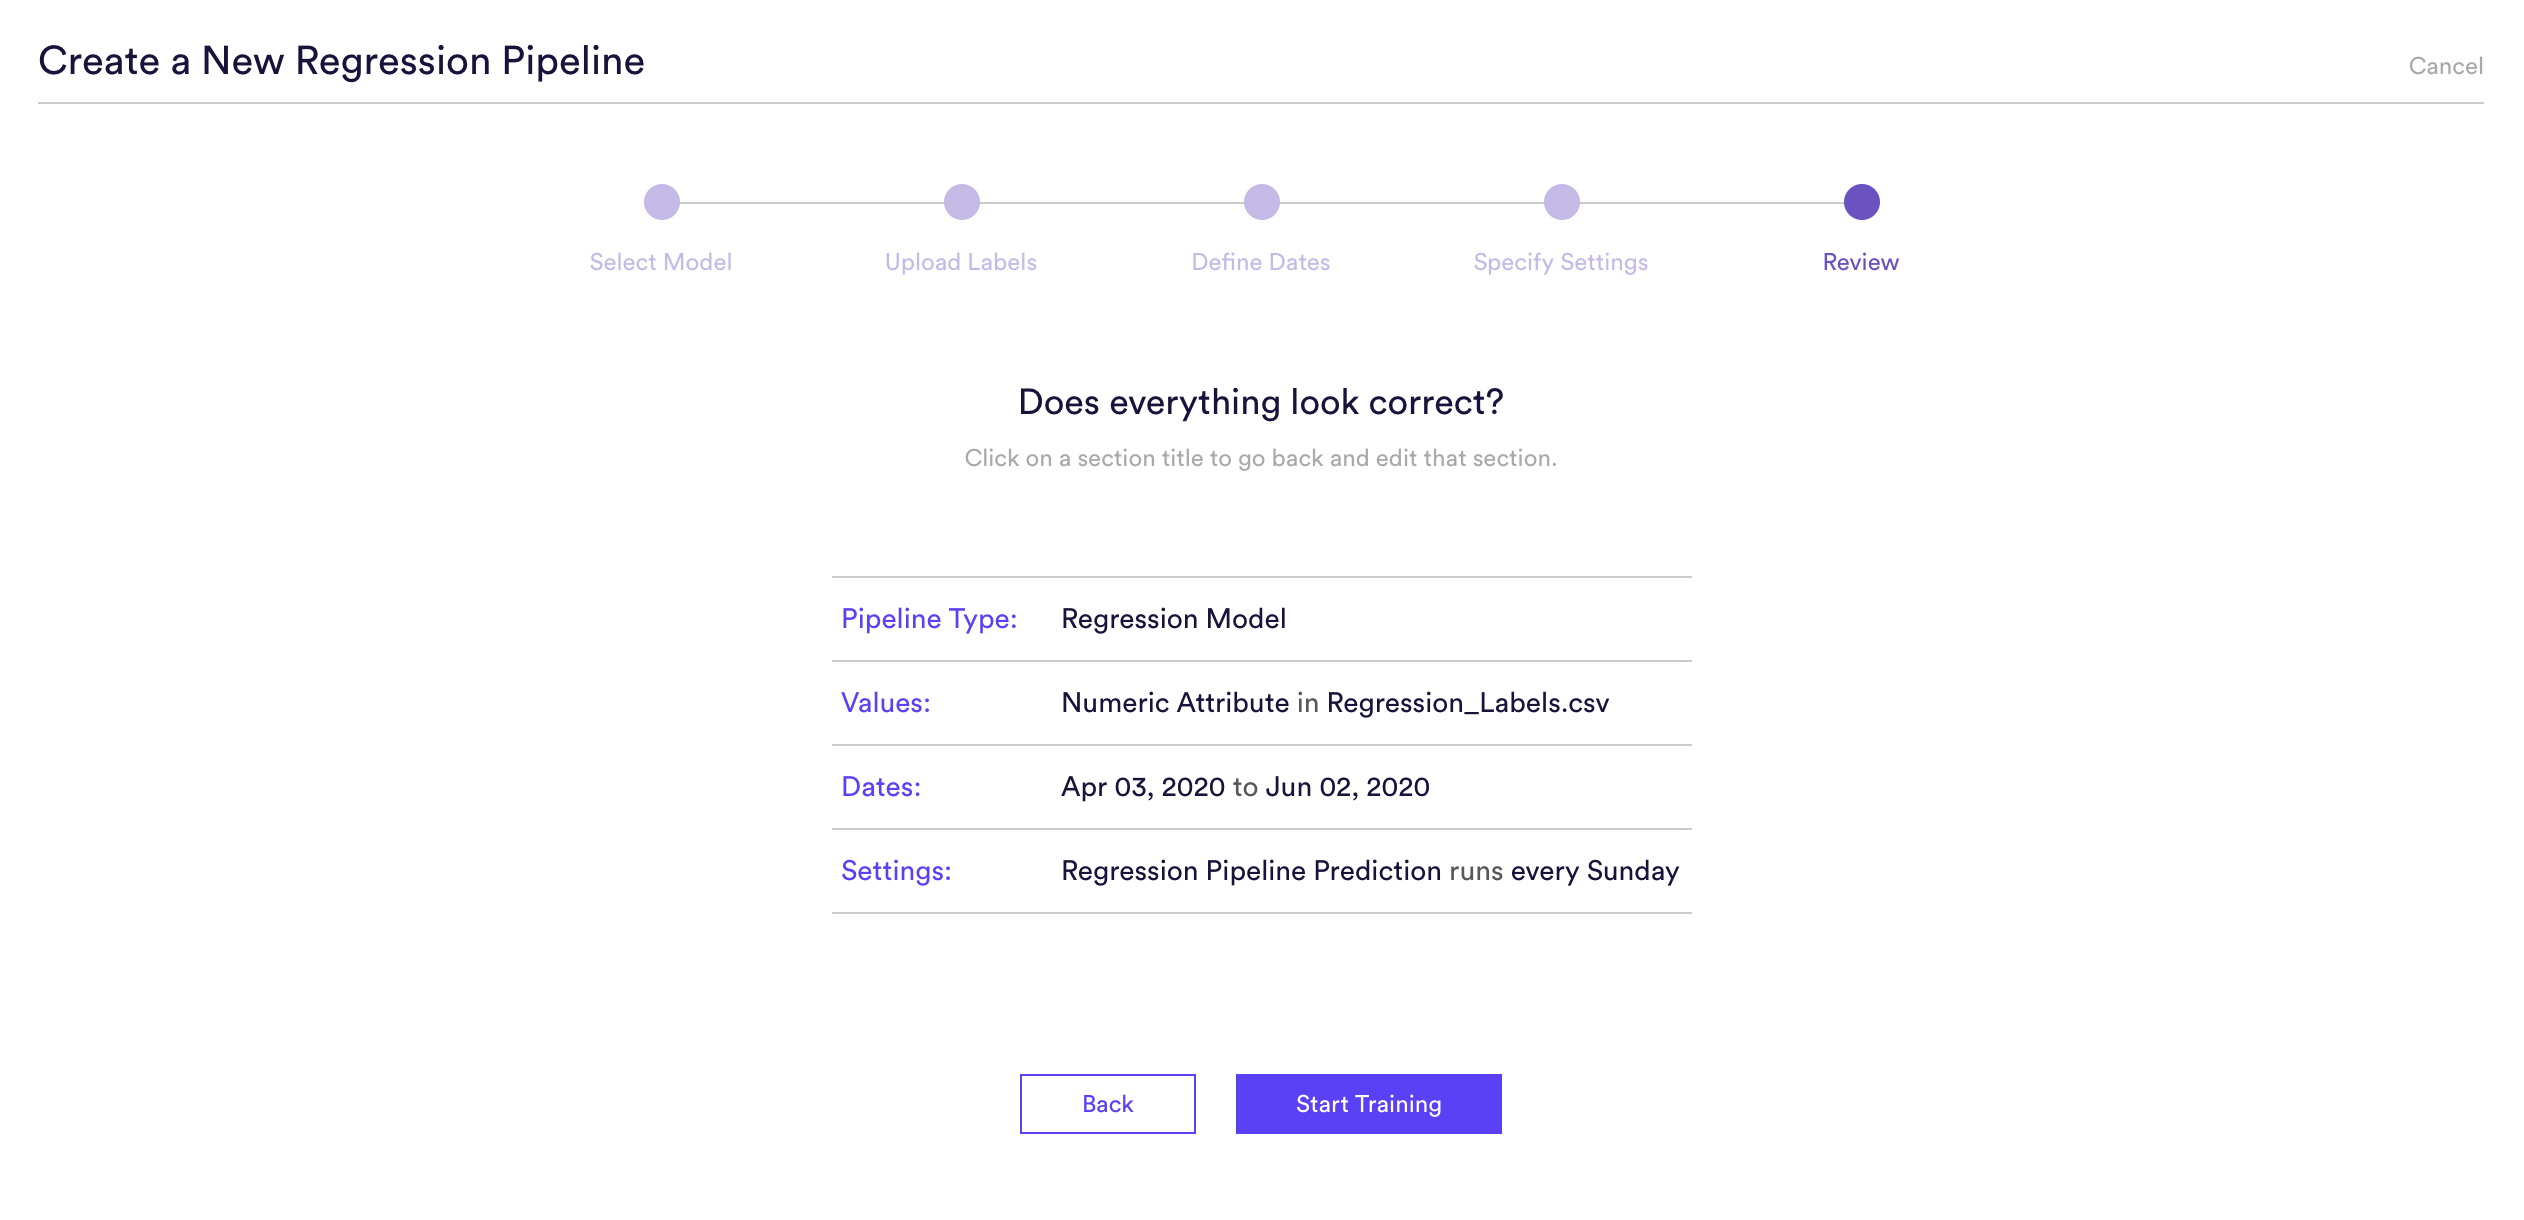
Step 5: Review
The final step is to review your pipeline and ensure all settings look accurate! If anything needs updated, simply go ‘Back’ in the workflow and update any step.
Step 6: Update Labels Over Time (Optional)
If you’re collecting new example labels over time, you can import these extra labels into Cortex so that your pipelines are always learning from the most recent information. To upload new labels, hit the “Edit” button on your pipeline (next to “Export Predictions”).
Related Links
- Regression Performance
- How to Build a Look Alike Pipeline
- How to Build a Classification Pipeline
- How to Build a Future Events Pipeline
- How to Build an Uplift Pipeline
- How to Build a Recommendations Pipeline
Still have questions? Reach out to support@mparticle.com for more info!