How Can We Help?
How to Build a Recommendations Pipeline
Cortex is an easy-to-use platform that enables anyone to automate Machine Learning Pipelines from continuous streams of event data. In this guide, we’ll show you how to generate personalized recommendations for each of your users by building a Recommendations pipeline in Cortex.
What are Recommendations Pipelines?
Results from a Recommendations pipeline answer the question: which of my items will maximize the probability of engagement for each user? Any set of items can serve as the basis for your recommendations, so long as (a) there are at least 2 unique items in the set, and (b) user-item interactions are included in your Events data. The top recommendation for each user is the item that, if shown to the user, will maximize the likelihood of a user-item interaction. Optionally, you can also define a particular type of interaction (e.g. purchase) that your recommendations should optimize.
When should I use a Recommendations pipeline?
A Recommendations pipeline can be used to determine which items are most relevant to each user’s unique preferences. If you have a pool of items and you’d like to personalize each user’s experience by surfacing those that will maximize engagement, use a Recommendations pipeline.
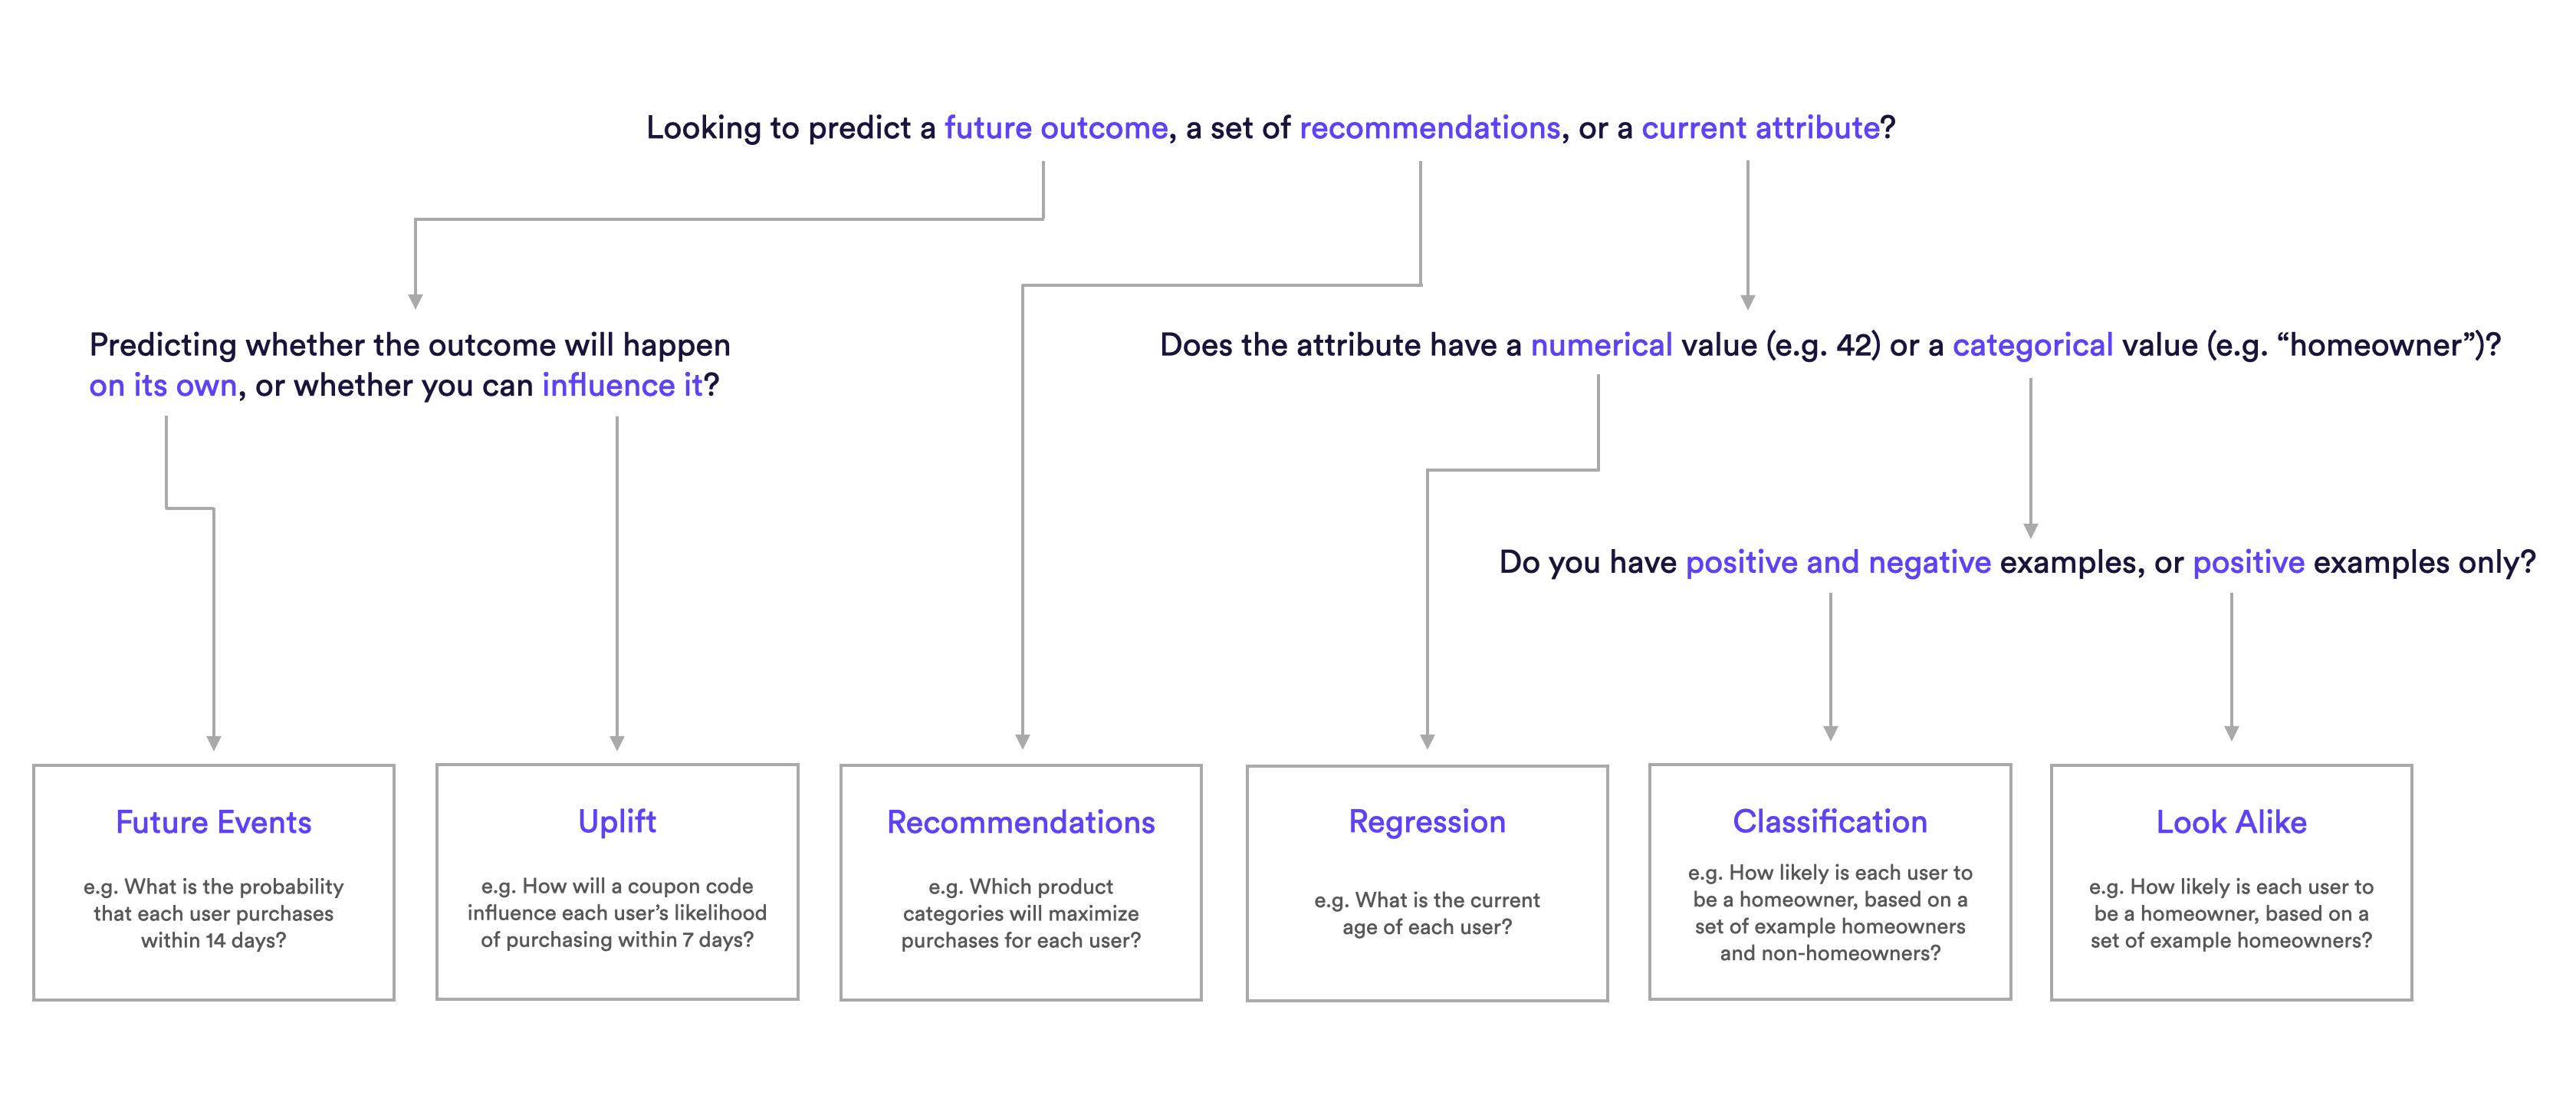
The following diagram will help explain which pipeline type is best suited for different predictions.
What are Examples of Recommendations Pipelines?
Recommendations Pipeline Examples
- Which articles will maximize CTR onsite for each user?
- Which products will maximize email click through for each user?
- Which video genres will maximize overall engagement for each user?
- Which product categories will maximize purchases for each user?
- Which day-of-week will maximize email opens for each user?
- Which marketing channels will maximize click-through-rate?
How do I build these pipelines in Cortex?
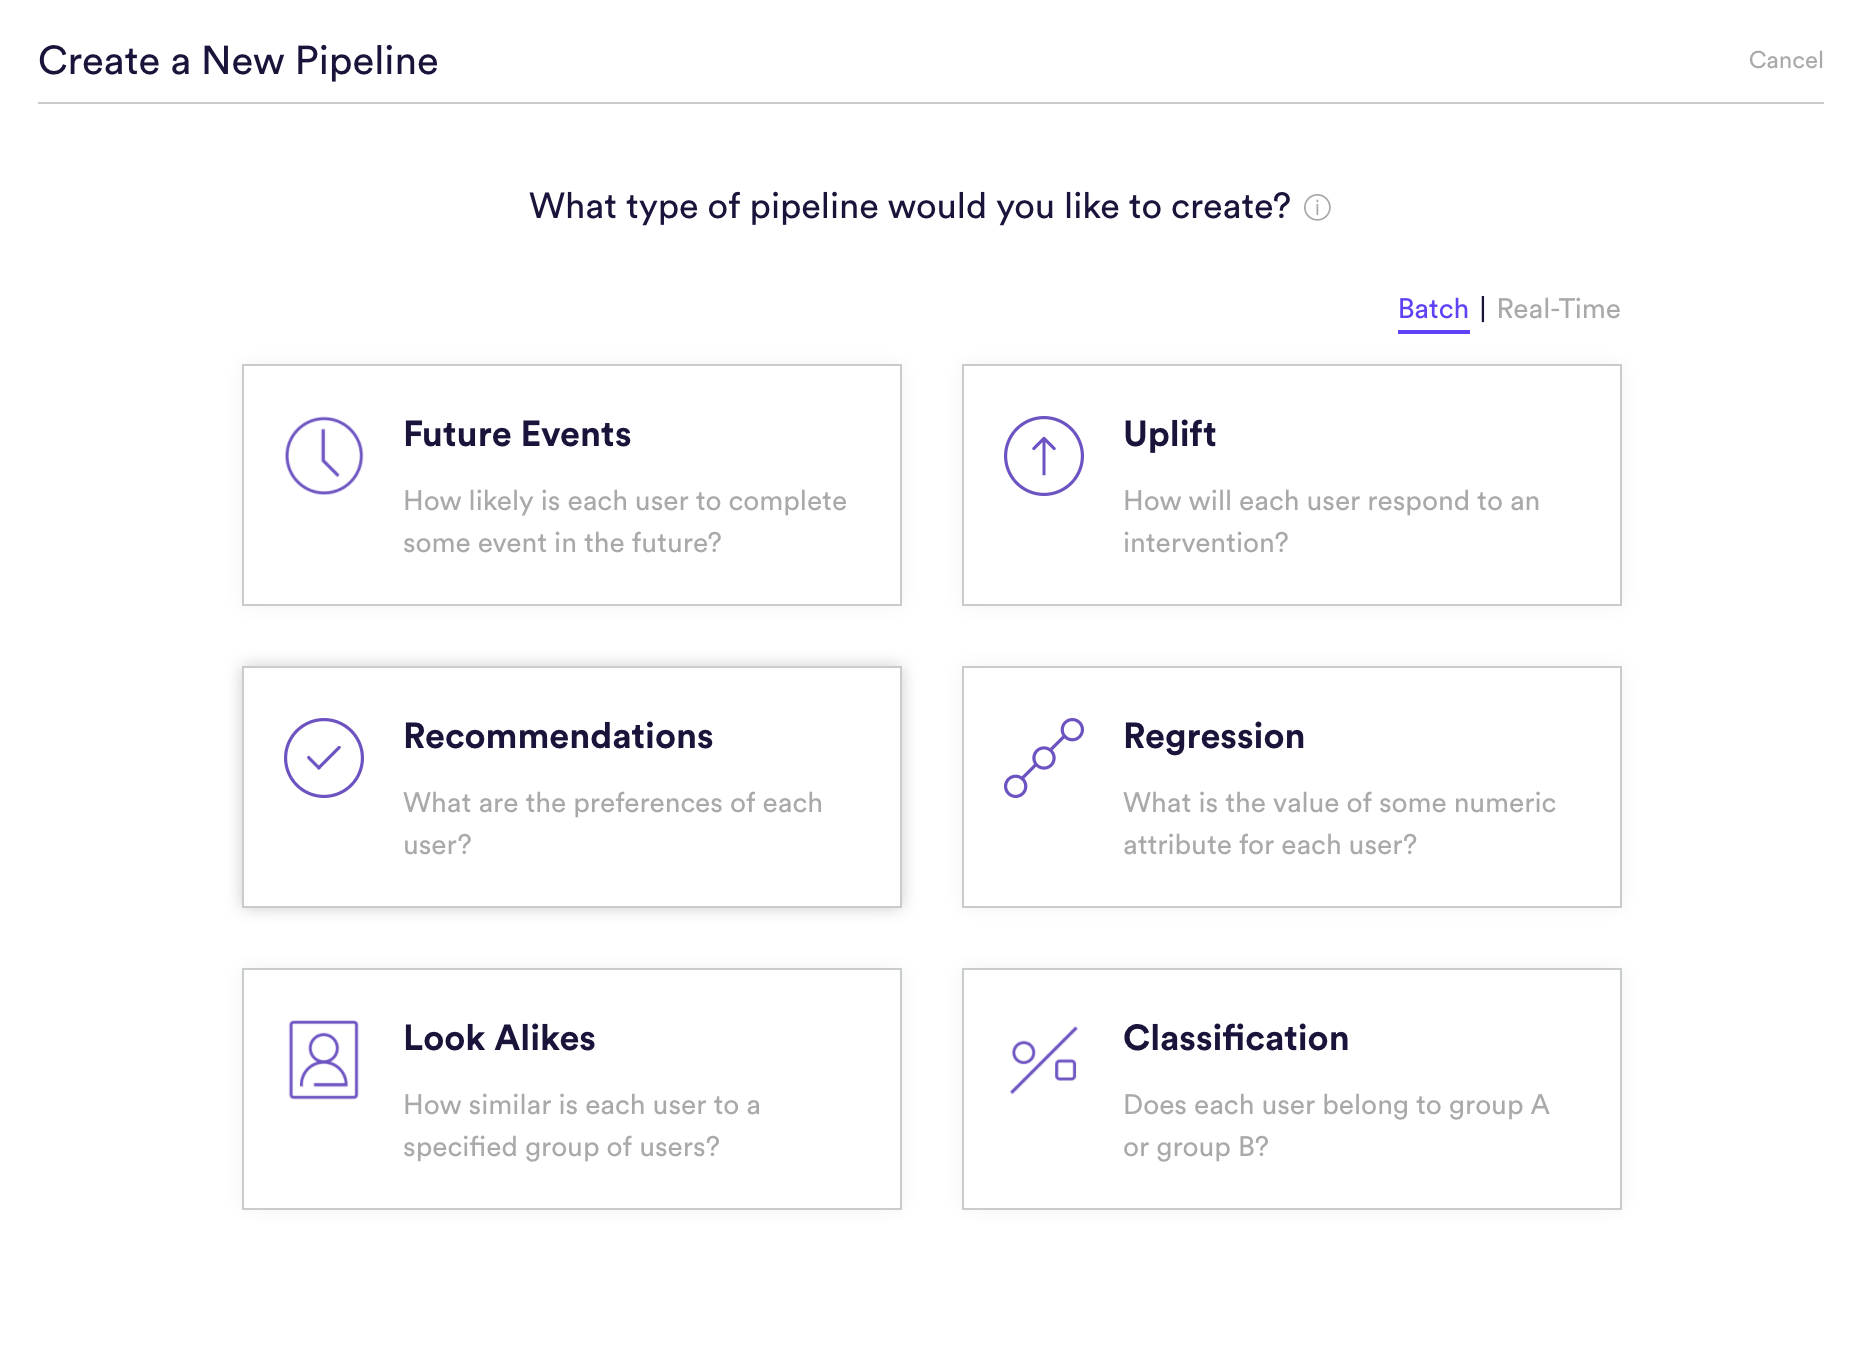
Step 1: Choose Pipeline Type
Select ‘Create New Pipeline’ from within your Cortex account. Make sure that the “Batch | Real-Time” toggle is set to “Batch”, and choose the Recommendations pipeline type.
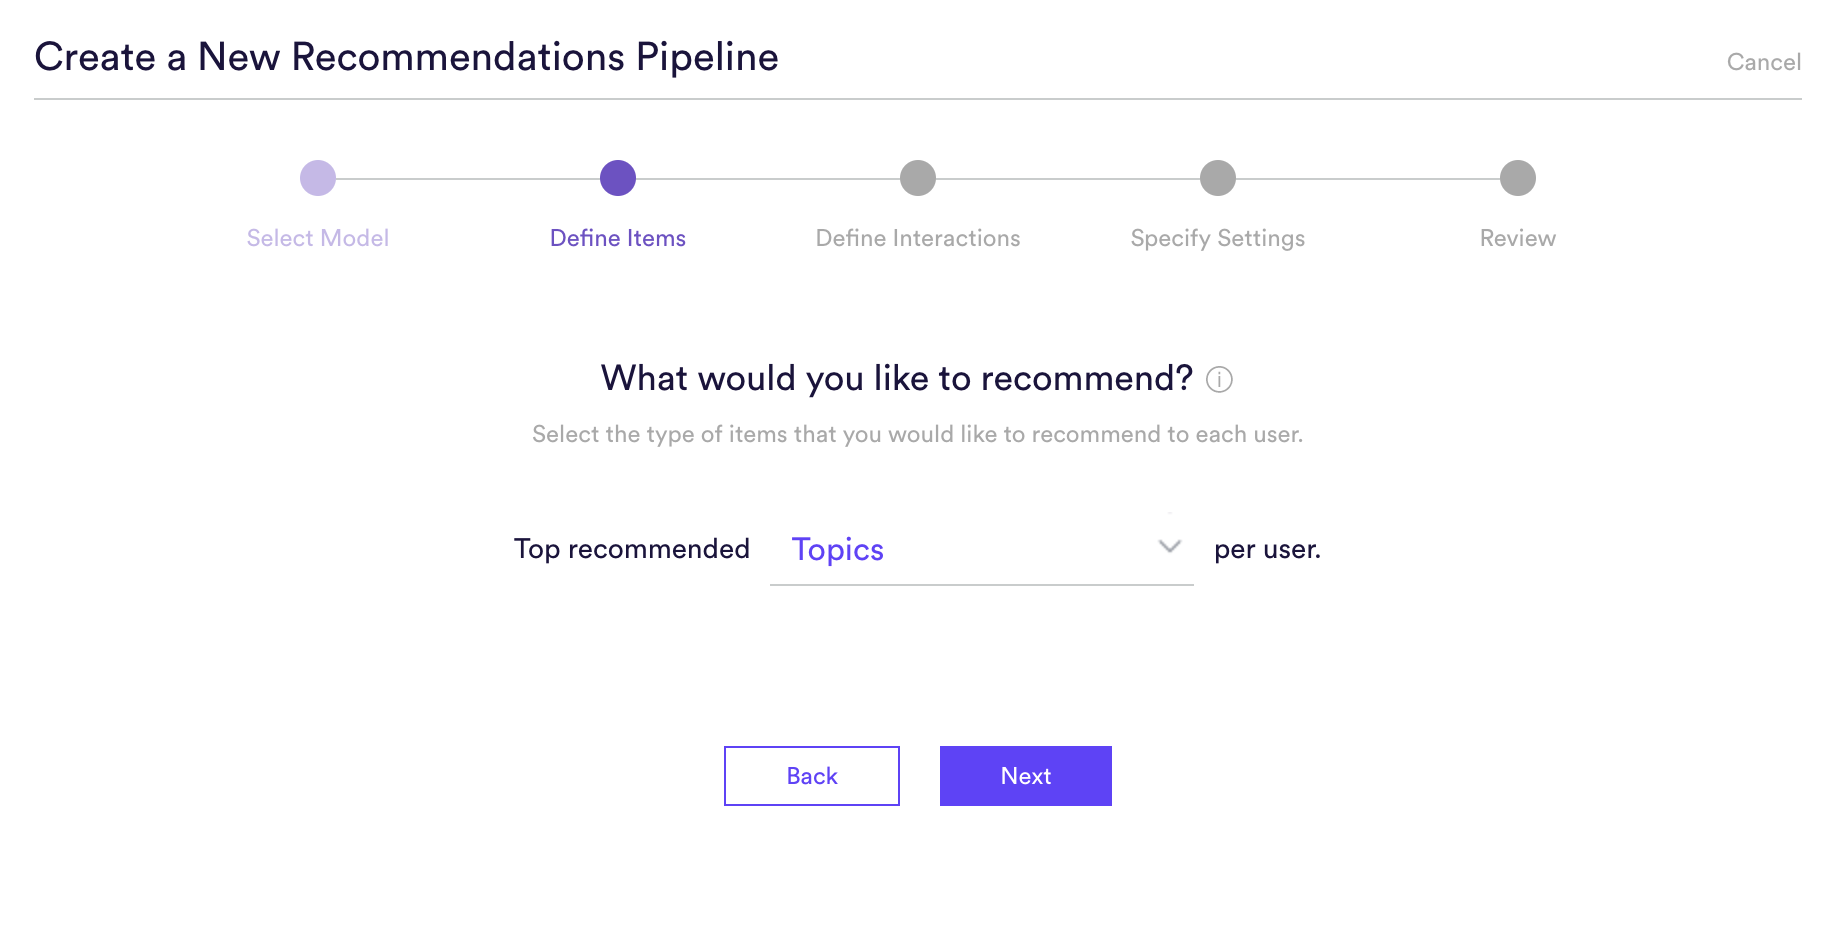
Step 2: Define Items
Select the type of items that should serve as the basis for your recommendations. Available item types are those that (a) are tied to your events (either directly or through an items feed), and (b) contain at least 2 unique items to recommend. Note however that the more unique items there are for your pipeline to recommend, the higher quality and more personalized these recommendations are likely to be.
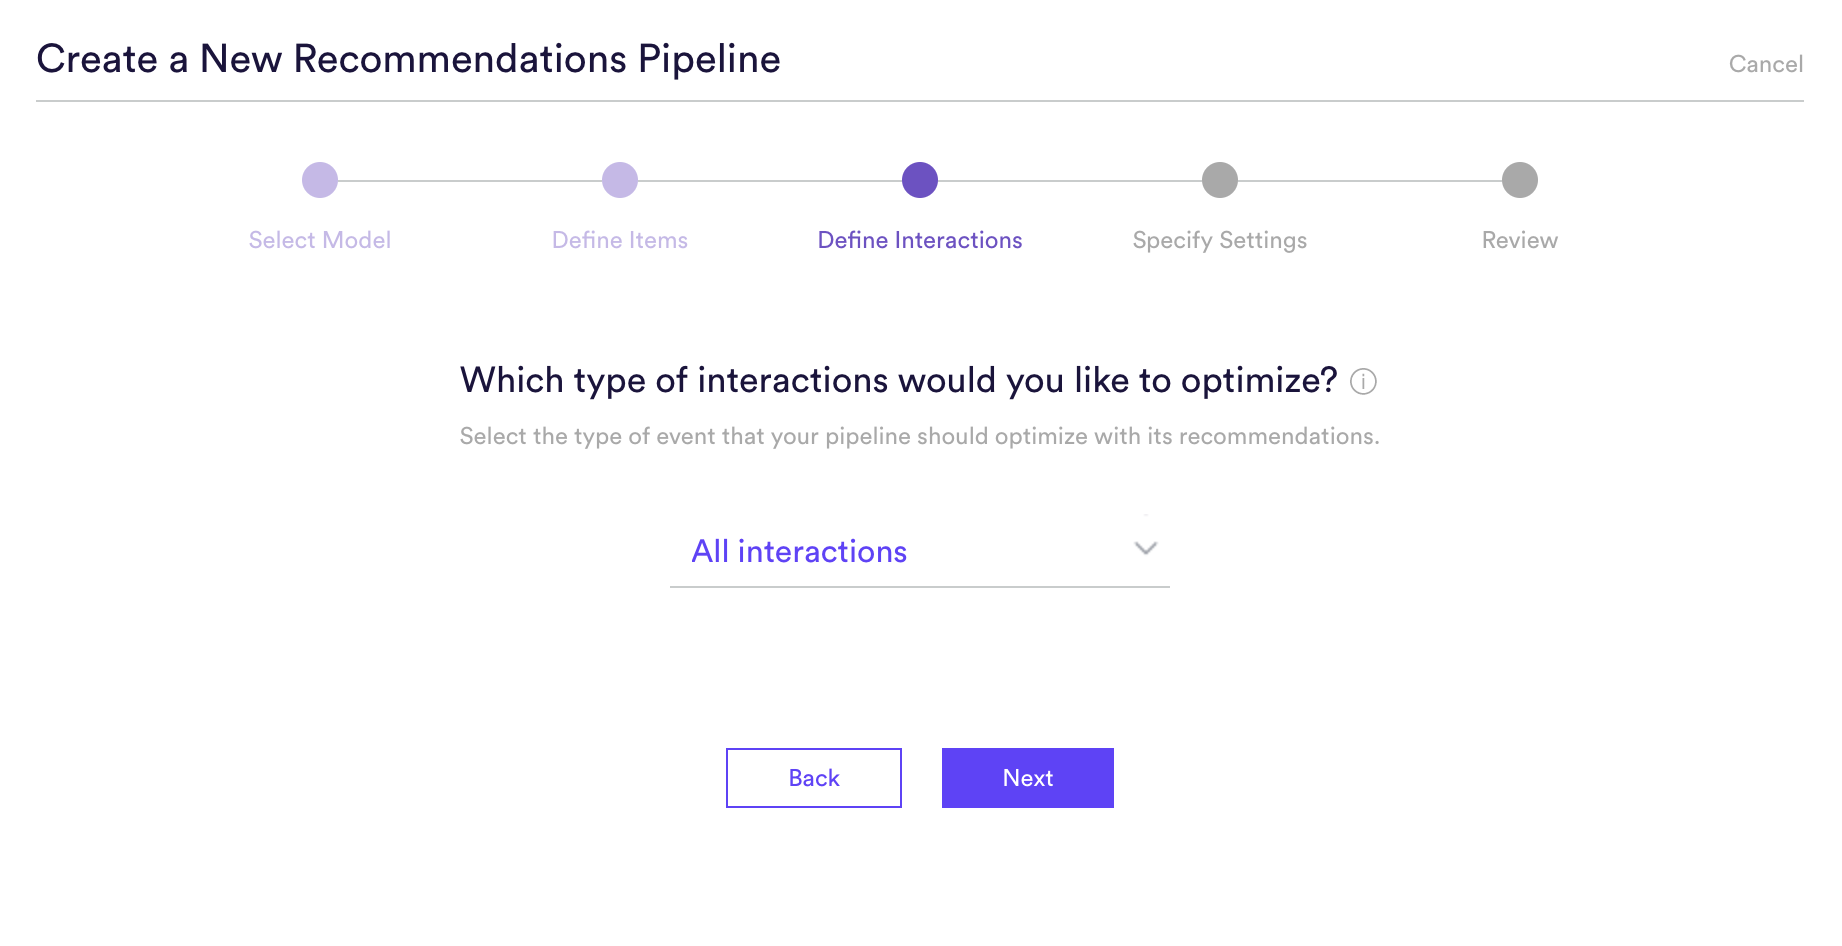
Step 3: Define Interactions
Select the type of event that your pipeline should optimize with its recommendations. You may select any event that captures an interaction between your users and the items that you selected in Step (2). Or, you can choose to optimize for all interactions (the default setting).
Cortex will weigh this event more heavily than others when learning each user’s preferences. Your pipeline’s performance will also be evaluated based specifically on this type of interaction.
Step 4: Specify Settings
Specify settings such as your pipeline’s name, schedule, tags, and more.
Every time your pipeline runs, Cortex goes through the end-to-end process of generating fresh predictions from the latest data that’s been ingested. If you’d like to power automation based on recommendations that are always up-to-date, make sure your pipeline is set to run continuously. If you’re just testing things out or building a pipeline for one-time use, your pipeline should only run once.
Step 5: Review
The final step is to review your pipeline and ensure all settings look accurate! If anything needs updated, simply go ‘Back’ in the workflow and update any step.
Related Links
- Recommendations Performance
- How to Build a Future Events Pipeline
- How to Build an Uplift Pipeline
- How to Build a Look Alike Pipeline
- How to Build a Classification Pipeline
- How to Build a Regression Pipeline
Still have questions? Reach out to support@mparticle.com for more info!