How Can We Help?
Decision Projects
At their core, Machine Learning Pipelines provide information – What will this user do? How will this user respond to this campaign? What is this user’s age range?
But even the most accurate ML Pipelines are only useful if they’re driving real value for your business. Cortex’s Decision Layer is designed to bring this value to life, making it easy to deploy your pipelines for automated decision-making at scale. In this guide, we’ll walk through how to access this functionality through Decision Projects and the Decision SDK module.
Overview of Decision Projects
A Decision Project provides tools for translating ML predictions into concrete actions that your business should take for each user onsite. For example, an ML Pipeline might predict each customer’s likelihood to subscribe within the next week. But if the goal is to maximize subscriptions, this information must ultimately be translated into a decision about the best way to encourage each user to subscribe. Should we target each user onsite with a discount, or a free trial?
Decision Projects enable you to optimize these sorts of user journey decisions (often referred to as next-best-action, next-best-offer, or dynamic decisioning). A Decision Project is defined by two pieces of information –
- A business goal that you are looking to achieve through automated decisioning
- A decision rule based on the output of 1 or more ML pipelines
Returning to the example use case above, we might create a Decision Project whose goal is to “maximize subscriptions by identifying which offer to target toward each user”. This Project’s decision rule might equate to: “if conversion probability from pipeline Likelihood to Subscribe with Discount is greater than conversion probability from pipeline Likelihood to Subscribe with Free Trial, then show the discount. Otherwise show the free trial.”
The end-to-end workflow for implementing a decisioning use case using Cortex is as follows:
- Build ML Pipelines – make predictions about each user’s preferences and future behavior
- Create Decision Project – define a decision rule for targeting users based on the output from 1 or more pipelines
- Deploy Decision SDK – implement Cortex’s JavaScript Decision SDK in order to access real-time decisions for users actively browsing onsite
How do I build a Decision Project?
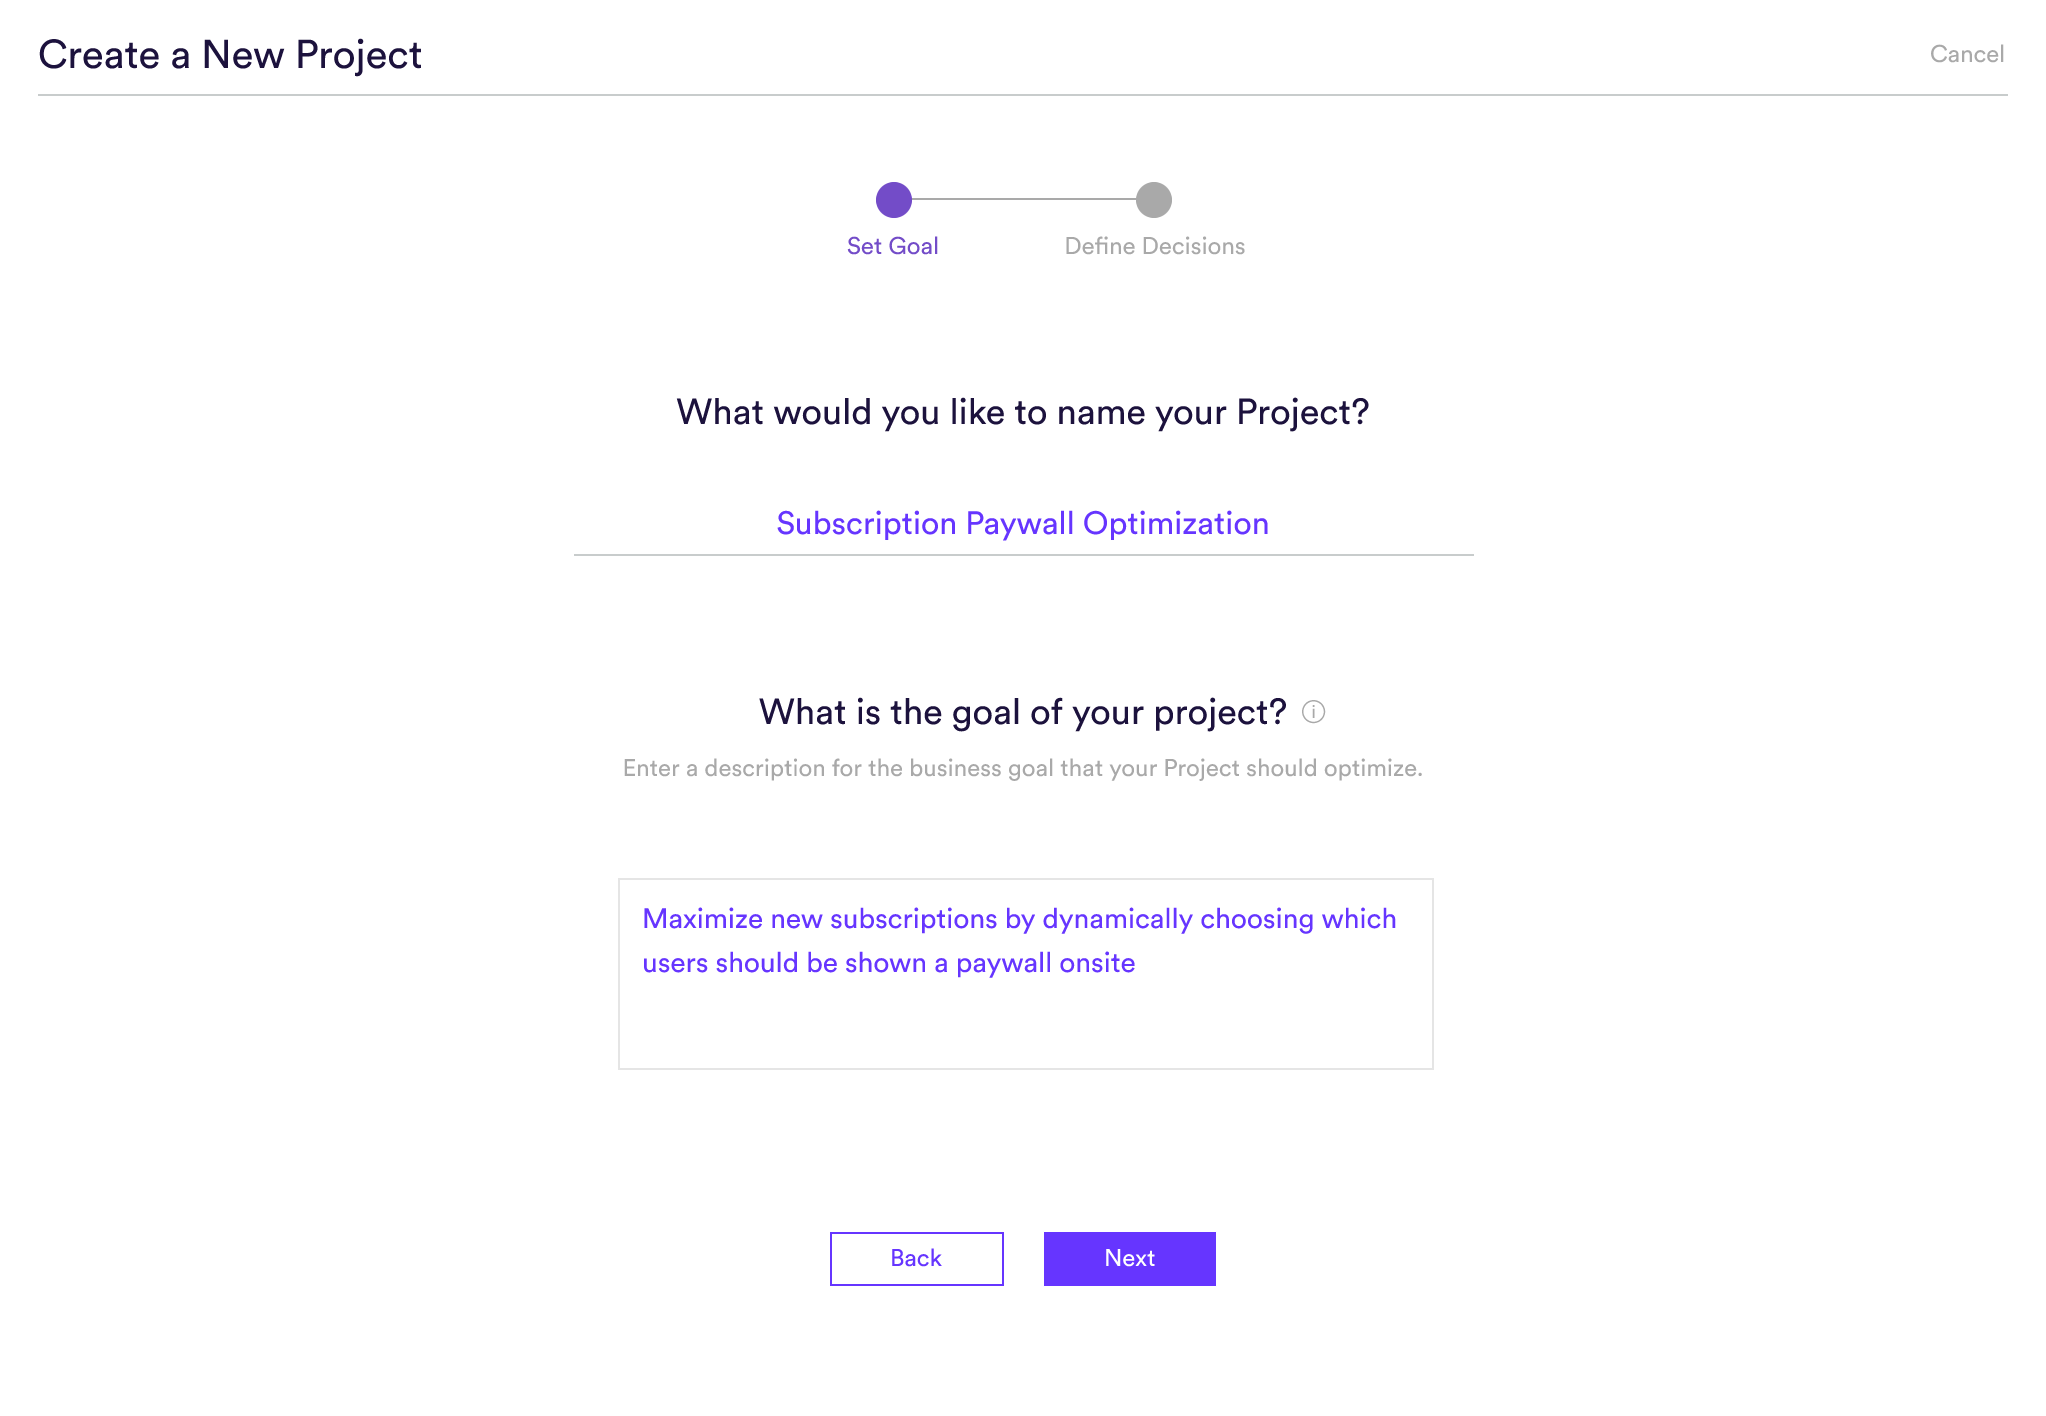
Step 1: Set Goal
Give your Project a name and specify the business goal that you’re looking to optimize. This description will be used to summarize your project, but it won’t have any impact on how it performs or is configured.
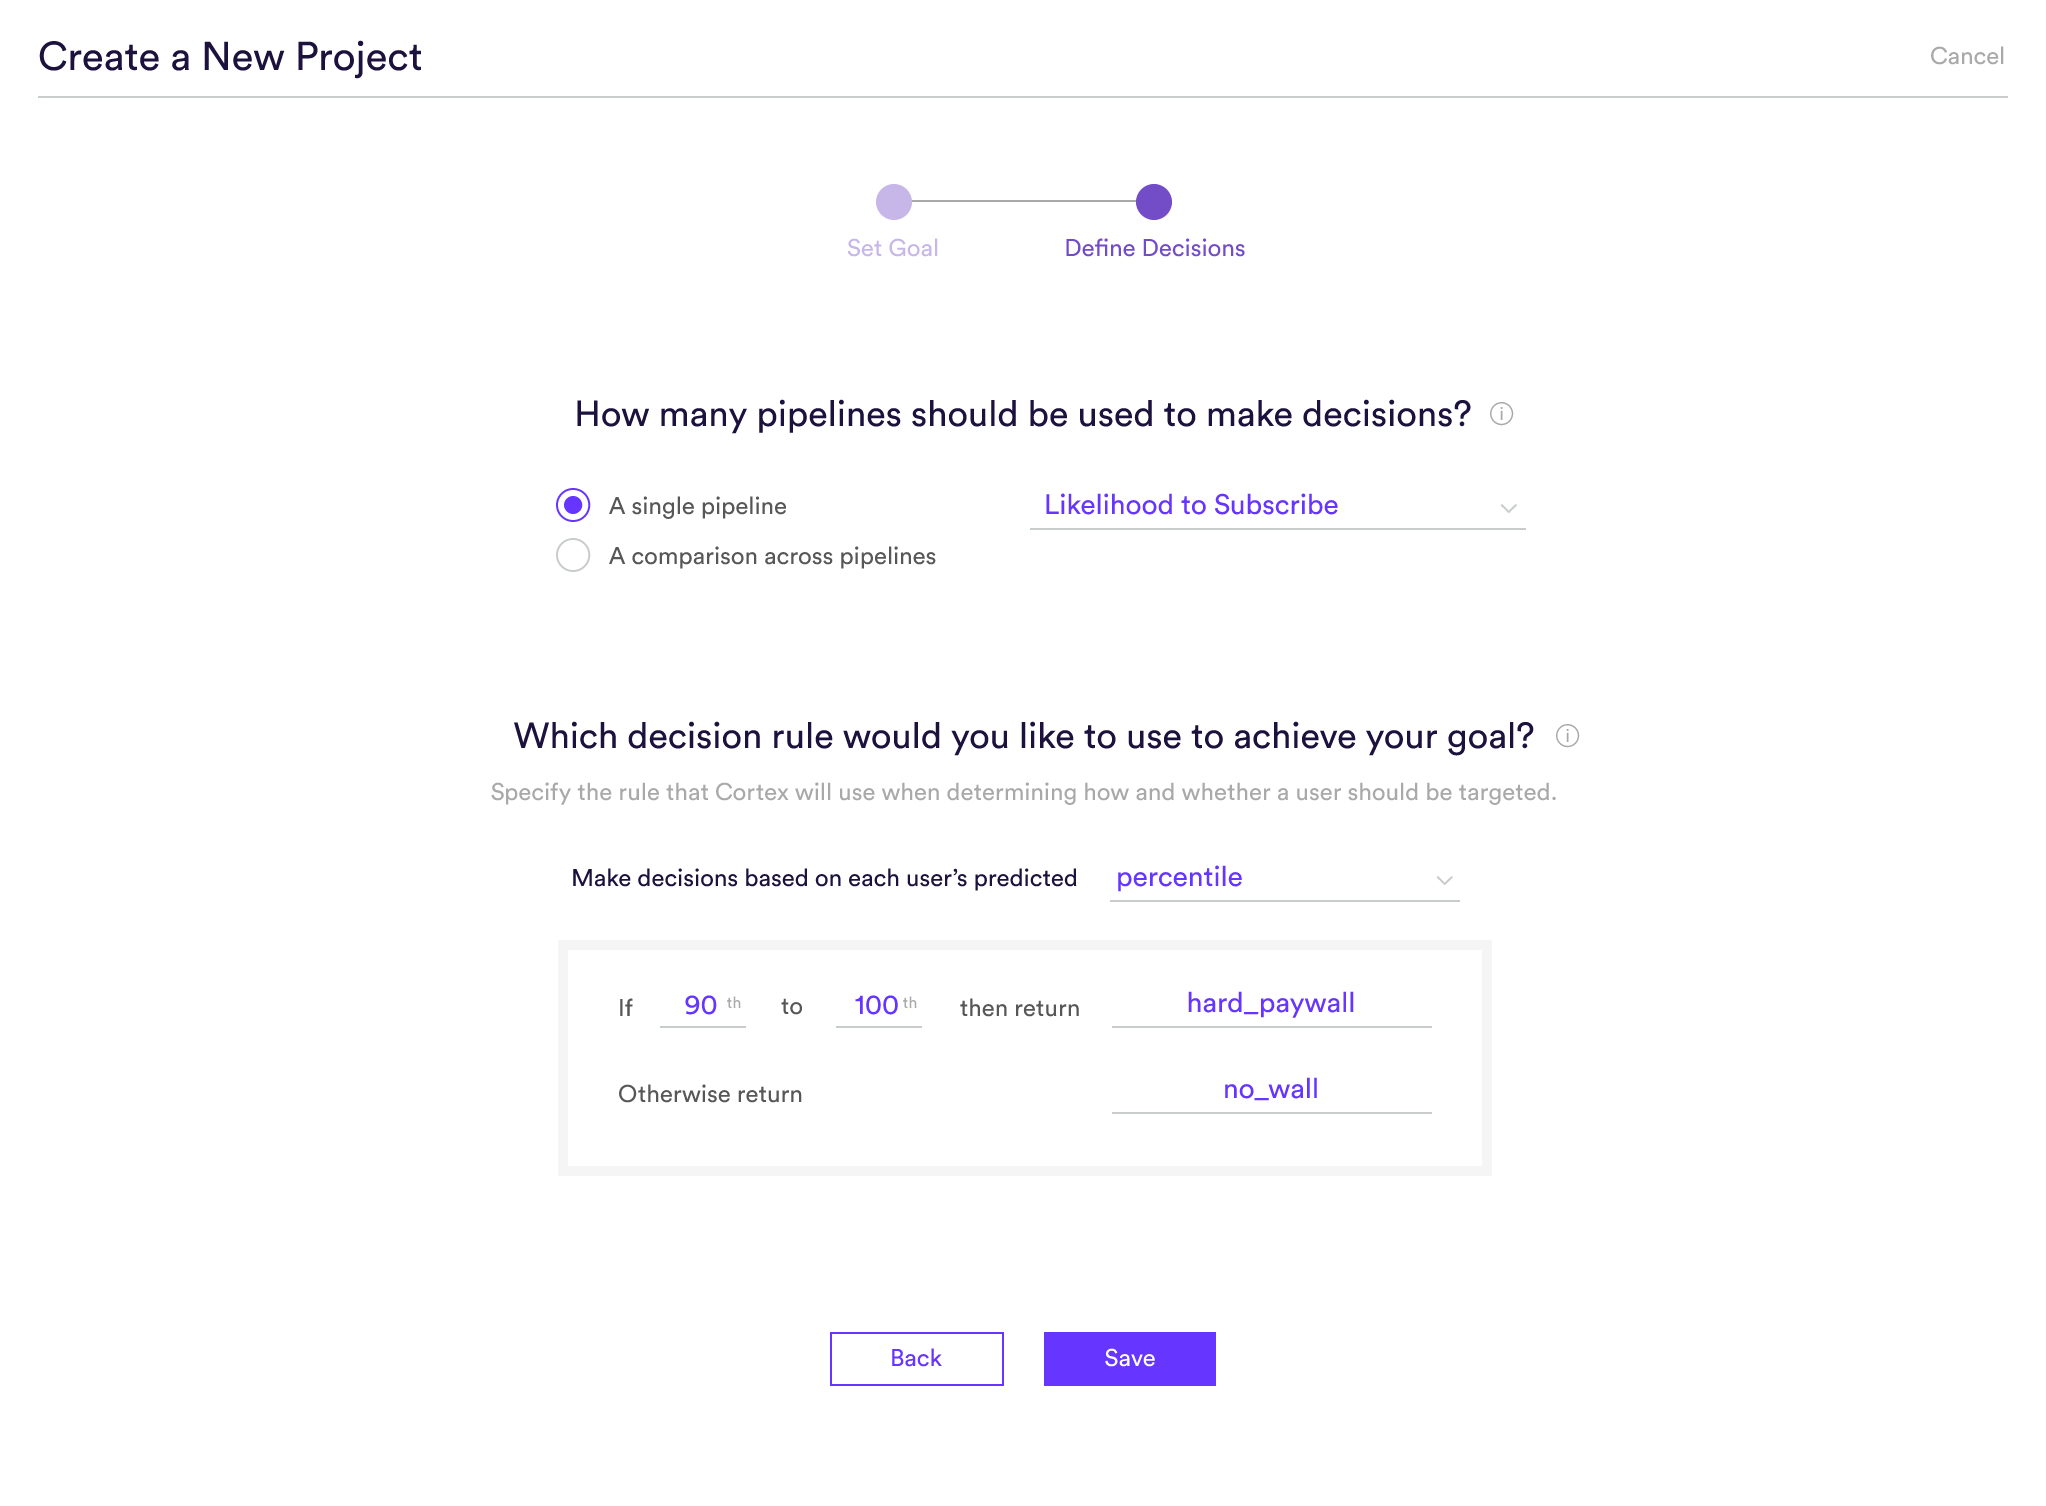
Step 2: Define Decision Rule
Define the rule that Cortex should use when deciding which action or experience should be served to each user.
To do this, first select whether these decisions should be based on predictions from a single pipeline (Future Events, Uplift, or Recommendations), or a comparison across multiple pipelines (Future Events or Uplift).
Single Pipeline
If you are using a single Future Events or Uplift pipeline to make decisions, your rule will evaluate whether the prediction for each user falls within a particular range of values (e.g. “is the user’s conversion probability between 0-10%?”). You must also define an output string indicating the decisions that should be returned within and outside of that range.
By default, decisions from an Uplift pipeline use the zero uplift score to divide users into two cohorts: those predicted to respond positively to treatment, and those predicted to respond negatively.
If you are using a single Recommendations pipeline, decisions will be based on each user’s top recommendations. No need to specify your decision outputs – instead, Cortex will return for each user a list of item IDs in descending order of recommendation.
Multiple Pipelines
If you are comparing across multiple pipelines, your rule will evaluate which pipeline scored each user the highest or lowest for some prediction metric (e.g. “for which pipeline does the user have the greatest conversion probability?”). Note that you can only compare across pipelines of the same type.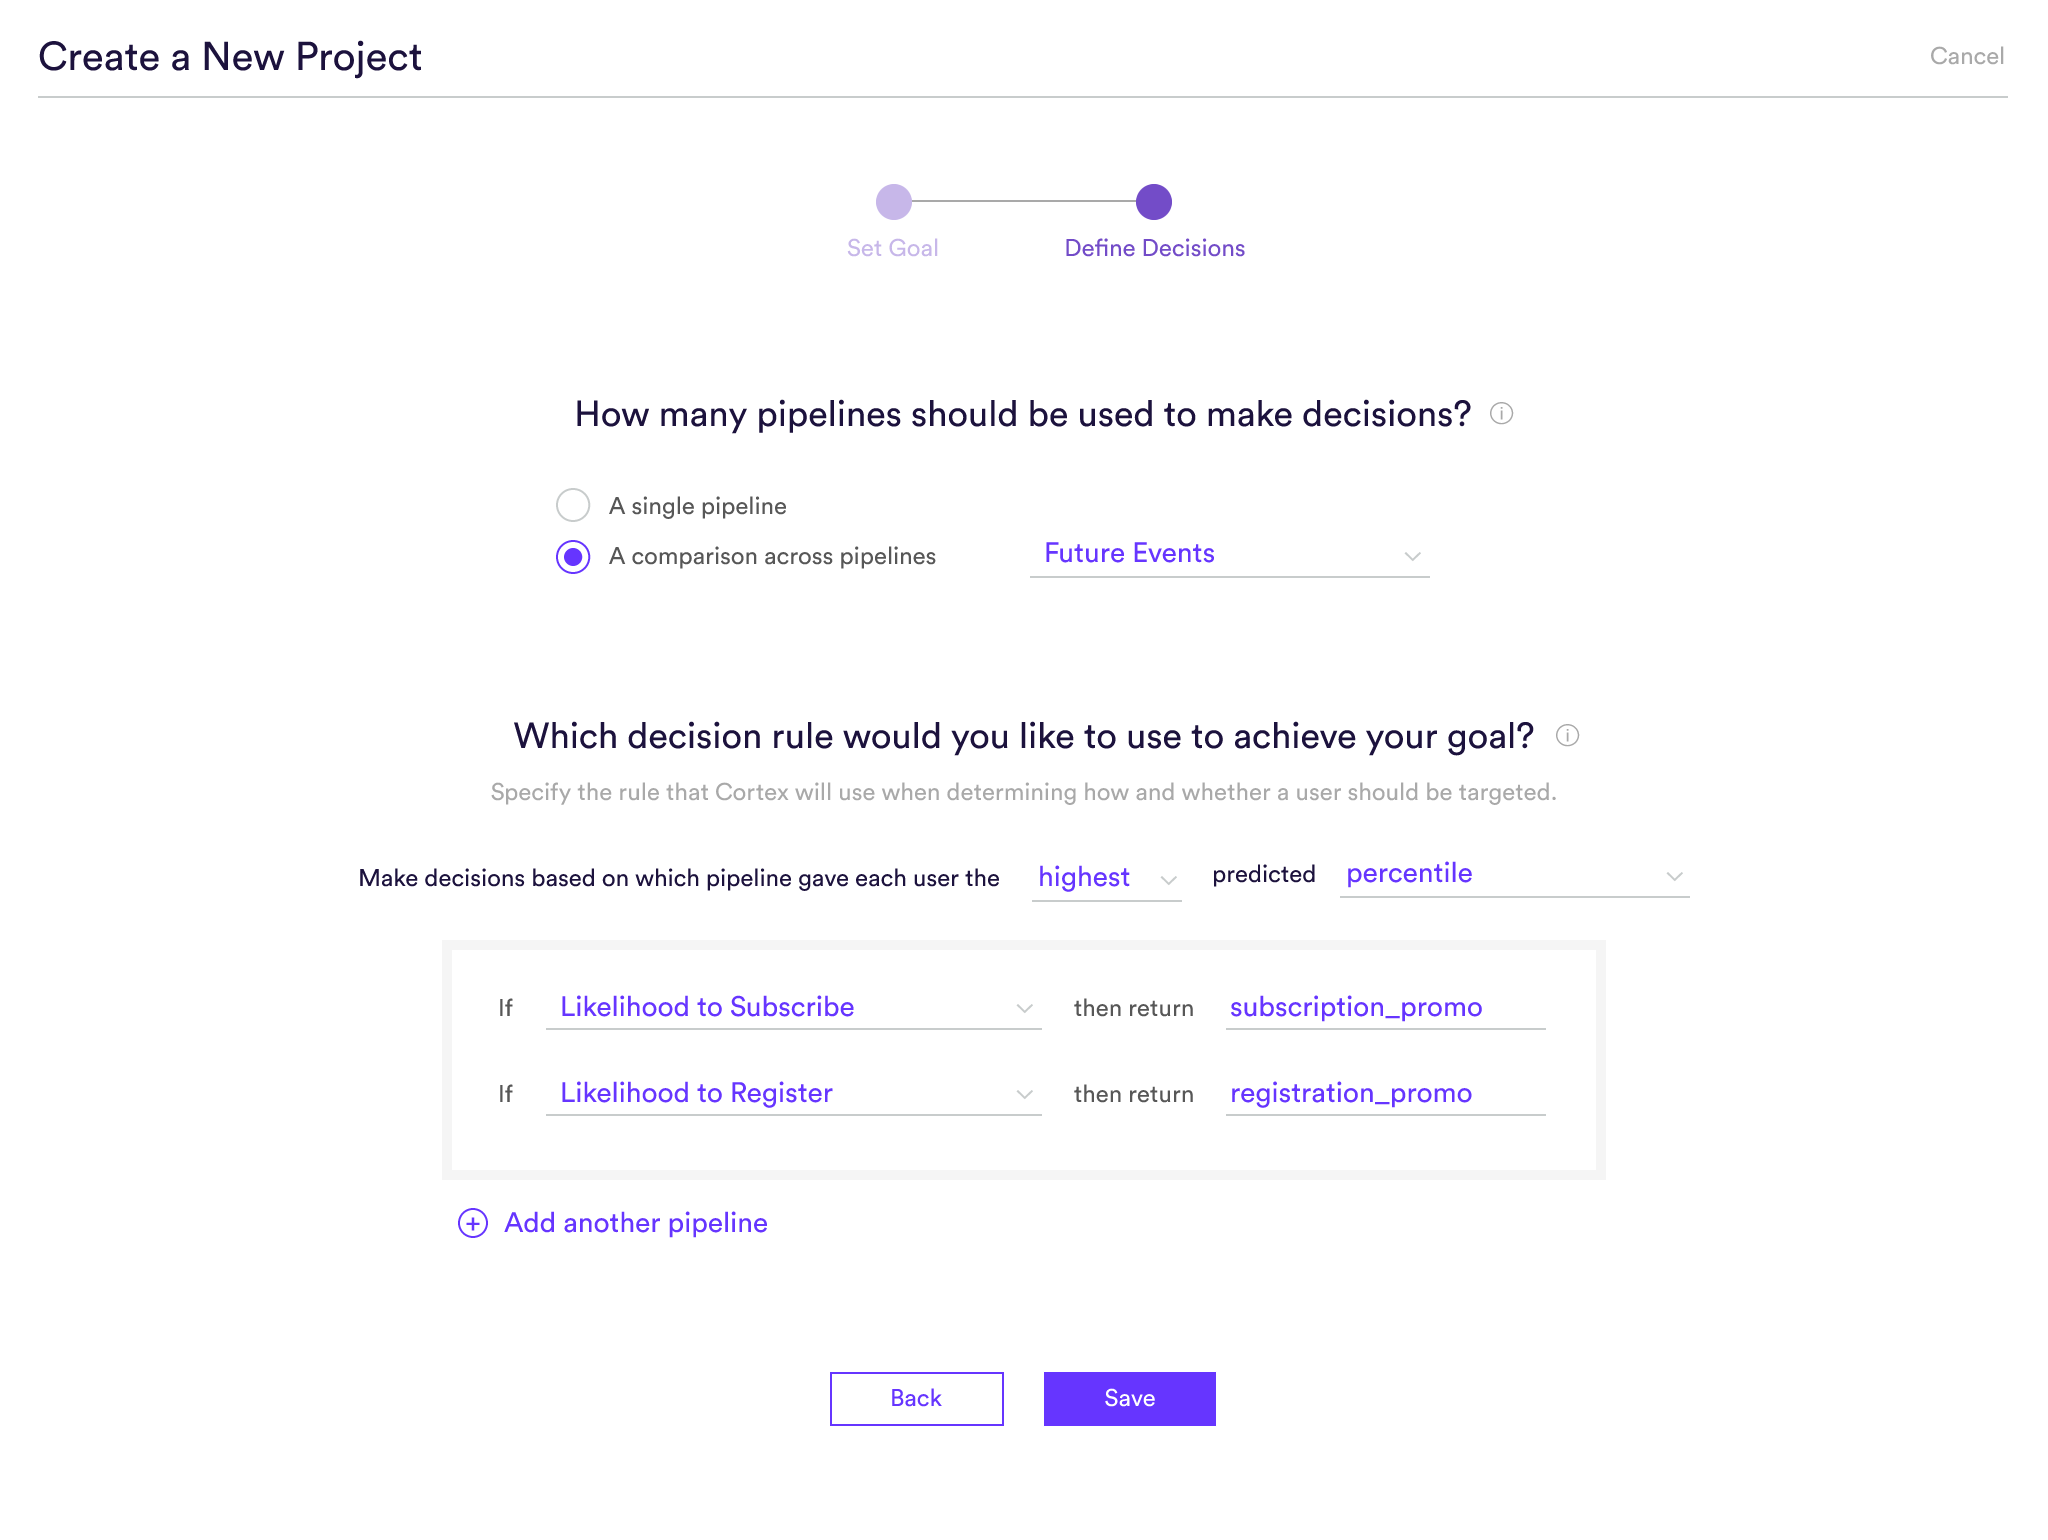
If you’re using Future Events pipelines, note that in addition to comparing across the standard prediction outputs (i.e. conversion probability and percentile), you may also choose to compare across expected values. To do this, specify how much each pipeline’s conversion is worth to your business. Cortex will weight each user’s likelihood of converting by the value of a conversion, and will make a decision based on total value to your business.
For example, say you’d like to choose whether to show each user a promotion for a basic subscription tier ($5/mo.) or a promotion for a premium subscription tier ($10/mo.). Now consider a user that is 10% likely to subscribe to the basic tier, and 7% likely to subscribe to premium. If you specified that each user should be shown the promotion which maximizes expected value, Cortex would return a decision to promote the premium tier, since (10 * 7% = 0.7) is greater than (5 * 10% = 0.5).
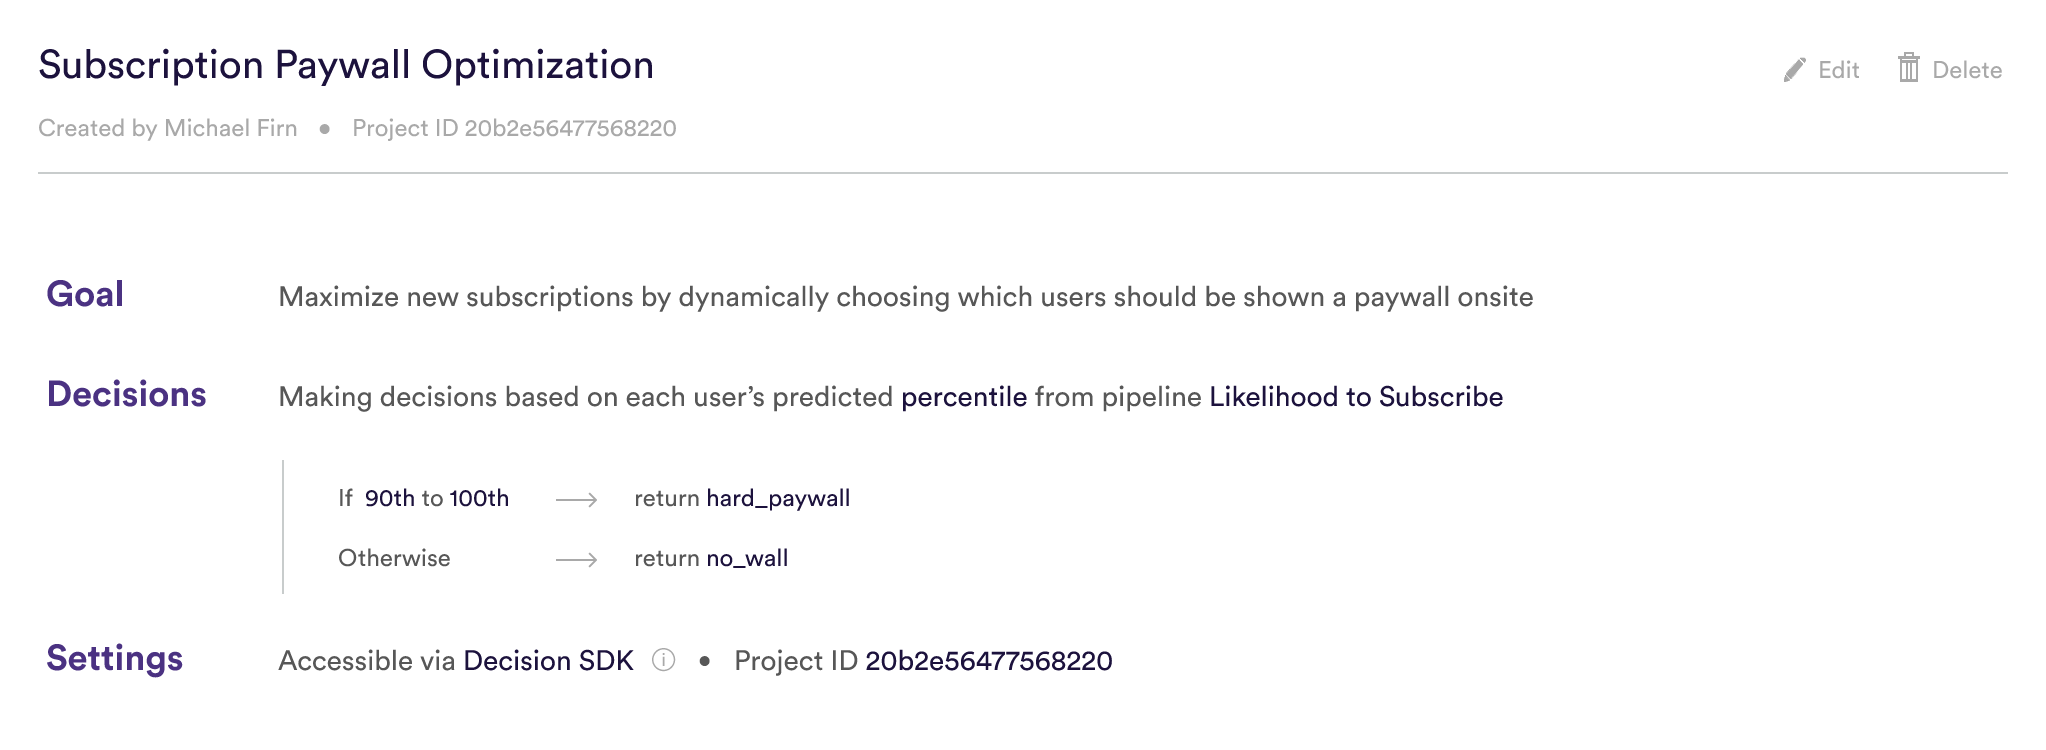
Deploying Your Decision Project
Once your Project has been built, you may access its decisions via the Decision Module of Cortex’s low-latency JavaScript SDK. The ID that you’ll need to load this project into the client is listed in the “Settings” area of your Project’s overview page.
If your Project uses 1 or more real-time ML pipelines, these pipelines will begin training after you’ve implemented the Decision SDK and enough real-time data has been gathered.