How Can We Help?
mParticle
A Data Source in Cortex represents an integration between your Cortex account and a third-party platform used for enterprise data storage. Once your source is connected, data will regularly flow into Cortex where it can be used to build Machine Learning pipelines and power intelligent decisions.
mParticle is a leading customer data platform (CDP) designed to simplify your data infrastructure. With mParticle, you can quickly and easily collect customer data, connect that data to a variety of business tools, and ultimately drive better, more data-driven customer interactions. In this guide, we’ll walk through how to connect mParticle as a Data Source within your Cortex account.
Connecting an mParticle Data Source
Before creating an mParticle Data Source in Cortex, you must first make sure that your mParticle account includes an Input through which events data is being collected. Once an Input is live, follow the steps below so that this data begins flowing from mParticle to your Cortex account.
Step 1: Copy Cortex API Key from Cortex
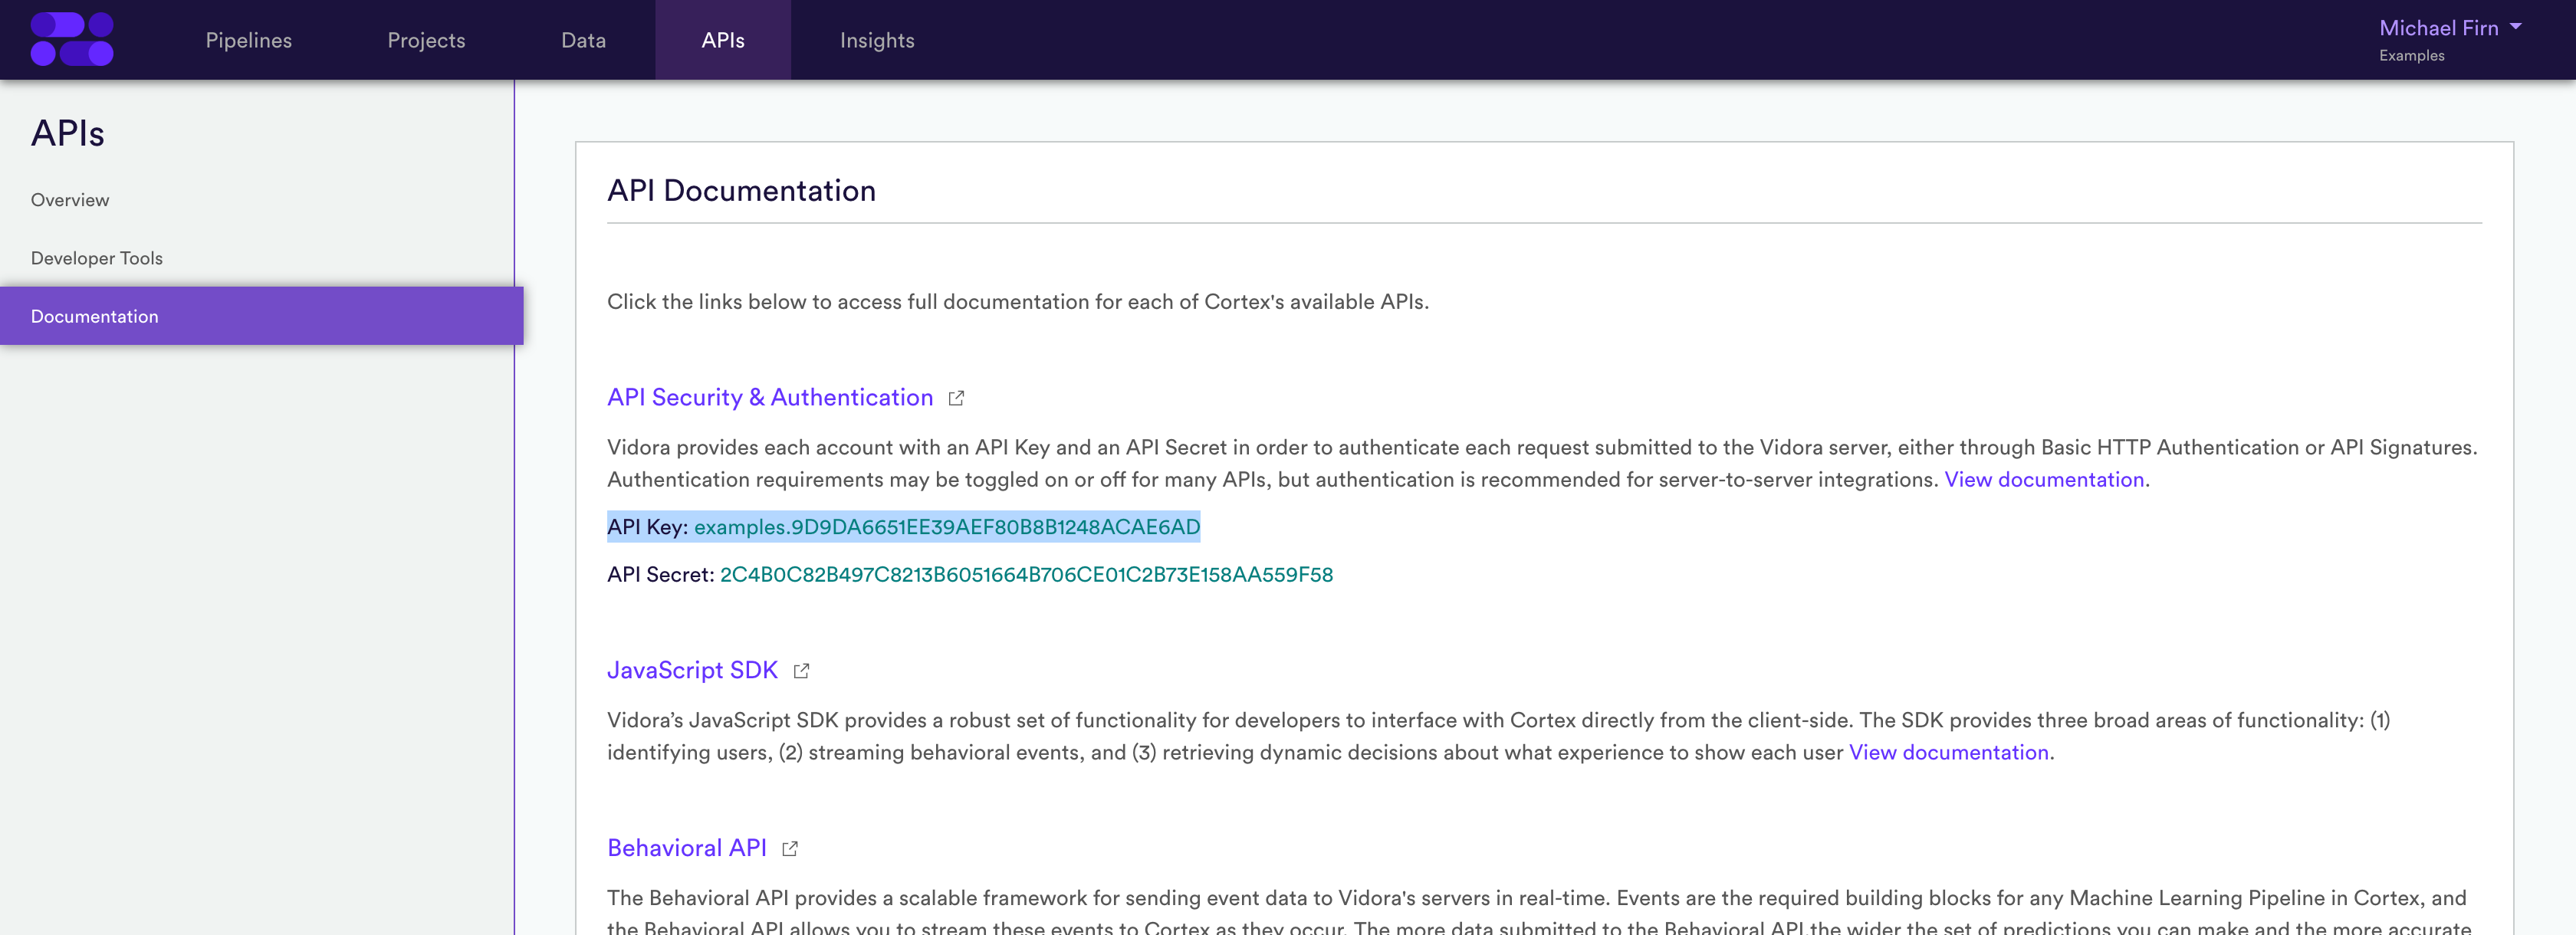
An integration between mParticle and Cortex leverages the Cortex Behavioral API. In order to forward events to Cortex via this API, your Cortex API Key must be copied over to your mParticle account.
To do this, first log in to your Cortex account and navigate to the Data>Data Sources page. Click on the mParticle logo, and you’ll see the API Key for your account. Copy this API Key so that you can reference it in Step 2 below.
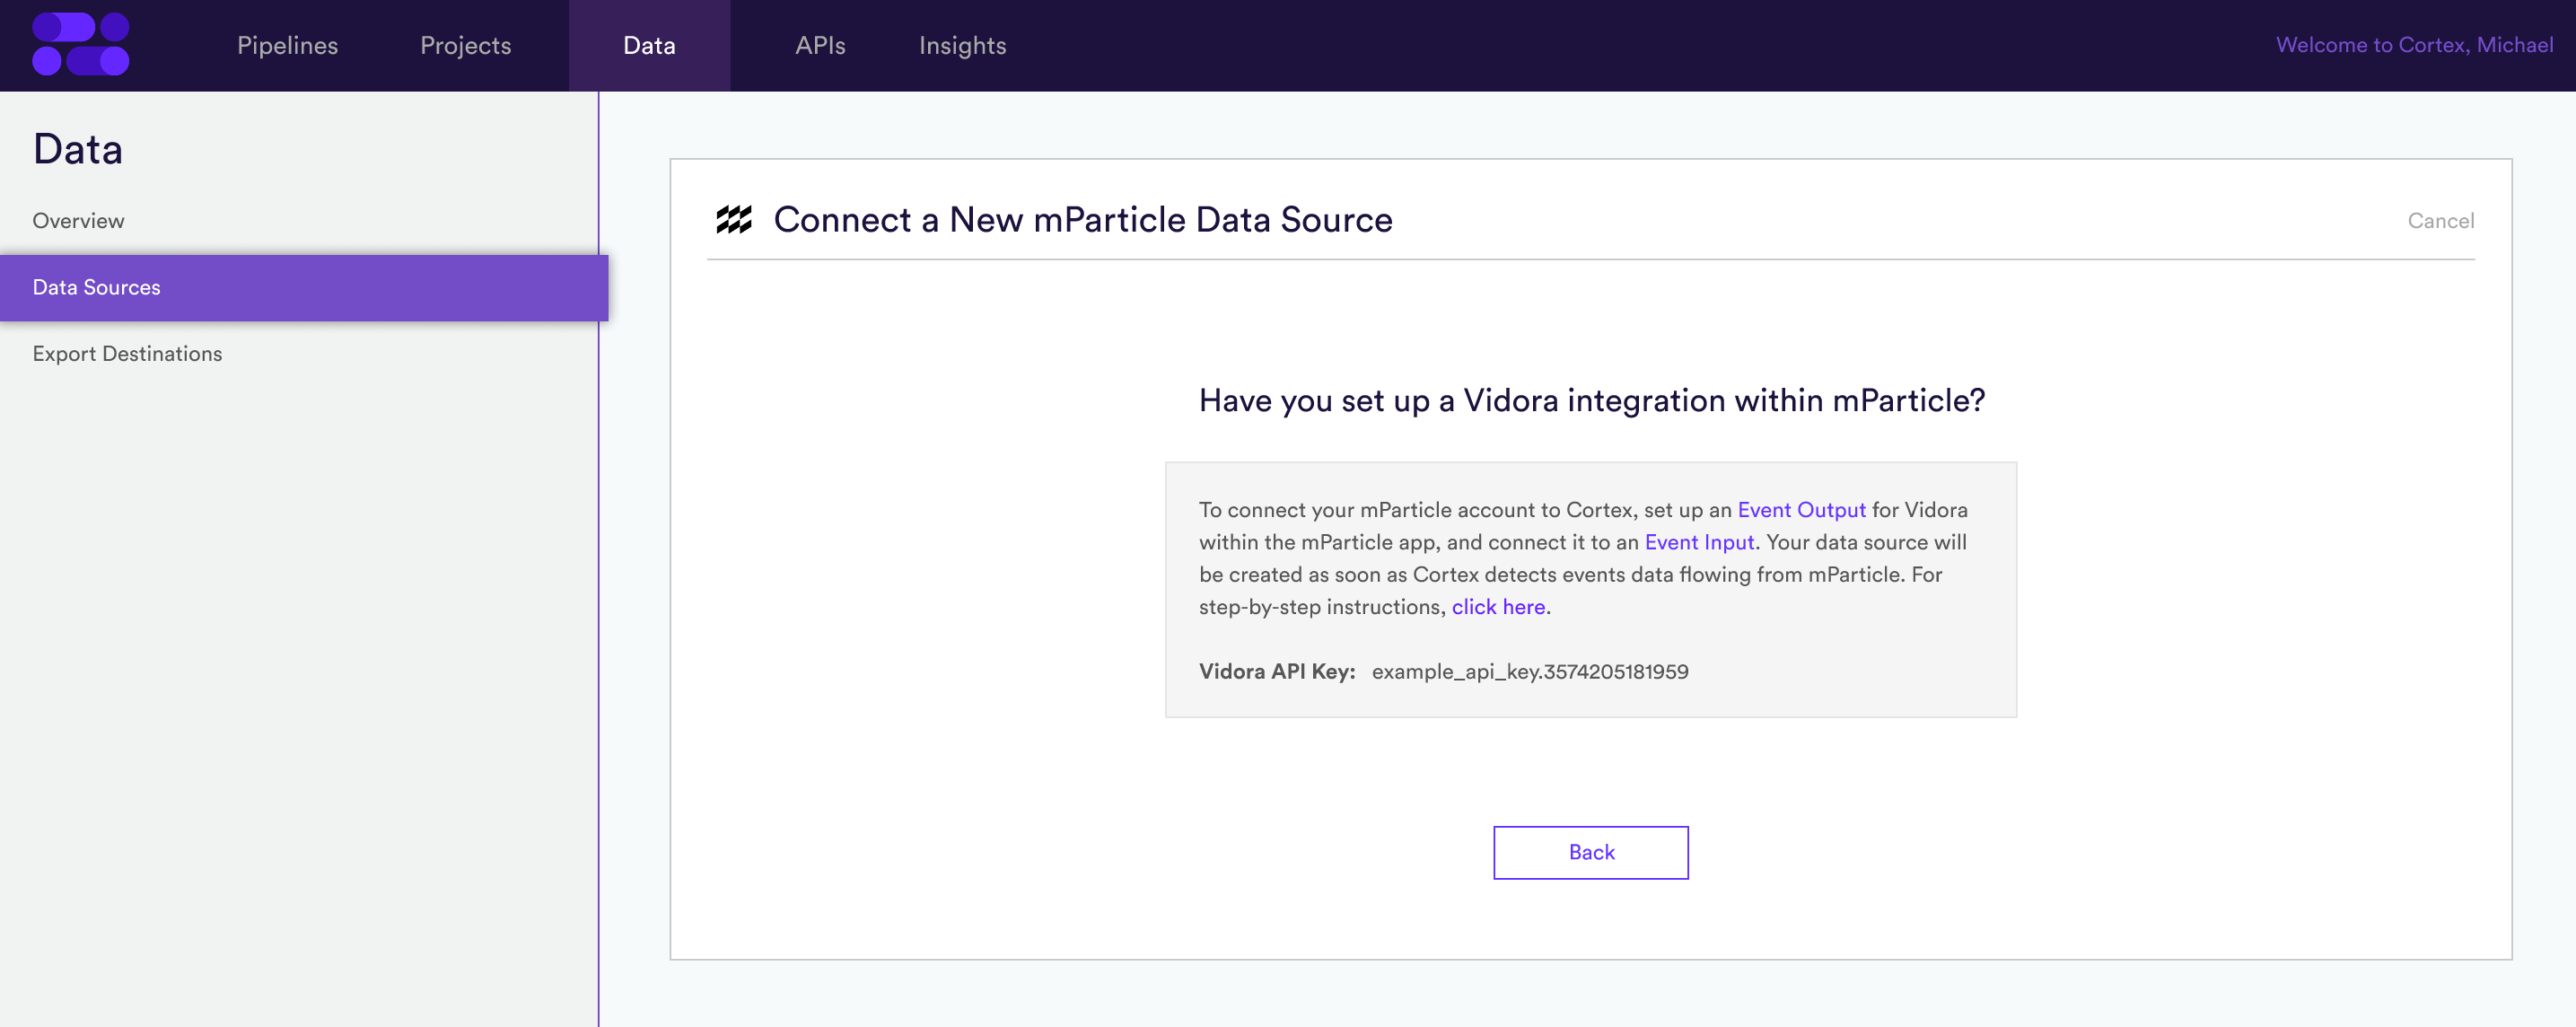
Note that you can also access your API key by navigating to the API>Documentation page.
Step 2: Create a Cortex Event Output within mParticle
An Output in mParticle refers to an integration through which data can be forwarded to a 3rd party. Outputs come in two types: Event and Audience. In order to stream event data from mParticle into your Cortex account, Cortex should be added as an Event Output through steps (A-D) outlined below:
- (A) Navigate to the Directory tab in the left and search for Vidora
- (B) Select Output Event when asked to choose an integration type
- (C) After hitting Configure to continue, enter a name for your Output and paste in your Cortex API key from Step (A)
- (D) When done, hit Save & Open in Connections to finish creating your Output.

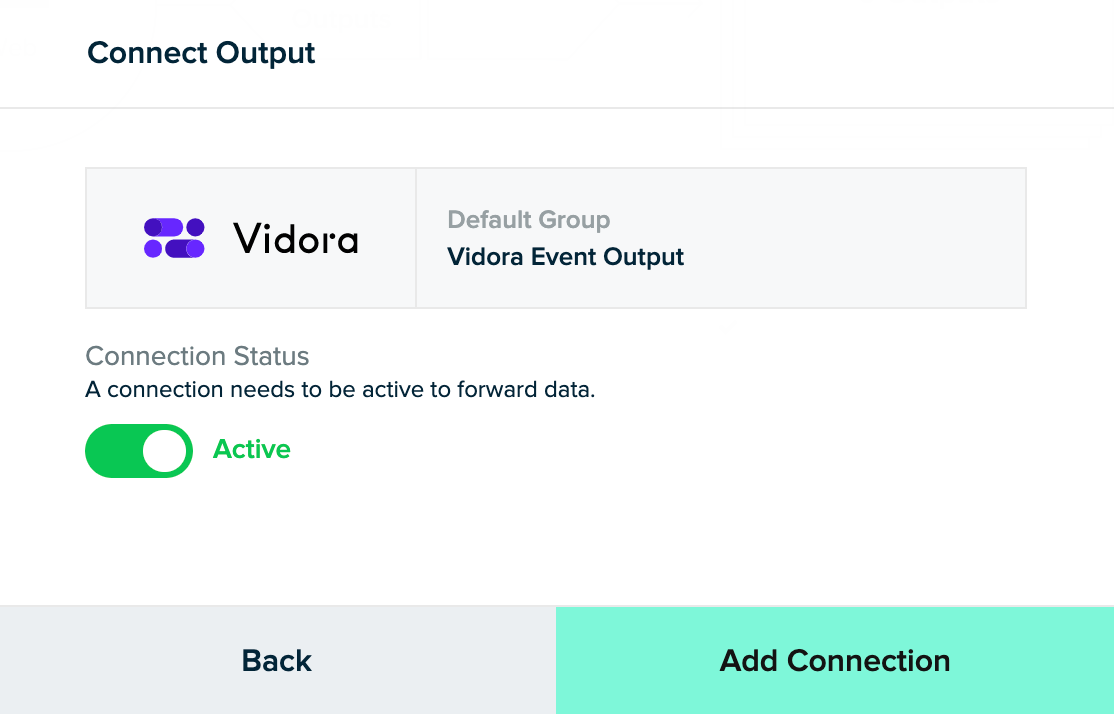
Step 3: Connect Your Input and Output within mParticle
Once you’ve created an Event Output for Cortex, next head to the Connections tab in order to connect this Output to an Input. This enables you to choose what data is sent to Cortex and from which sources:
- (A) From Connections > Connect, and select the Input that you’d like to use to supply events data to Cortex.
- (B) Click Connect Output, and select your Cortex output configuration.
- (C) Set the status to Active and click Save.
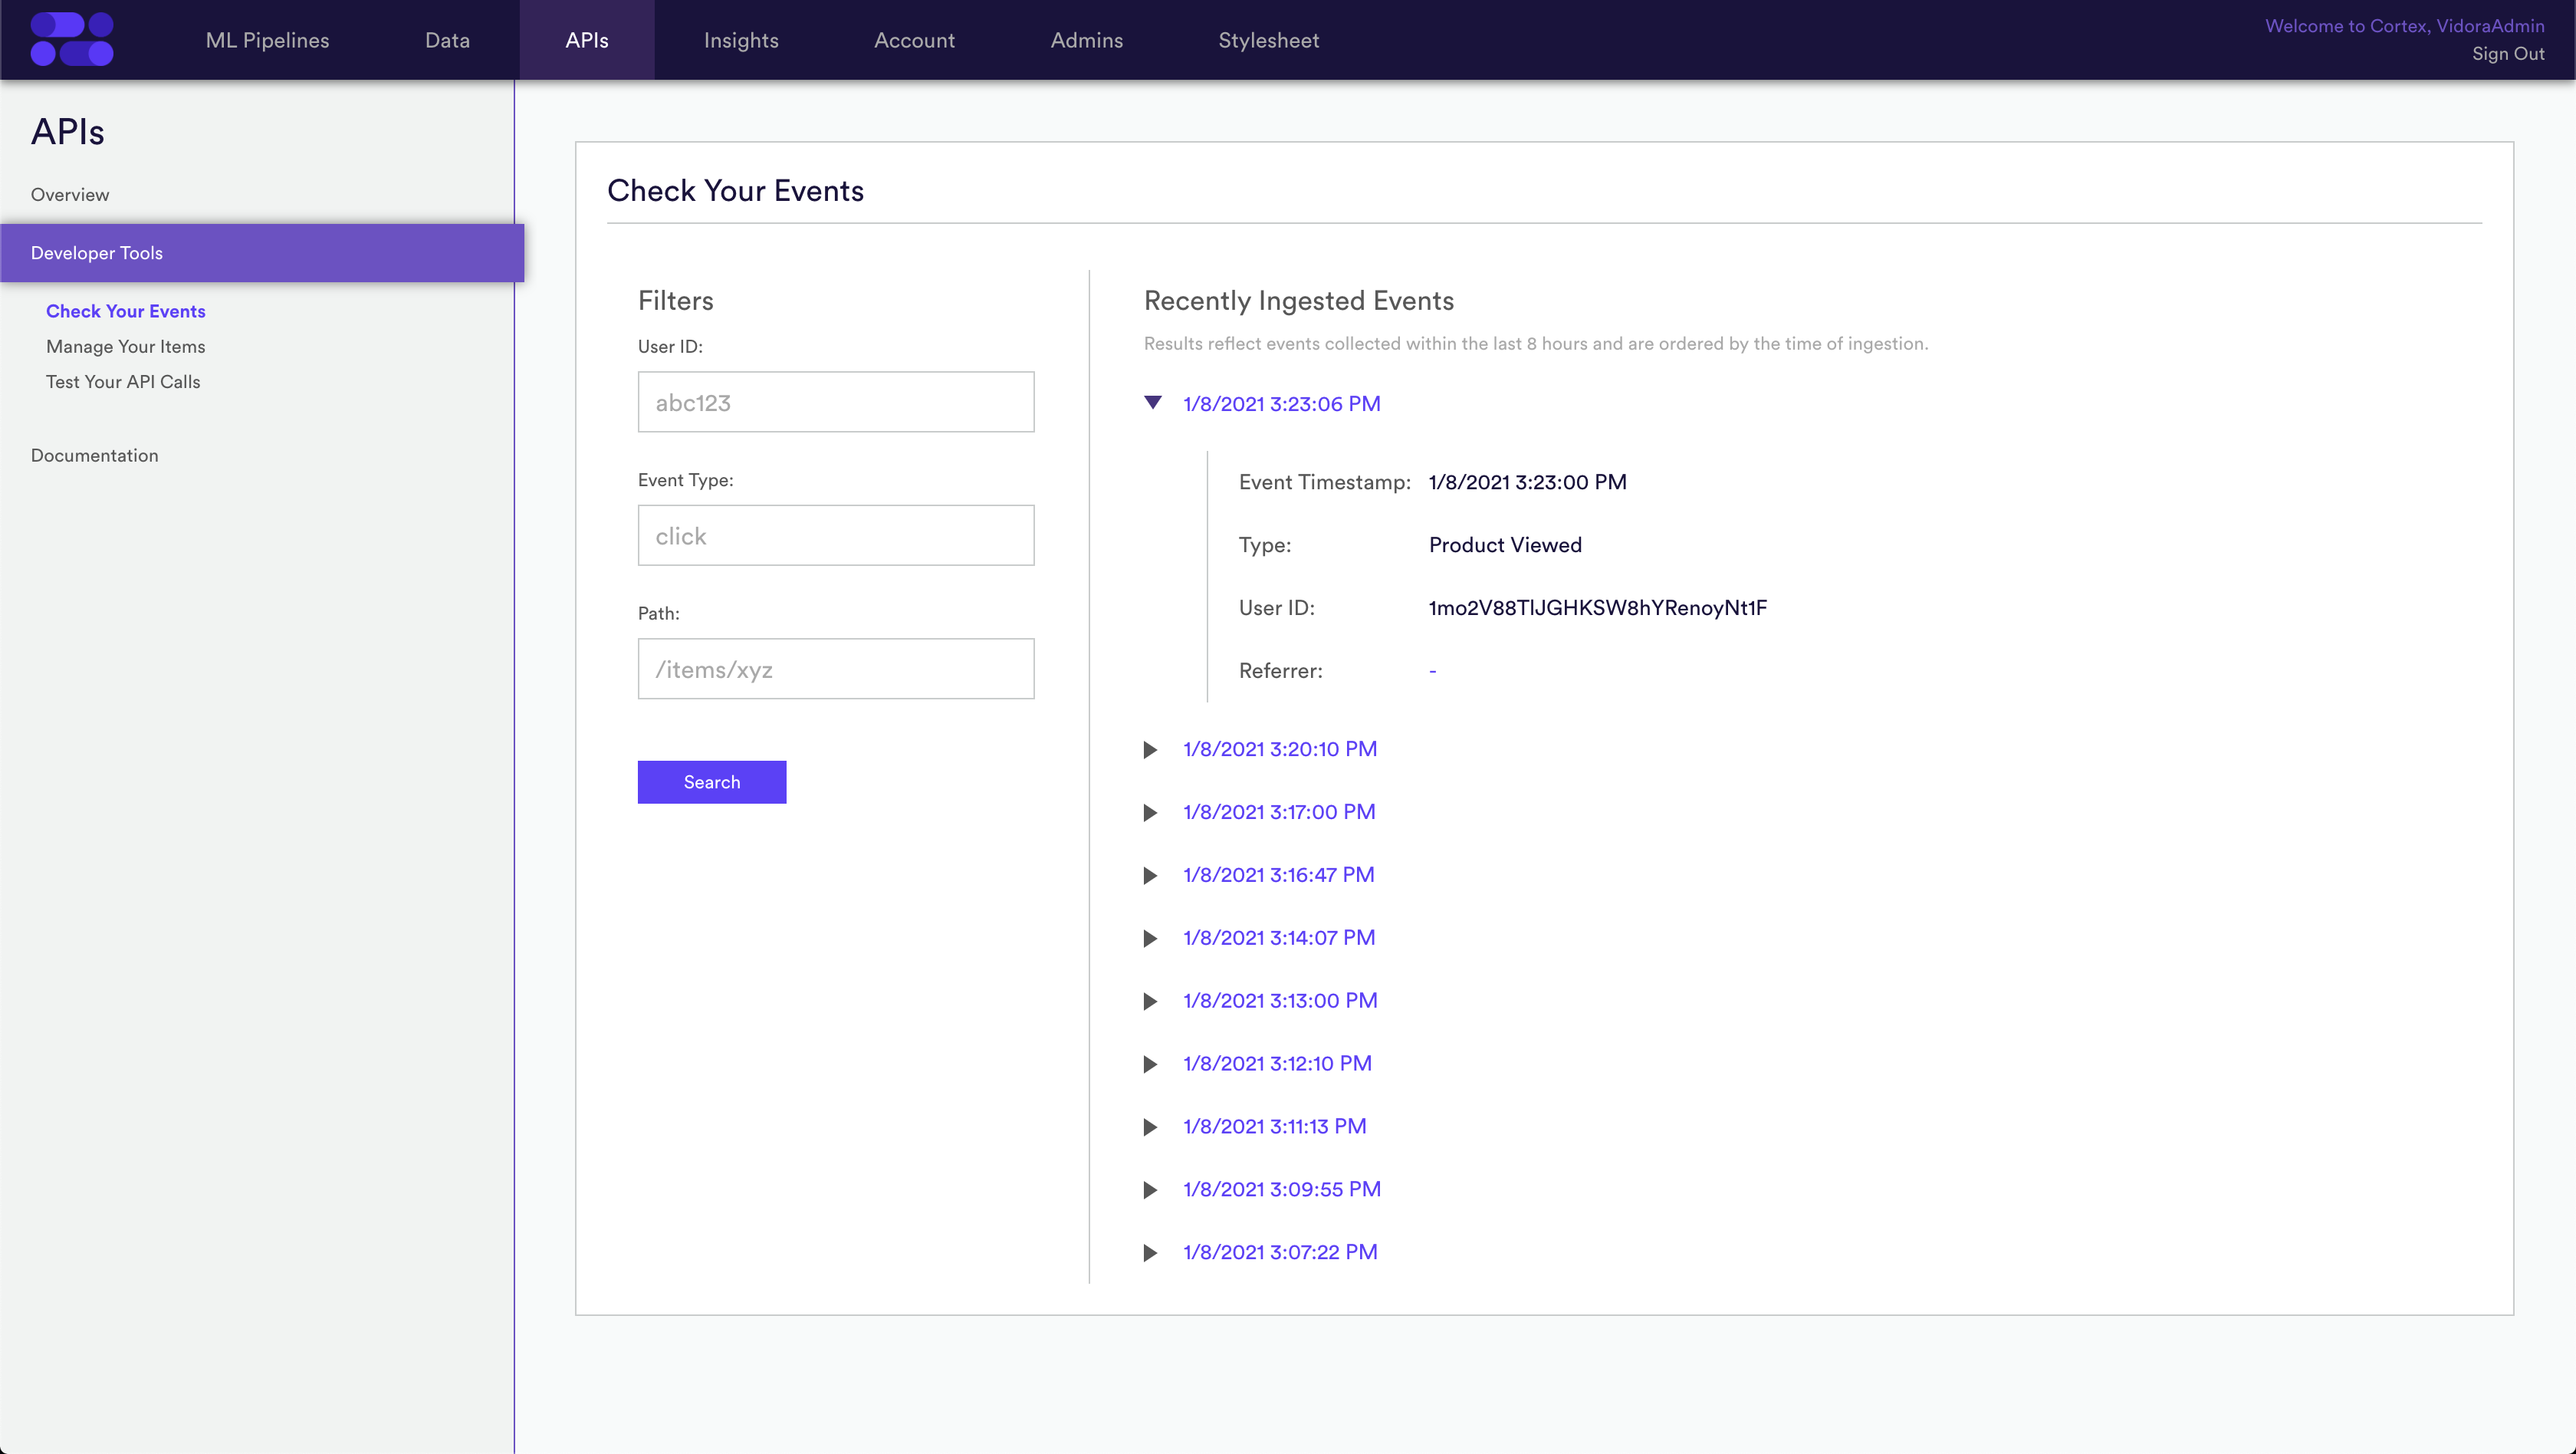
Step 4: Test the Integration
After you have set up your integration, test it out by sending a few events to Cortex from your site or app. You should see these events flow into mParticle through your Input. You should also see these same events flow into Cortex using the Check Your Events tool. Note you can always filter/search by User ID or Event Type for easy find-ability.
Once your Cortex account detects events data flowing from mParticle, a Data Source will automatically be created. You can access this Data Source from the Data tab within Cortex.
Replaying Historical Data
The above integration enables data to flow into Cortex as it is collected and stored in mParticle. In order to build pipelines right away, you should also ask your mParticle account manager to initiate a replay of historical data.
Related Links
Still have questions? Reach out to support@mparticle.com for more info!