How Can We Help?
Adobe Analytics
A Data Source in Cortex represents an integration between your Cortex account and a third-party platform used for enterprise data storage. Once your source is connected, data will regularly flow into Cortex where it can be used to build Machine Learning pipelines.
Adobe Analytics enables organizations to mix, match, and analyze data from anywhere in the customer journey. In this guide, we’ll walk through how to connect Adobe Analytics as a Data Source within your Cortex account.
Connecting an Adobe Analytics Data Source
To connect your Cortex account to Adobe Analytics, create a Data Source in Cortex by following the steps below. Each Data Source must be associated with a single schema, so if your Adobe Analytics instance contains multiple distinct report suites that you’d like to send to Cortex, you should create a separate Data Source for each one.
Step 1: Select Platform
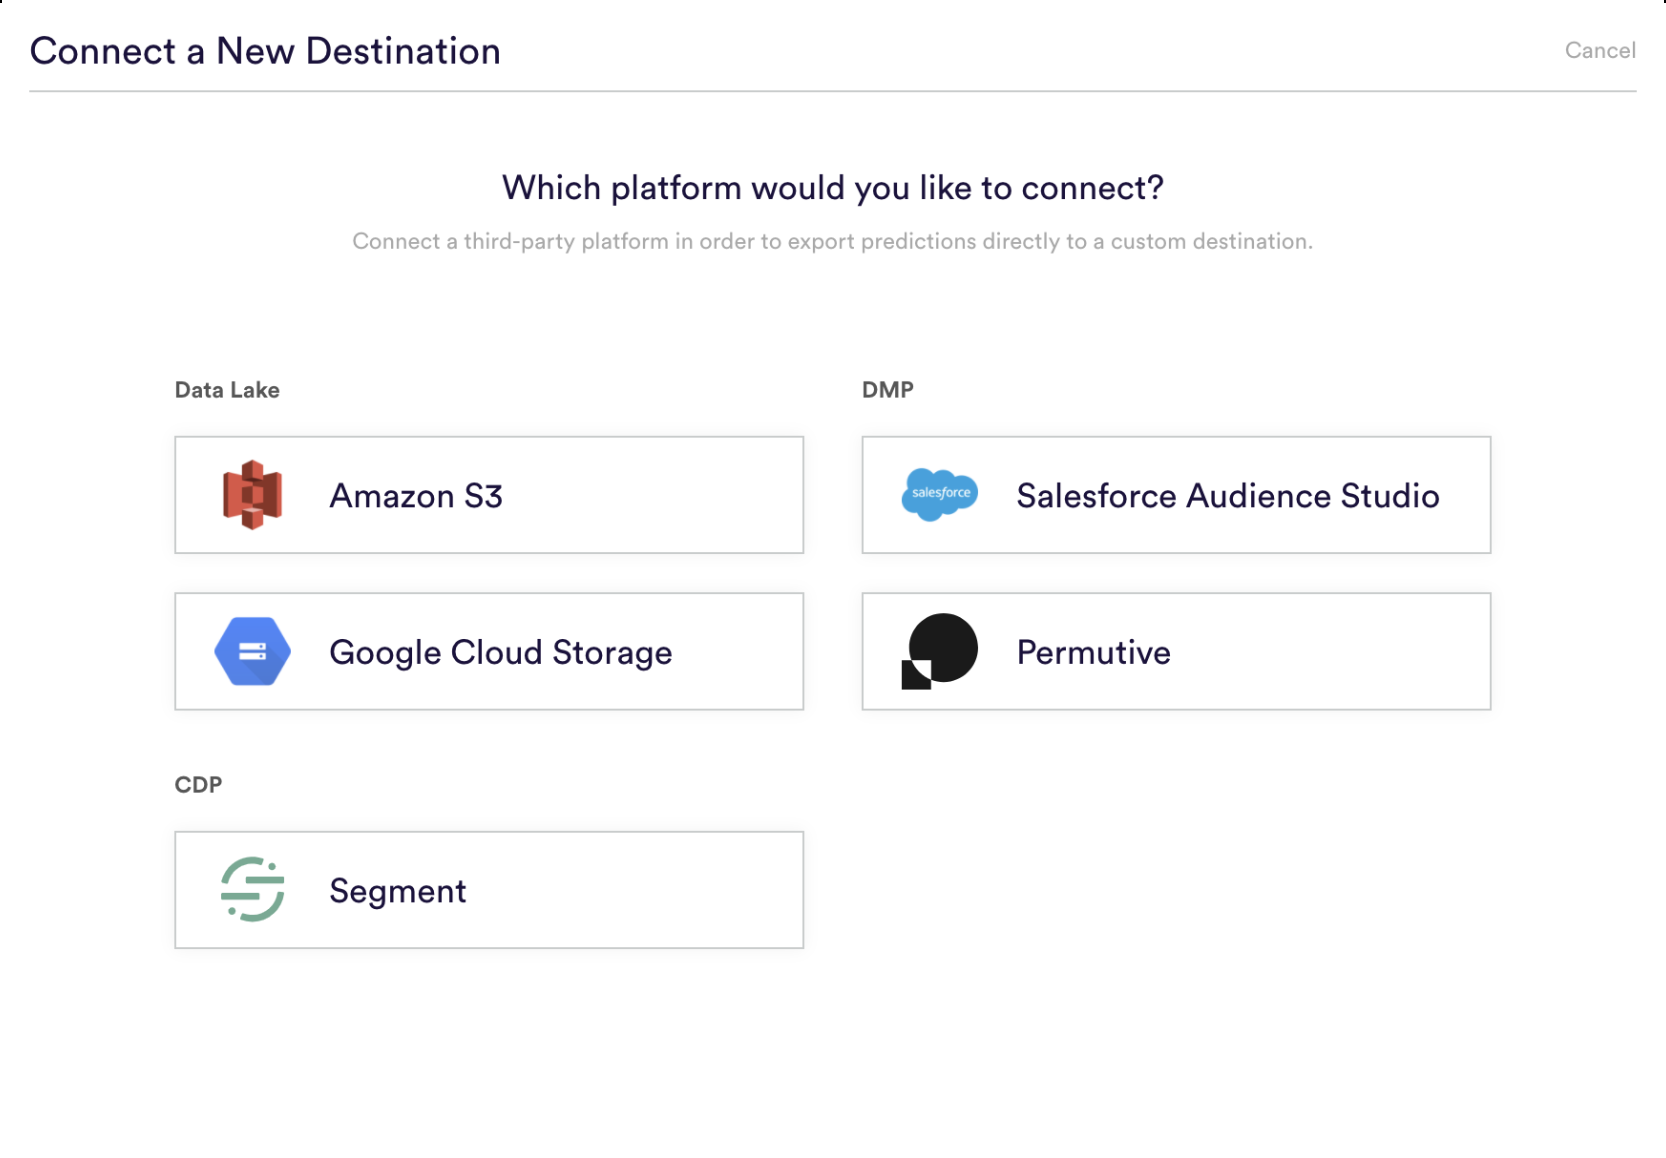
First navigate to the Data Sources area of the Data tab in Cortex, and select the “Adobe Analytics” icon from the list of available third-party platforms.
Step 2: Create a Data Feed in Adobe Analytics
Before you can create your Data Source, you must first set up a data feed to export raw data files out of Adobe Analytics on a recurring basis. To do this, follow the steps outlined below:
Create a New Data Feed
First, log into your Adobe Analytics account and begin the process of creating a new data feed.
- Log in to experiencecloud.adobe.com using your Adobe ID credentials.
- Click the 9-square icon in the upper right, then click the colored Analytics logo.
- In the top navigation bar, navigate to Admin > Data feeds.
- Click Add. A new page appears with three main categories: Feed information, Destination, and Data Column Definitions.
Define Feed Information
Next, specify information related to the feed that you’d like to export.
- Name: The name of the data feed.
- Report suite: The report suite the data feed is based on.
- Email when complete: The email address to be notified when a feed finishes processing.
- Feed interval: Please select the Daily option, so that your feed contains a full day’s worth of data.
- Delay processing: In most cases, no delay is needed.
- Start date: The start date indicates the first date you want a data feed. Set this date in the past in order to backfill Cortex with historical data.
- Continuous feed: Please select this checkbox to ensure that your feed has no end date. This allows the feed to run indefinitely as new data is collected over time.
Define Destination Information
Next, specify information related to the destination to which your feed should be exported. Your destination should be an S3 bucket that you will later authorize Cortex to access. If you don’t have your own S3 bucket, Cortex will provision one for you.
- Type: Please select S3 as the destination type.
- Bucket & Path: Specify the name of the bucket and folder path to which Adobe Analytics will export data. You may choose to append the report suite ID to this path if you wish.
- Access & Secret Key: Specify access credentials that Adobe should use to write files to this location.
Specify Data Column Definitions
Fill out information and definitions for the data columns you’d like to include in your feed.
- Remove escaped characters: When collecting data, some characters (such as newlines) can cause issues. Check this box if you would like these characters removed from feed files.
- Compression format: The type of compression used. Gzip outputs files in .tar.gz format. Zip outputs files in .zip format.
- Packaging type: Single file outputs the hit_data.tsv file in a single, potentially massive file. Multiple files paginates your data into 2GB chunks (uncompressed). If multiple files is selected and uncompressed data for the reporting window is less than 2GB, one file is sent. Adobe recommends using multiple files for most data feeds.
- Column templates: When creating many data feeds, Adobe recommends creating a column template. Selecting a column template automatically includes the specified columns in the template. Adobe also provides several templates by default.
- Available columns: All available data columns in Adobe Analytics. Click Add all to include all columns in a data feed.
- Included columns: The columns to include in a data feed. Click Remove all to remove all columns from a data feed.
- Download CSV: Downloads a CSV file containing all included columns.
Save Your Data Feed
Finally, click “Save” in the top right. Once your feed is saved, historical data processing begins. When data finishes processing for a day, the file is uploaded to your S3 location, where it will be ingested by Cortex.
Step 3: Define Data
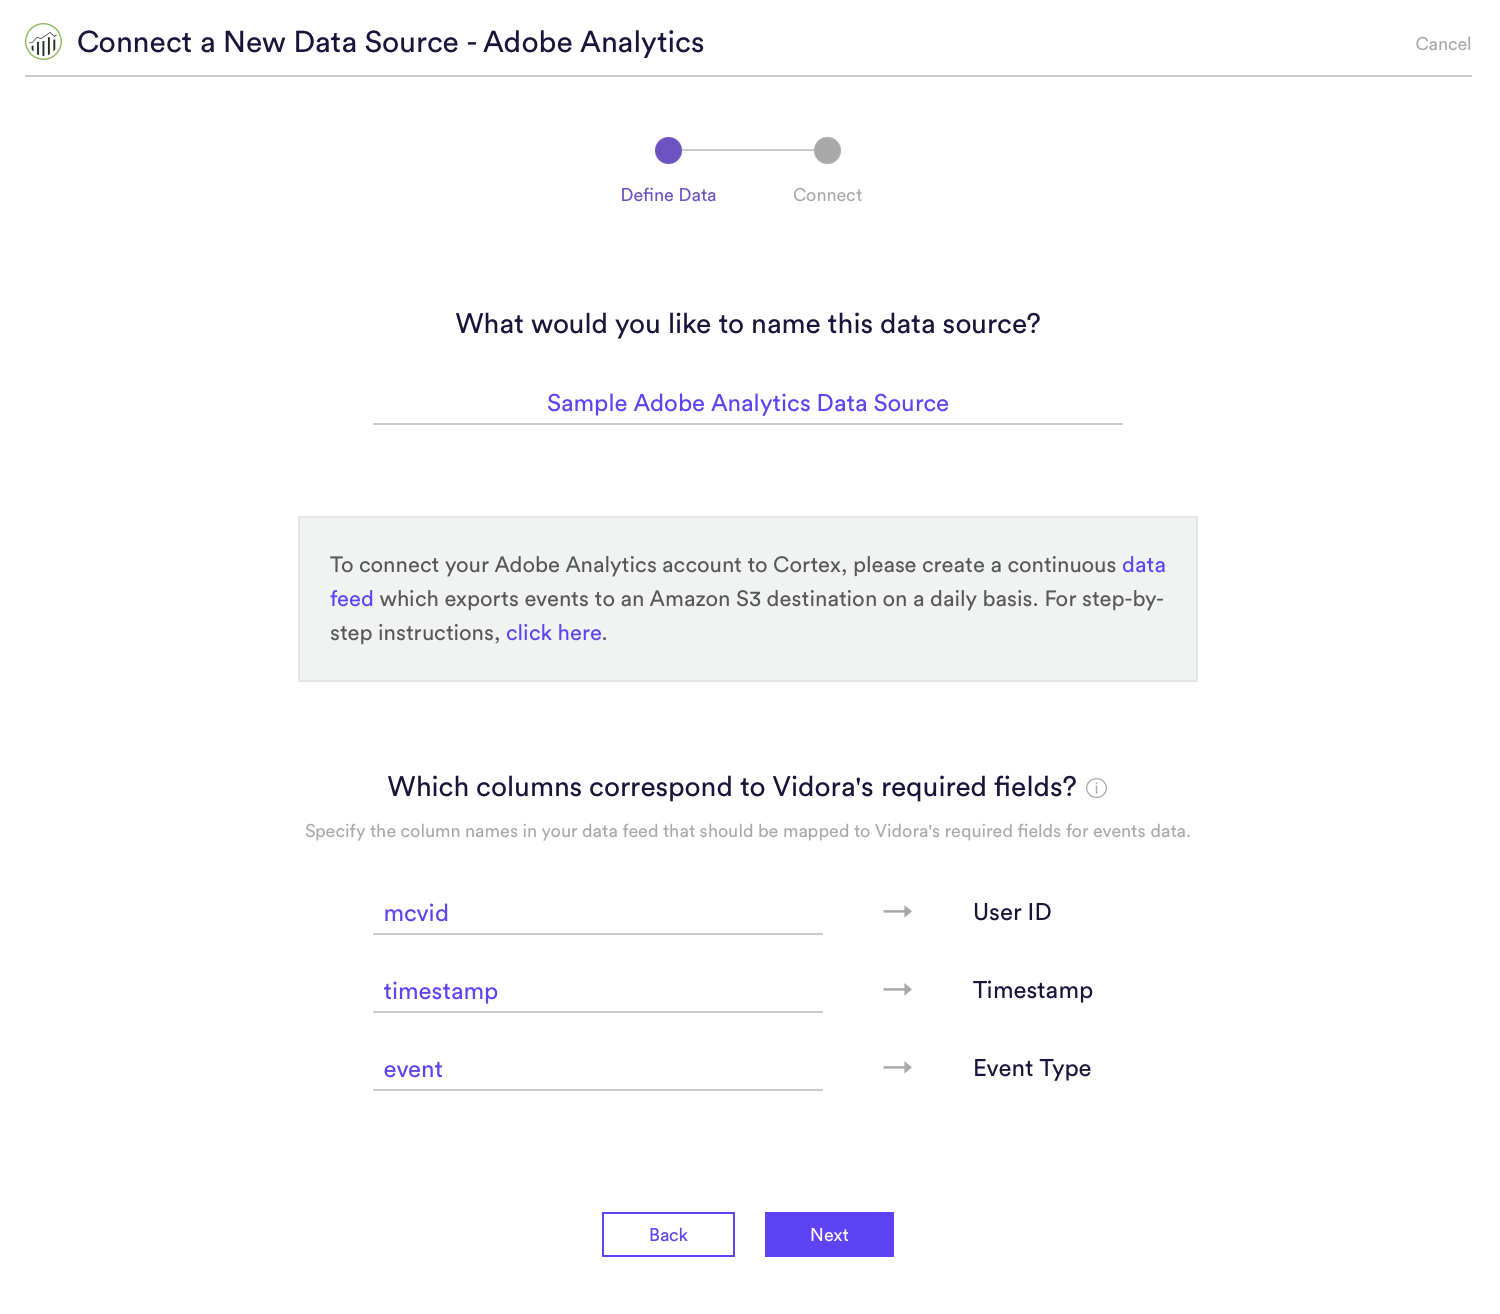
Specify the column names included in your Adobe Analytics data feed that correspond to Cortex’s three required fields for events data –
- User ID – Unique ID of the user that completed the event.
- Timestamp – Timestamp when the event was recorded (unix or ISO 8601).
- Event Type – Type of event completed by the user.
Step 4: Authorize Cortex to Access Your S3 Bucket
Before connecting your Data Source, you must first authorize Cortex to access the S3 bucket that serves as the destination for your data feed. This can be done by logging into your AWS IAM console in a new browser window, and taking the following steps.
Create Policy
First, create an IAM policy which specifies the actions that policyholders are allowed to take on your S3 bucket. Later, you’ll attach this policy to an IAM role created for Cortex.
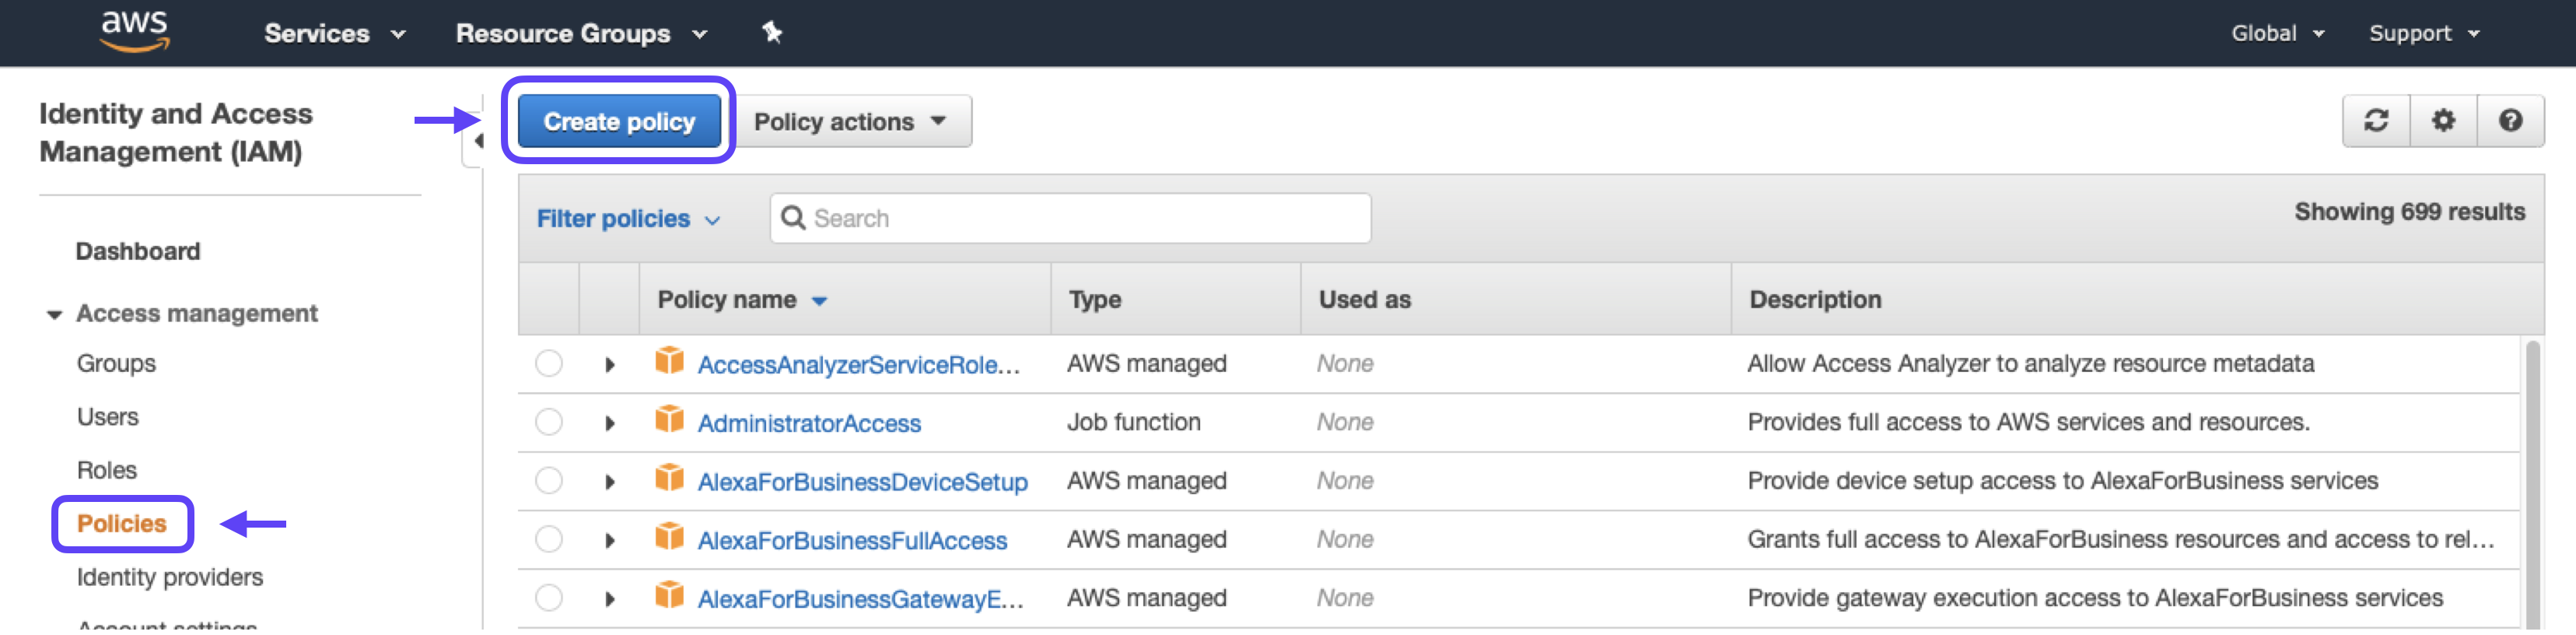
1. Go to the Policies section and click the Create Policy button.
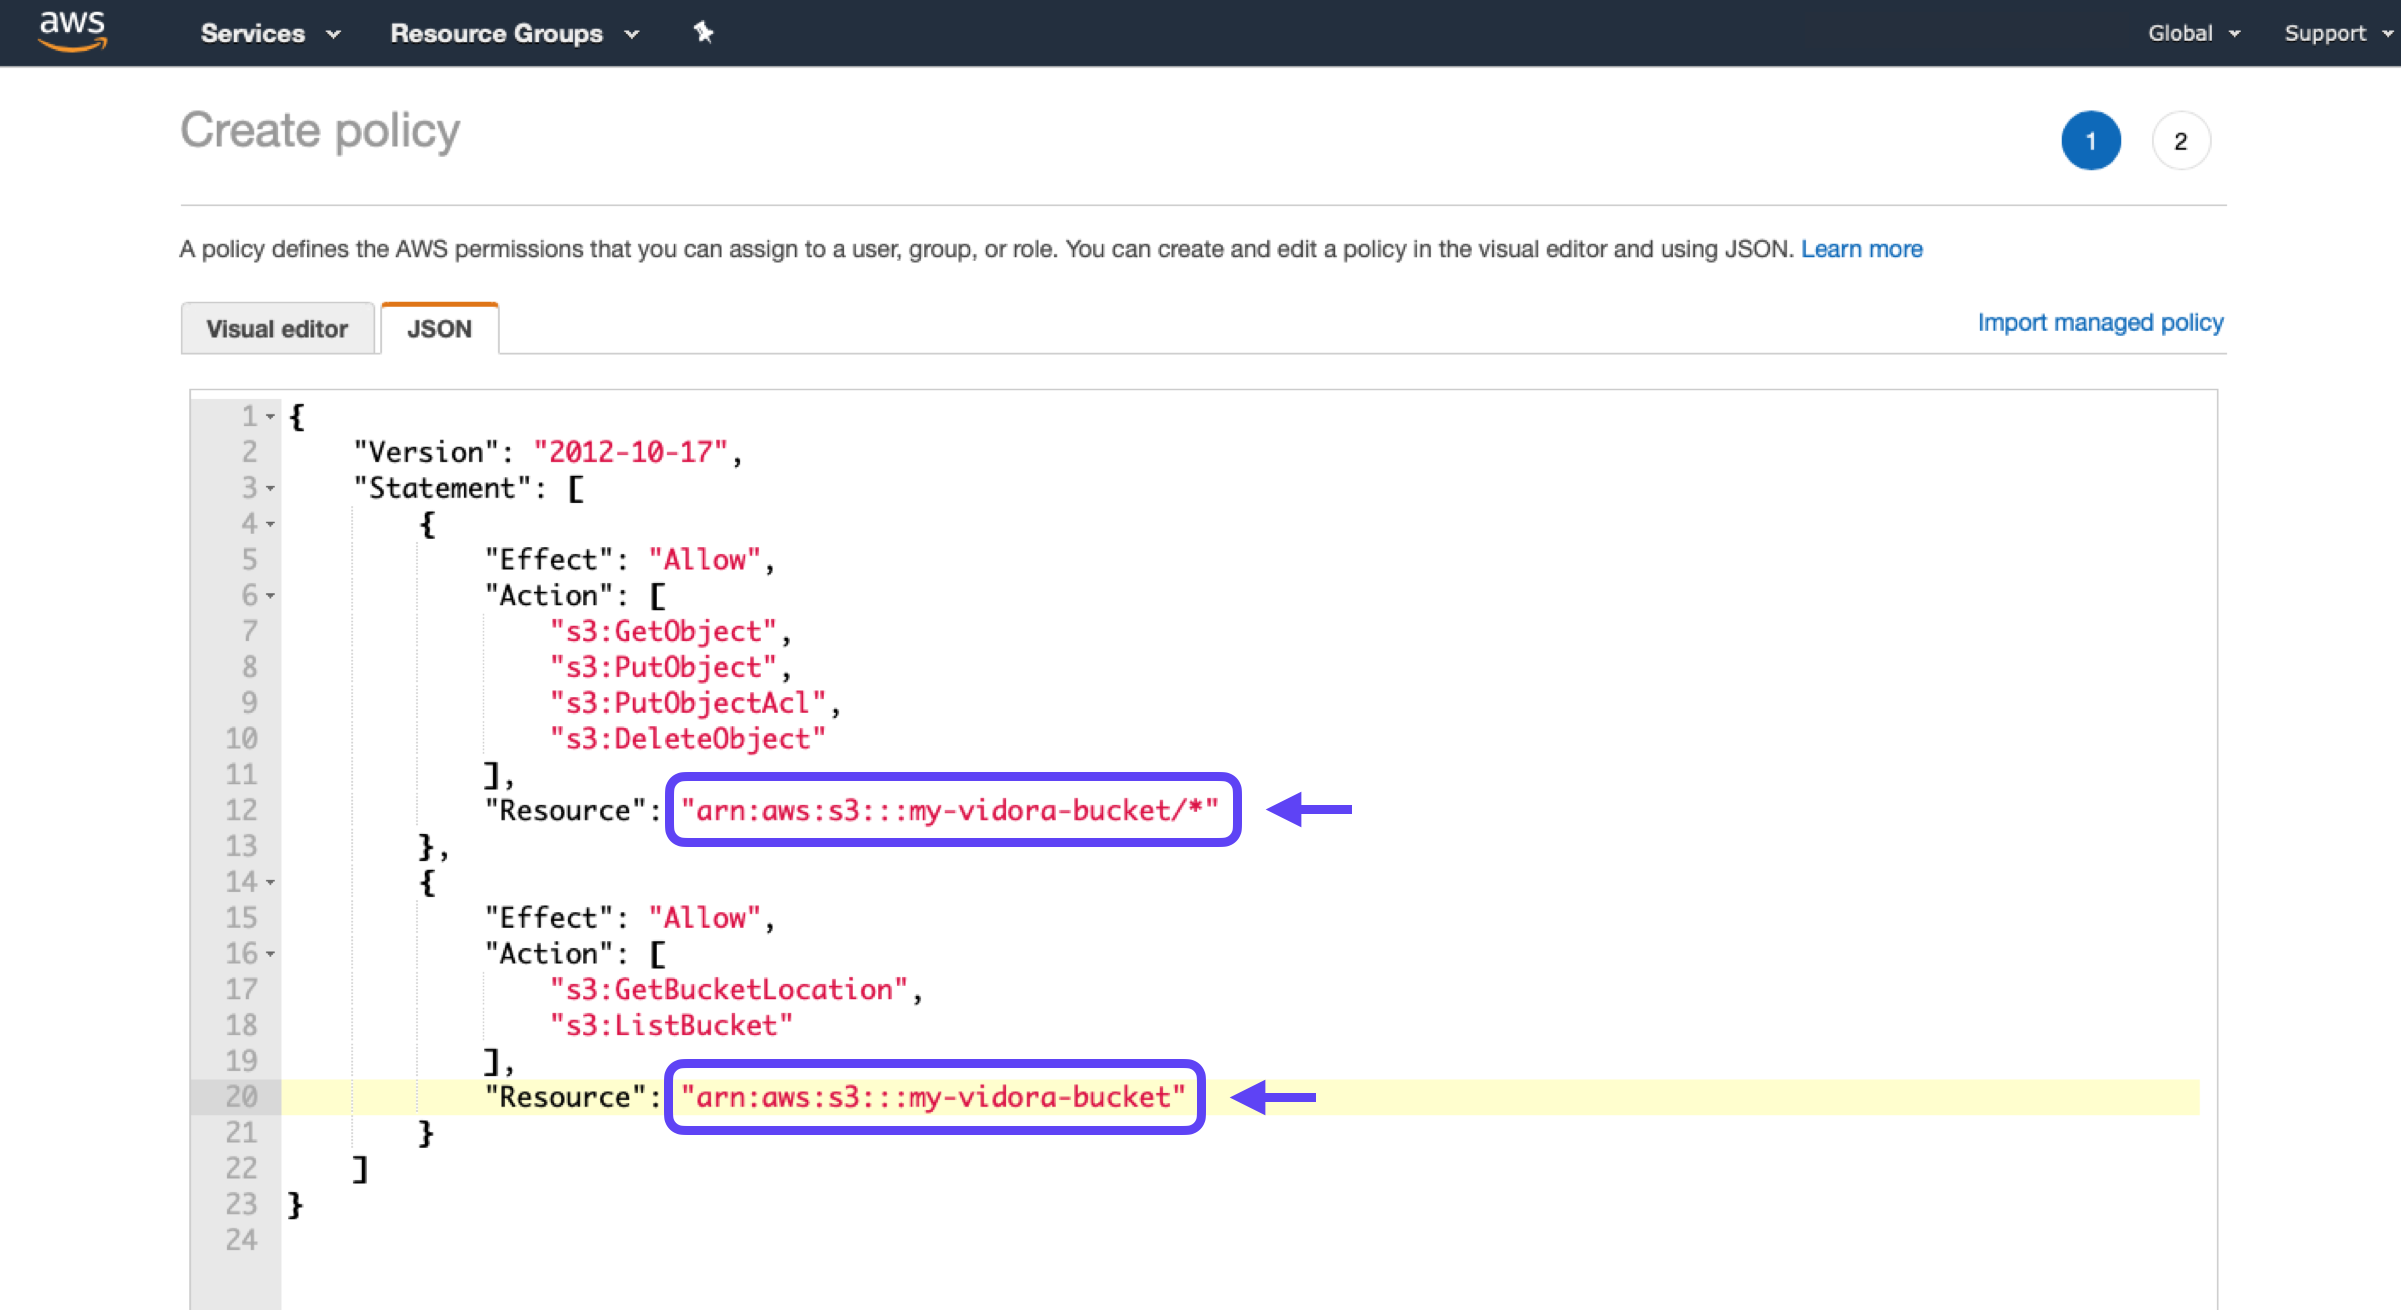
2. Copy-paste the following into the JSON tab. Make sure to replace the YOUR-BUCKET-NAME placeholder with the name of your own S3 bucket.
{
   "Version": "2012-10-17",
   "Statement": [
      {
         "Effect": "Allow",
         "Action": [
            "s3:GetObject",
            "s3:PutObject",
            "s3:PutObjectAcl",
            "s3:DeleteObject"
          ],
         "Resource": "arn:aws:s3:::<YOUR-BUCKET-NAME>/*"
      },
      {
         "Effect": "Allow",
         "Action": [
            "s3:GetBucketLocation", "s3:ListBucket"
          ],
         "Resource": "arn:aws:s3:::<YOUR-BUCKET-NAME>"
      }
   ]
}
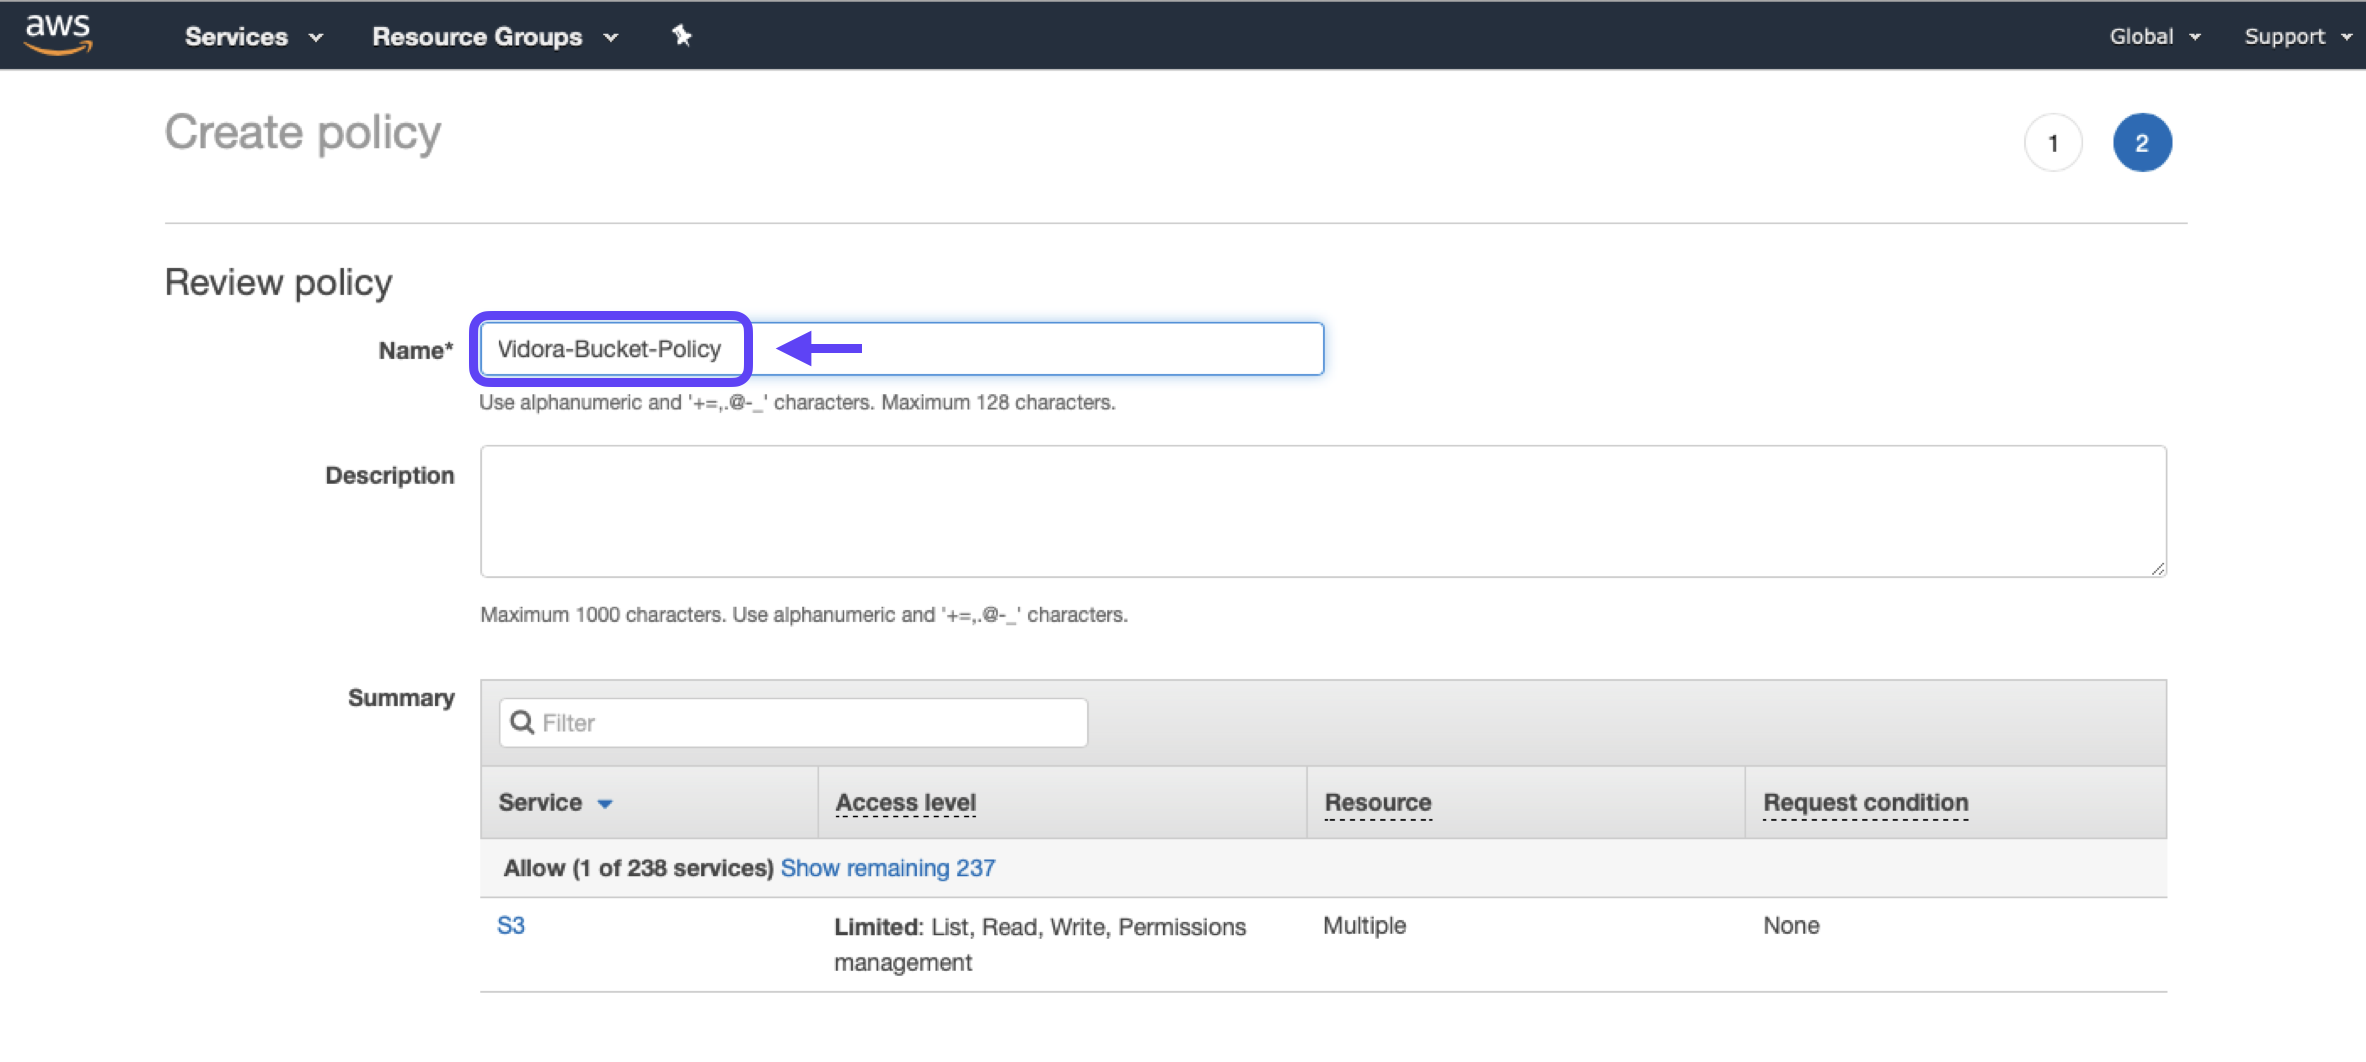
3. Click Review Policy, and provide a name and description for your policy. Make note of your policy’s name (e.g. “Vidora-Bucket-Policy”), and hit Create Policy.
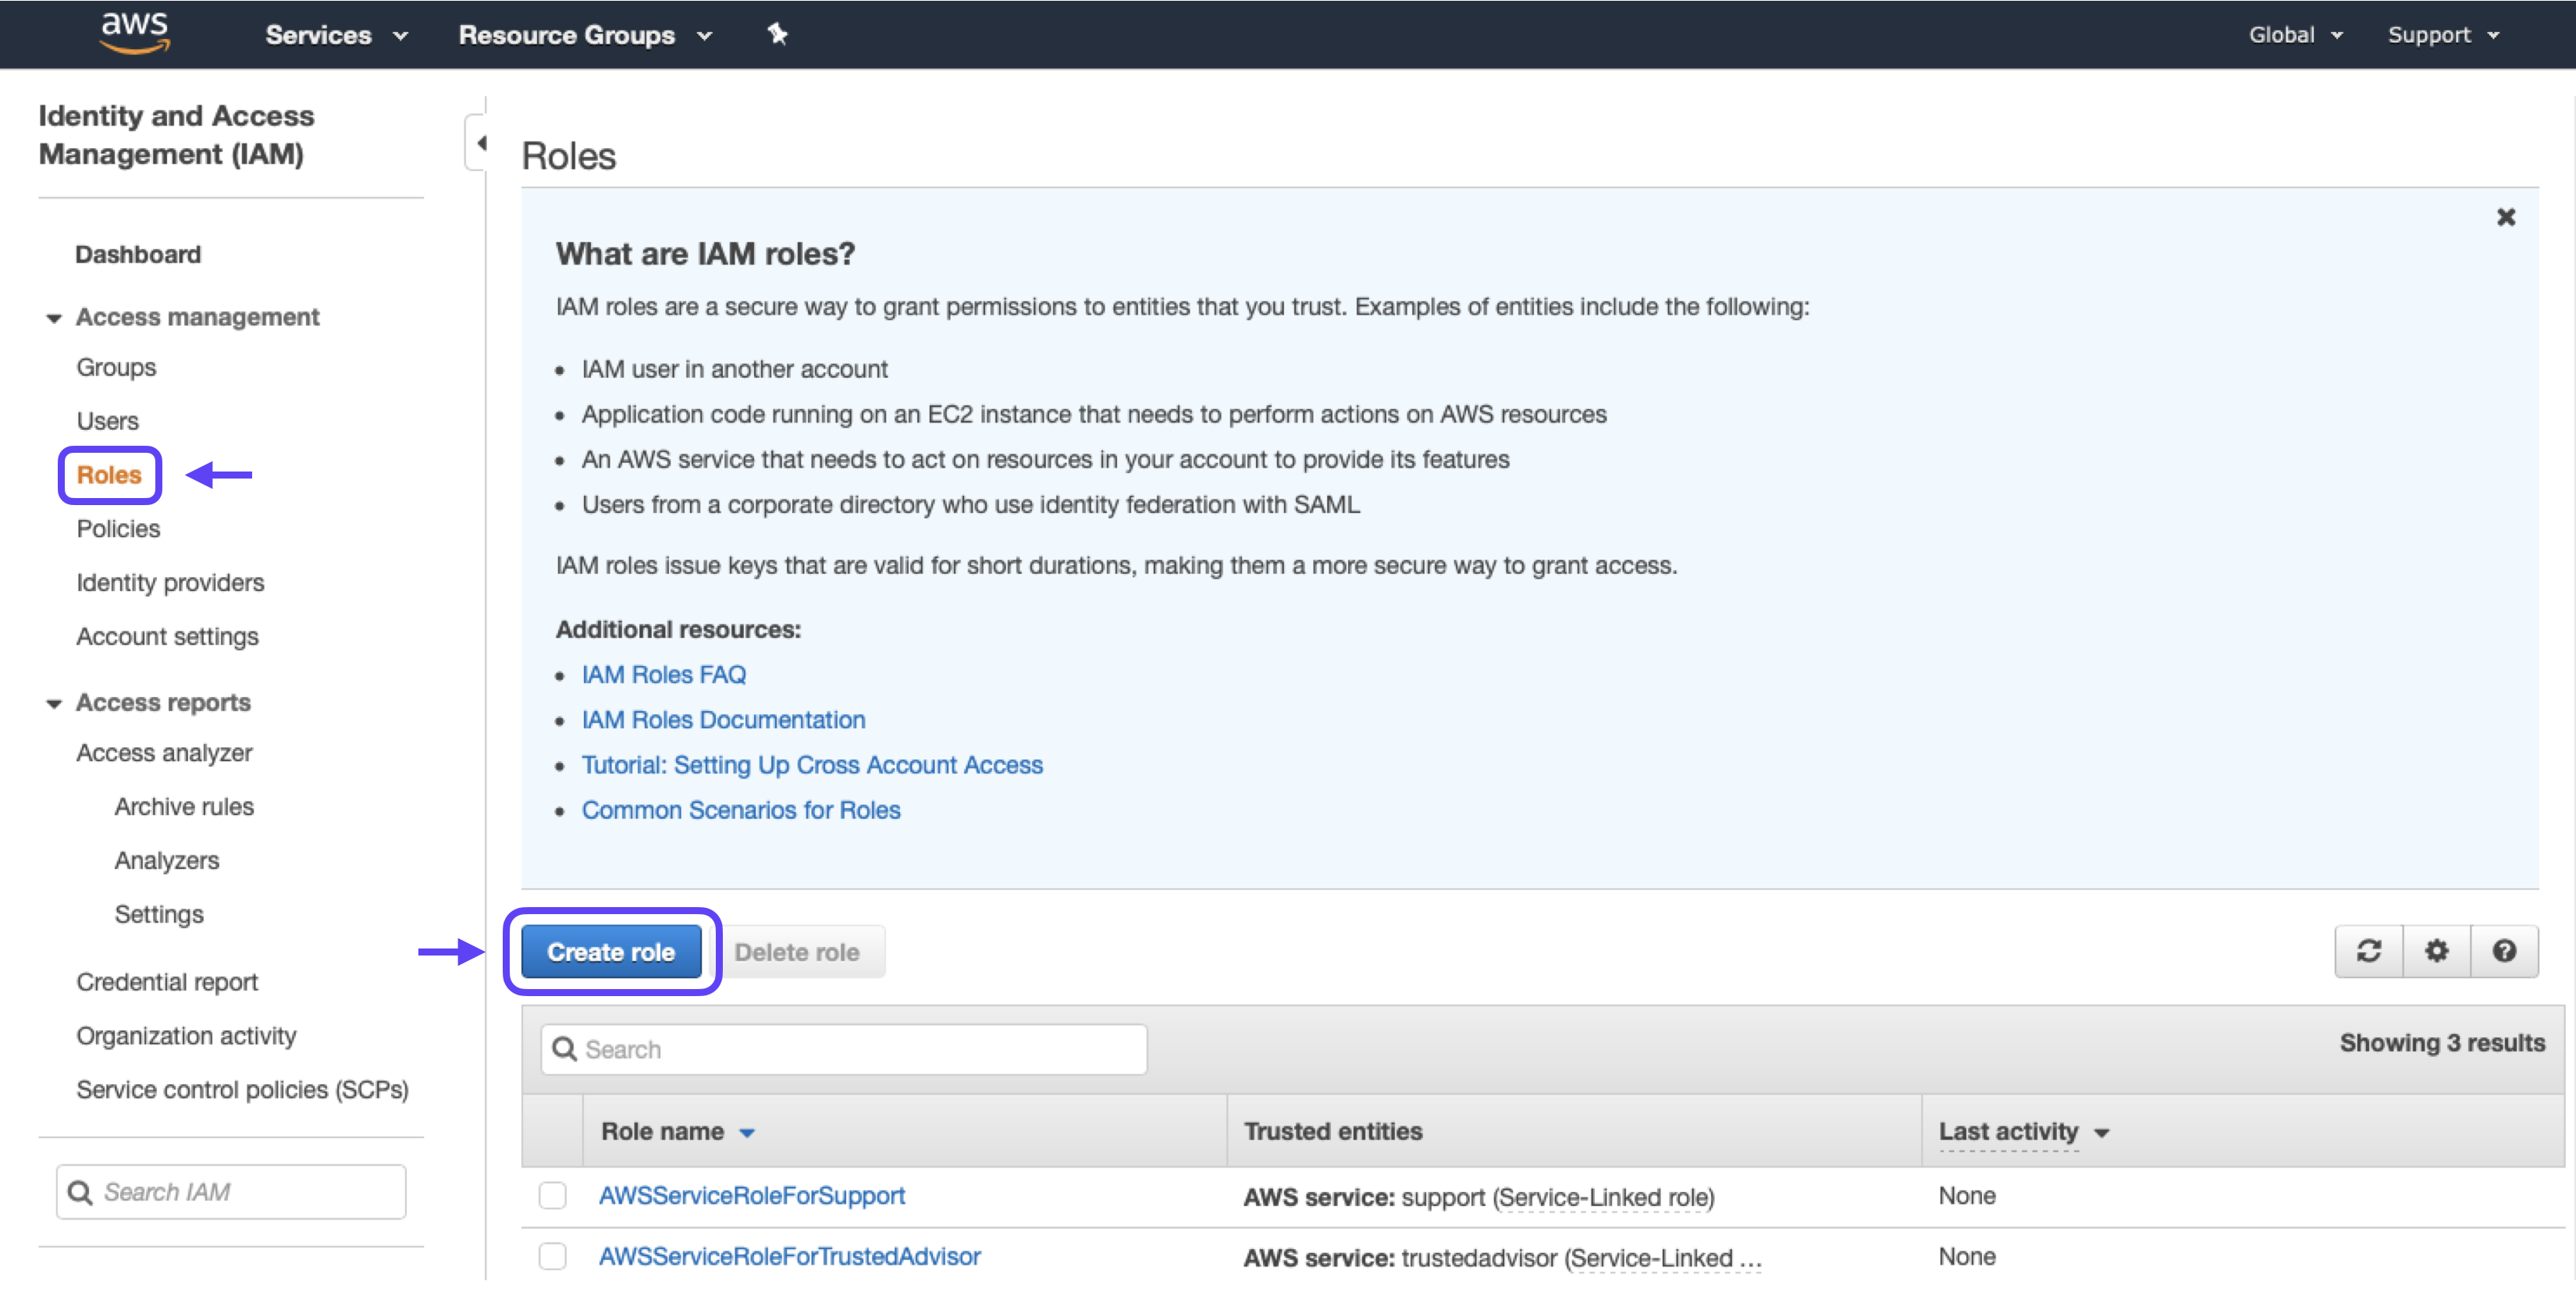
Create Role
Next, create an IAM role which links your newly created policy with Cortex’s AWS account. This authorizes Cortex to take the actions specified in your policy.
1. Go to the Roles section and click the Create New Role button.
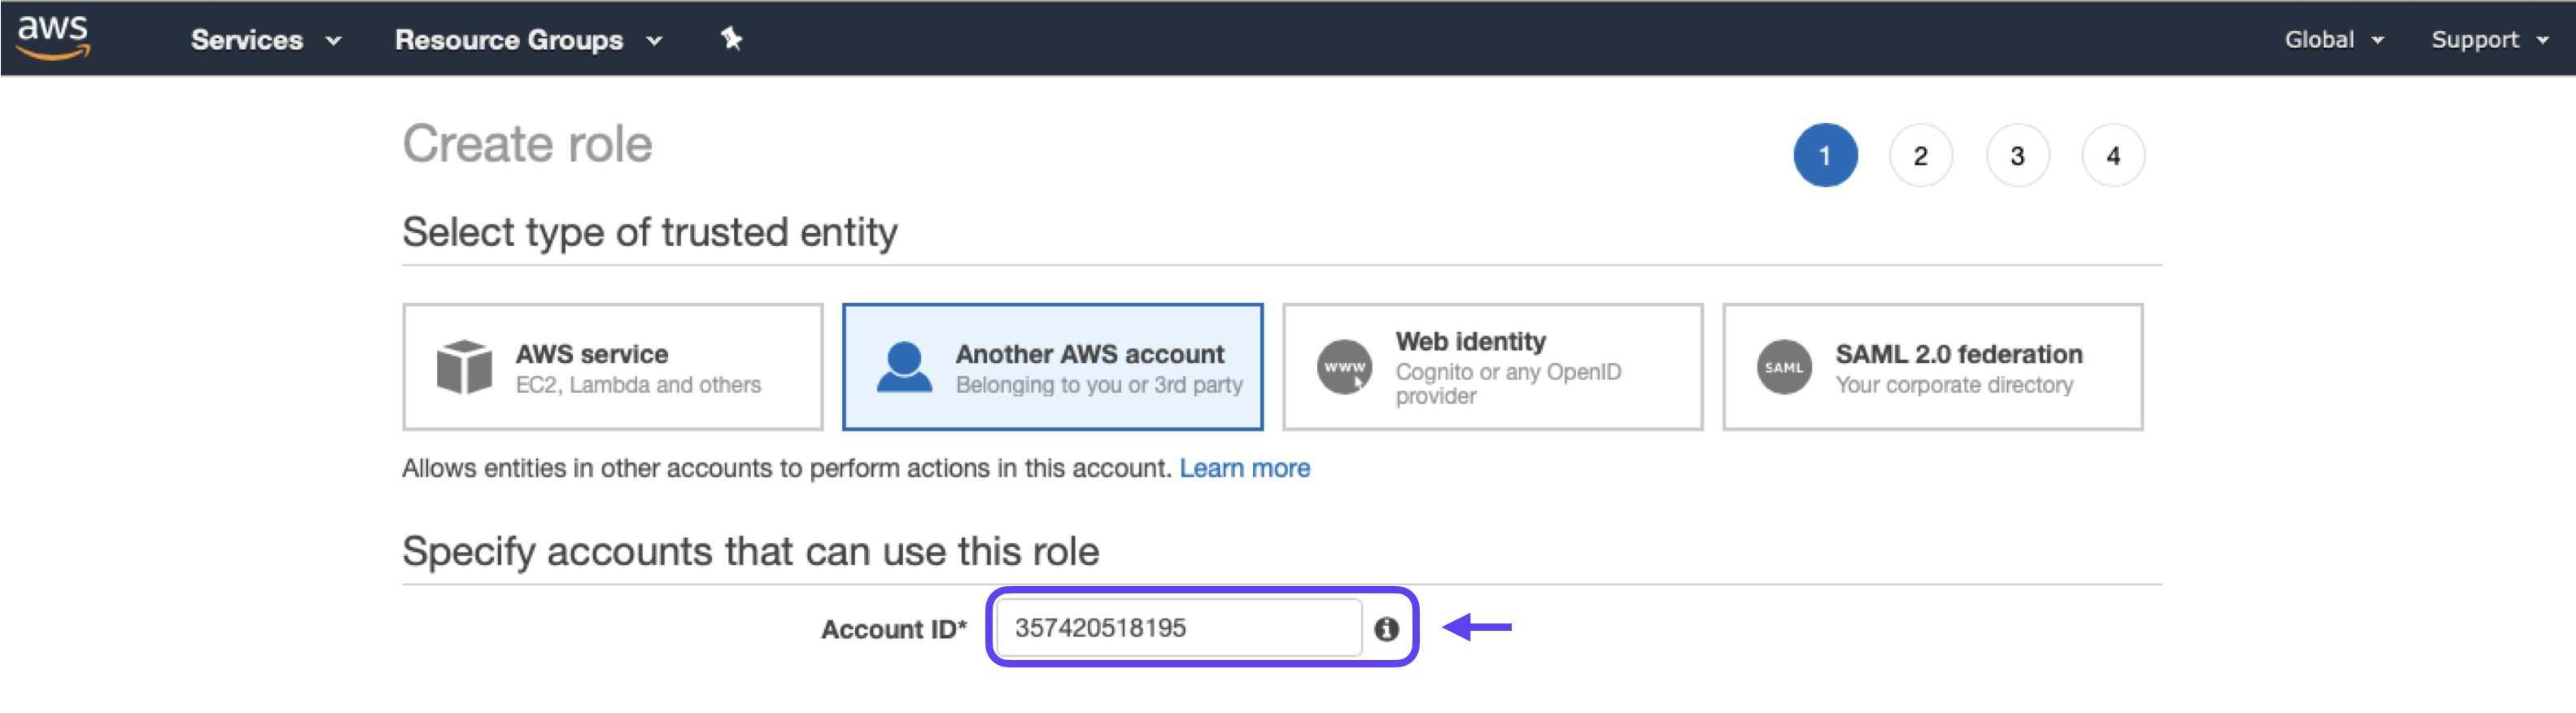
2. Select Another AWS Account, then enter 357420518195 (Cortex’s AWS account ID) in the Account ID field.
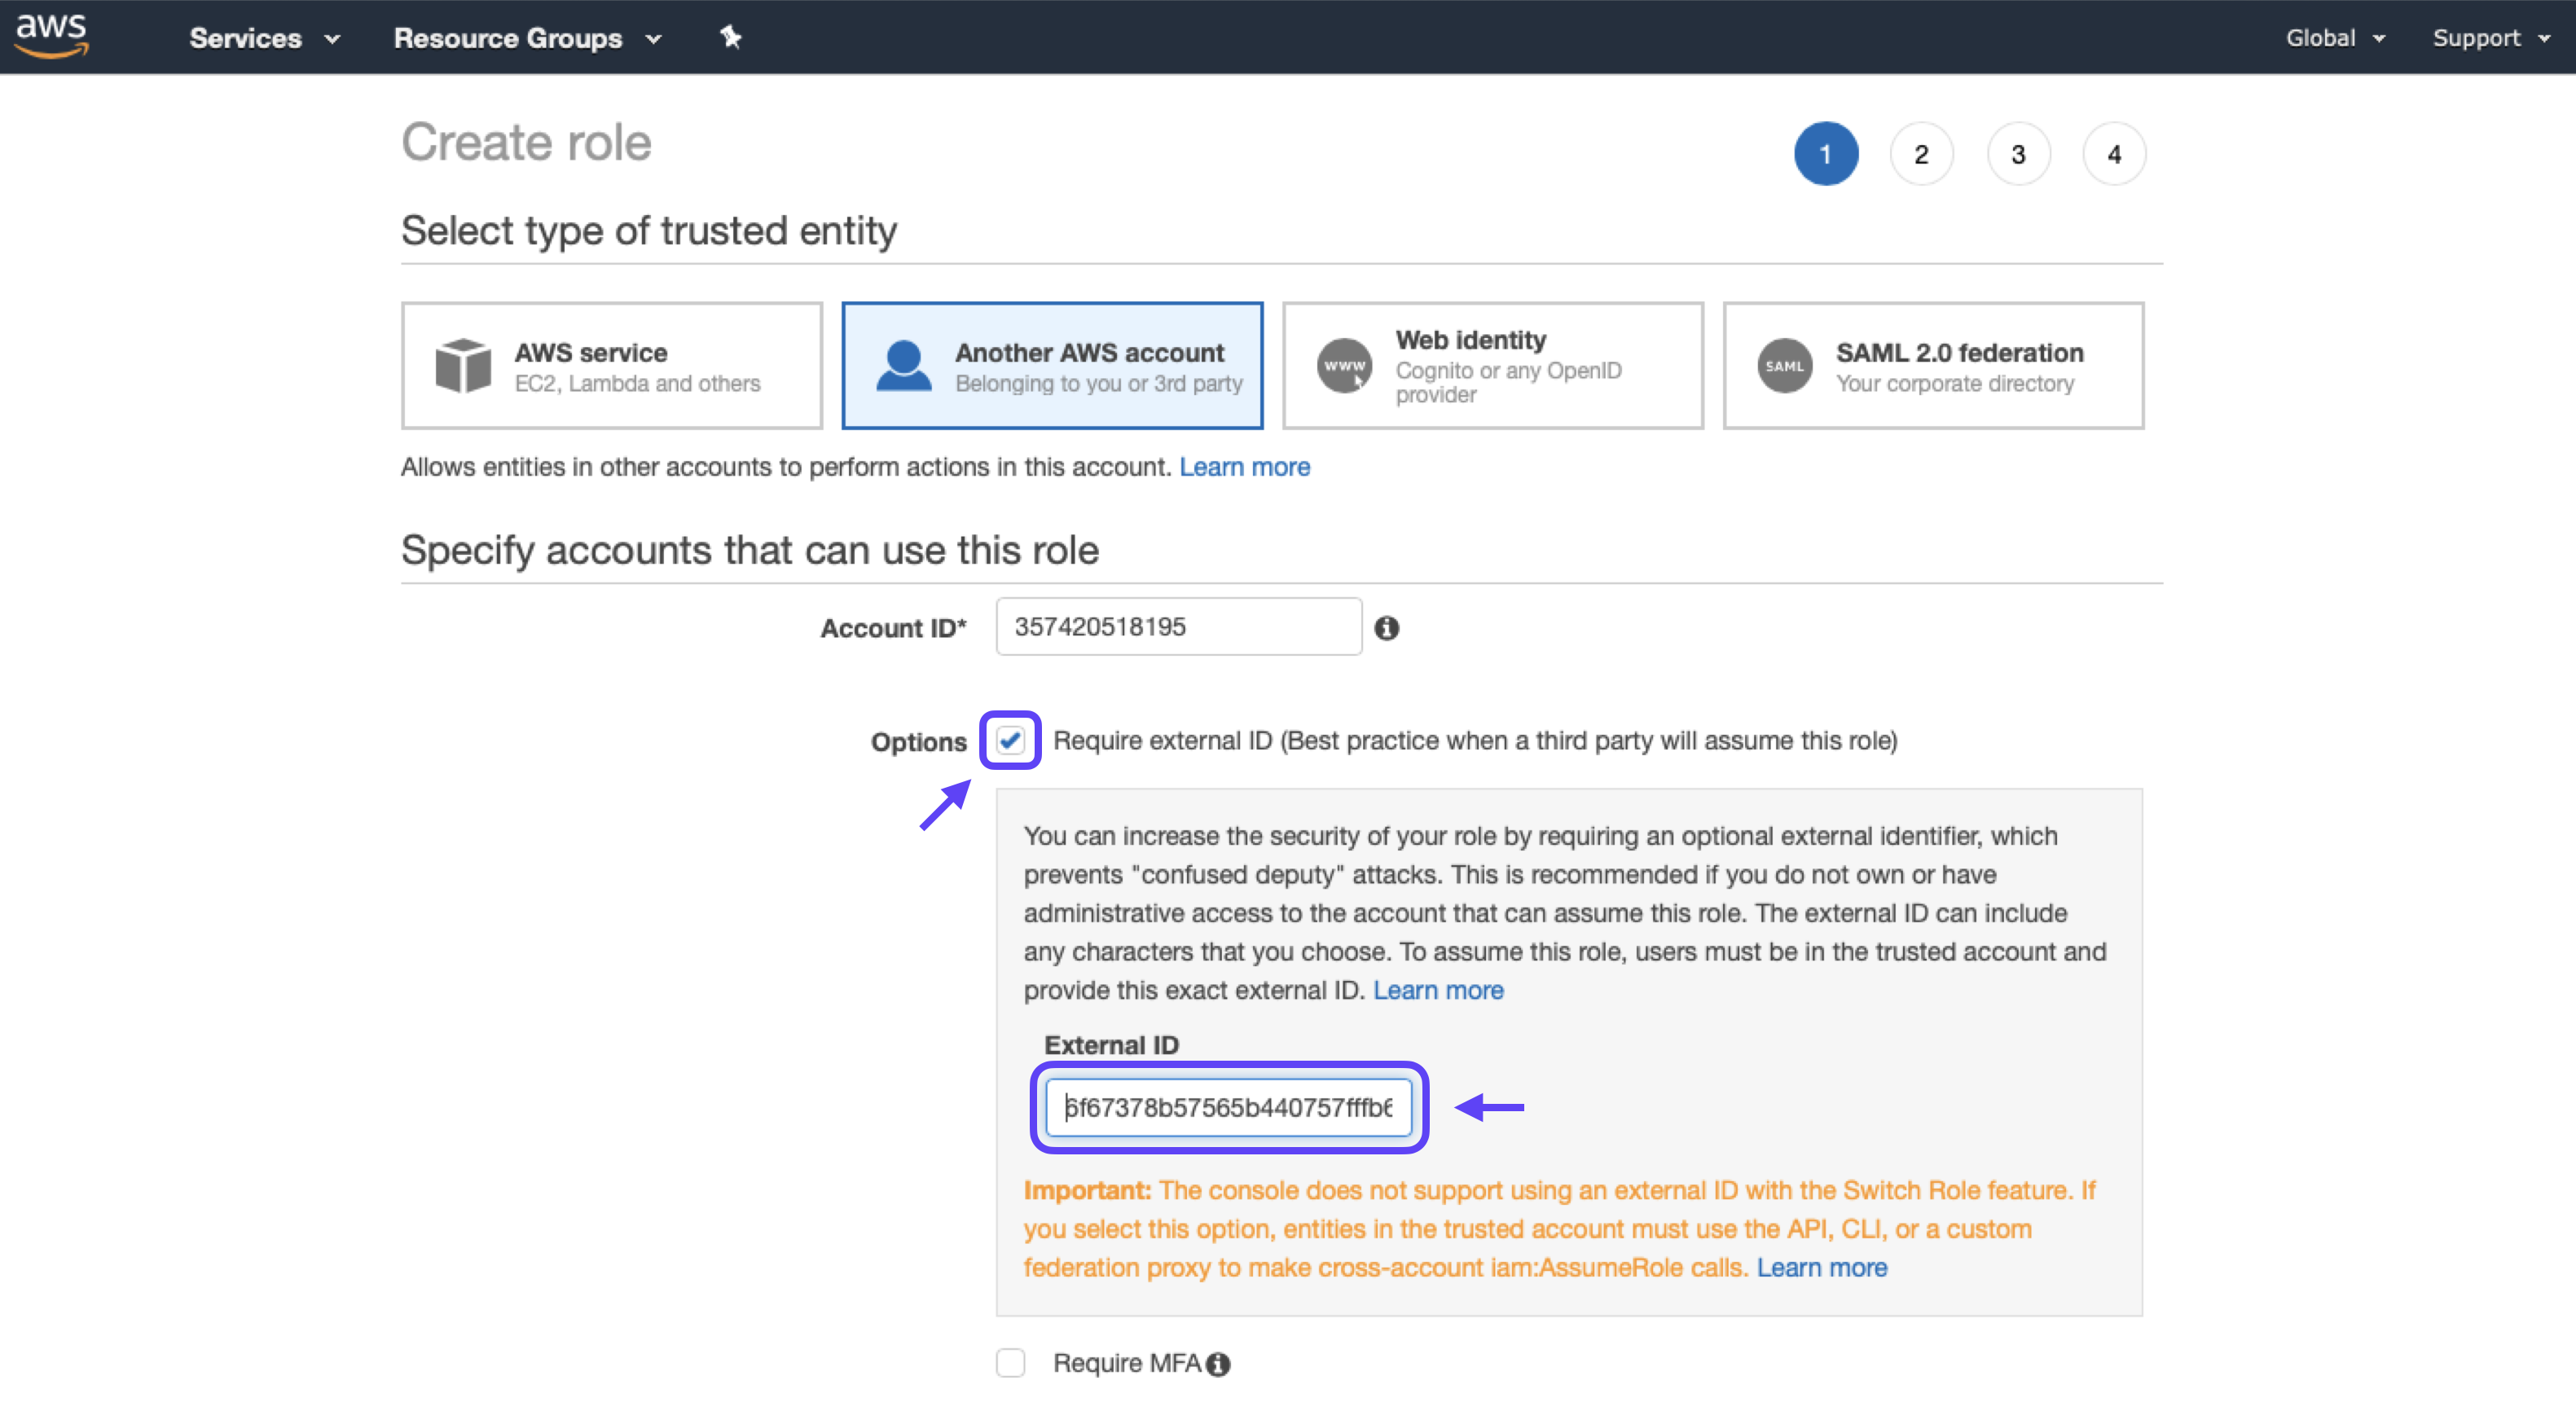
3. Check the “Require External ID” button, and enter the External ID listed in your Cortex account on the “Connect a New Amazon S3 Destination” page.
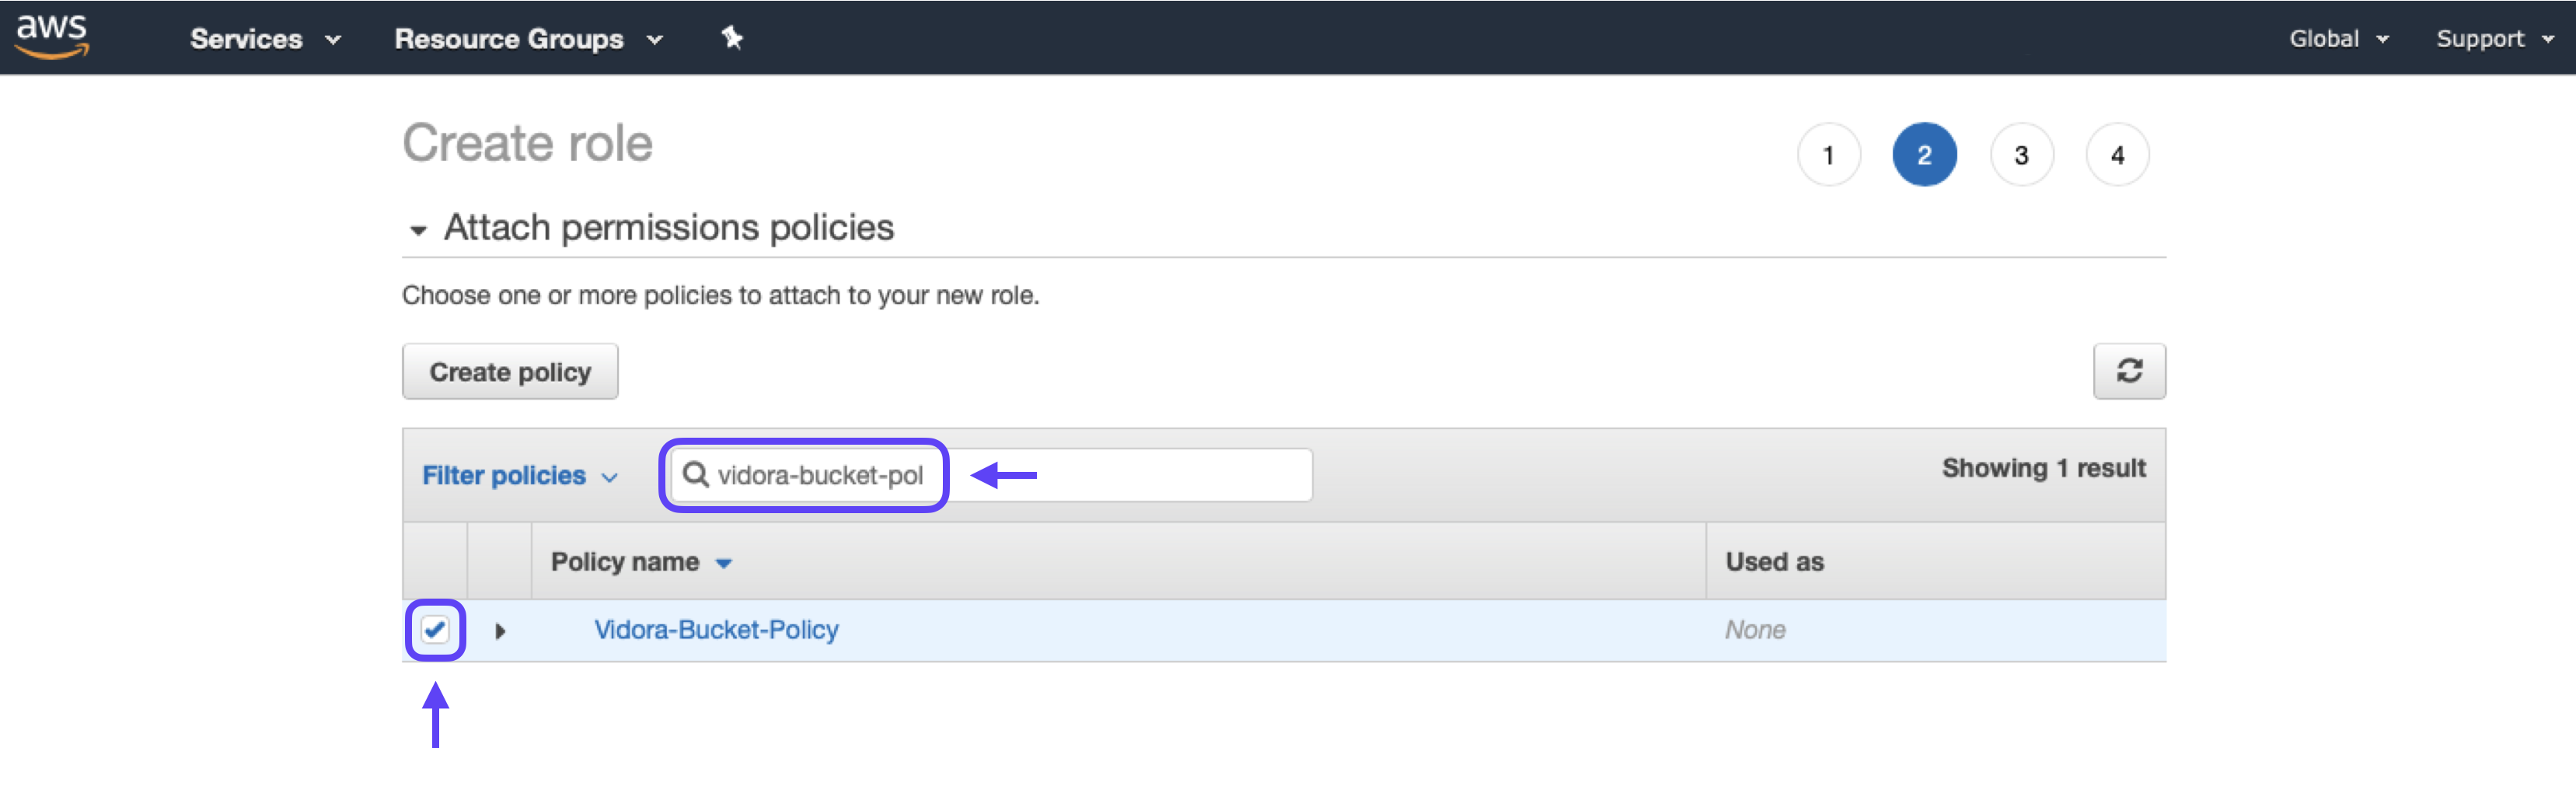
4. Proceed to the Permissions page, and search for the name of the Cortex policy that you created earlier. Click the check-box next to your policy in order to attach it to this role.
5. Proceed to the Tags page. Applying tags to your role is optional.
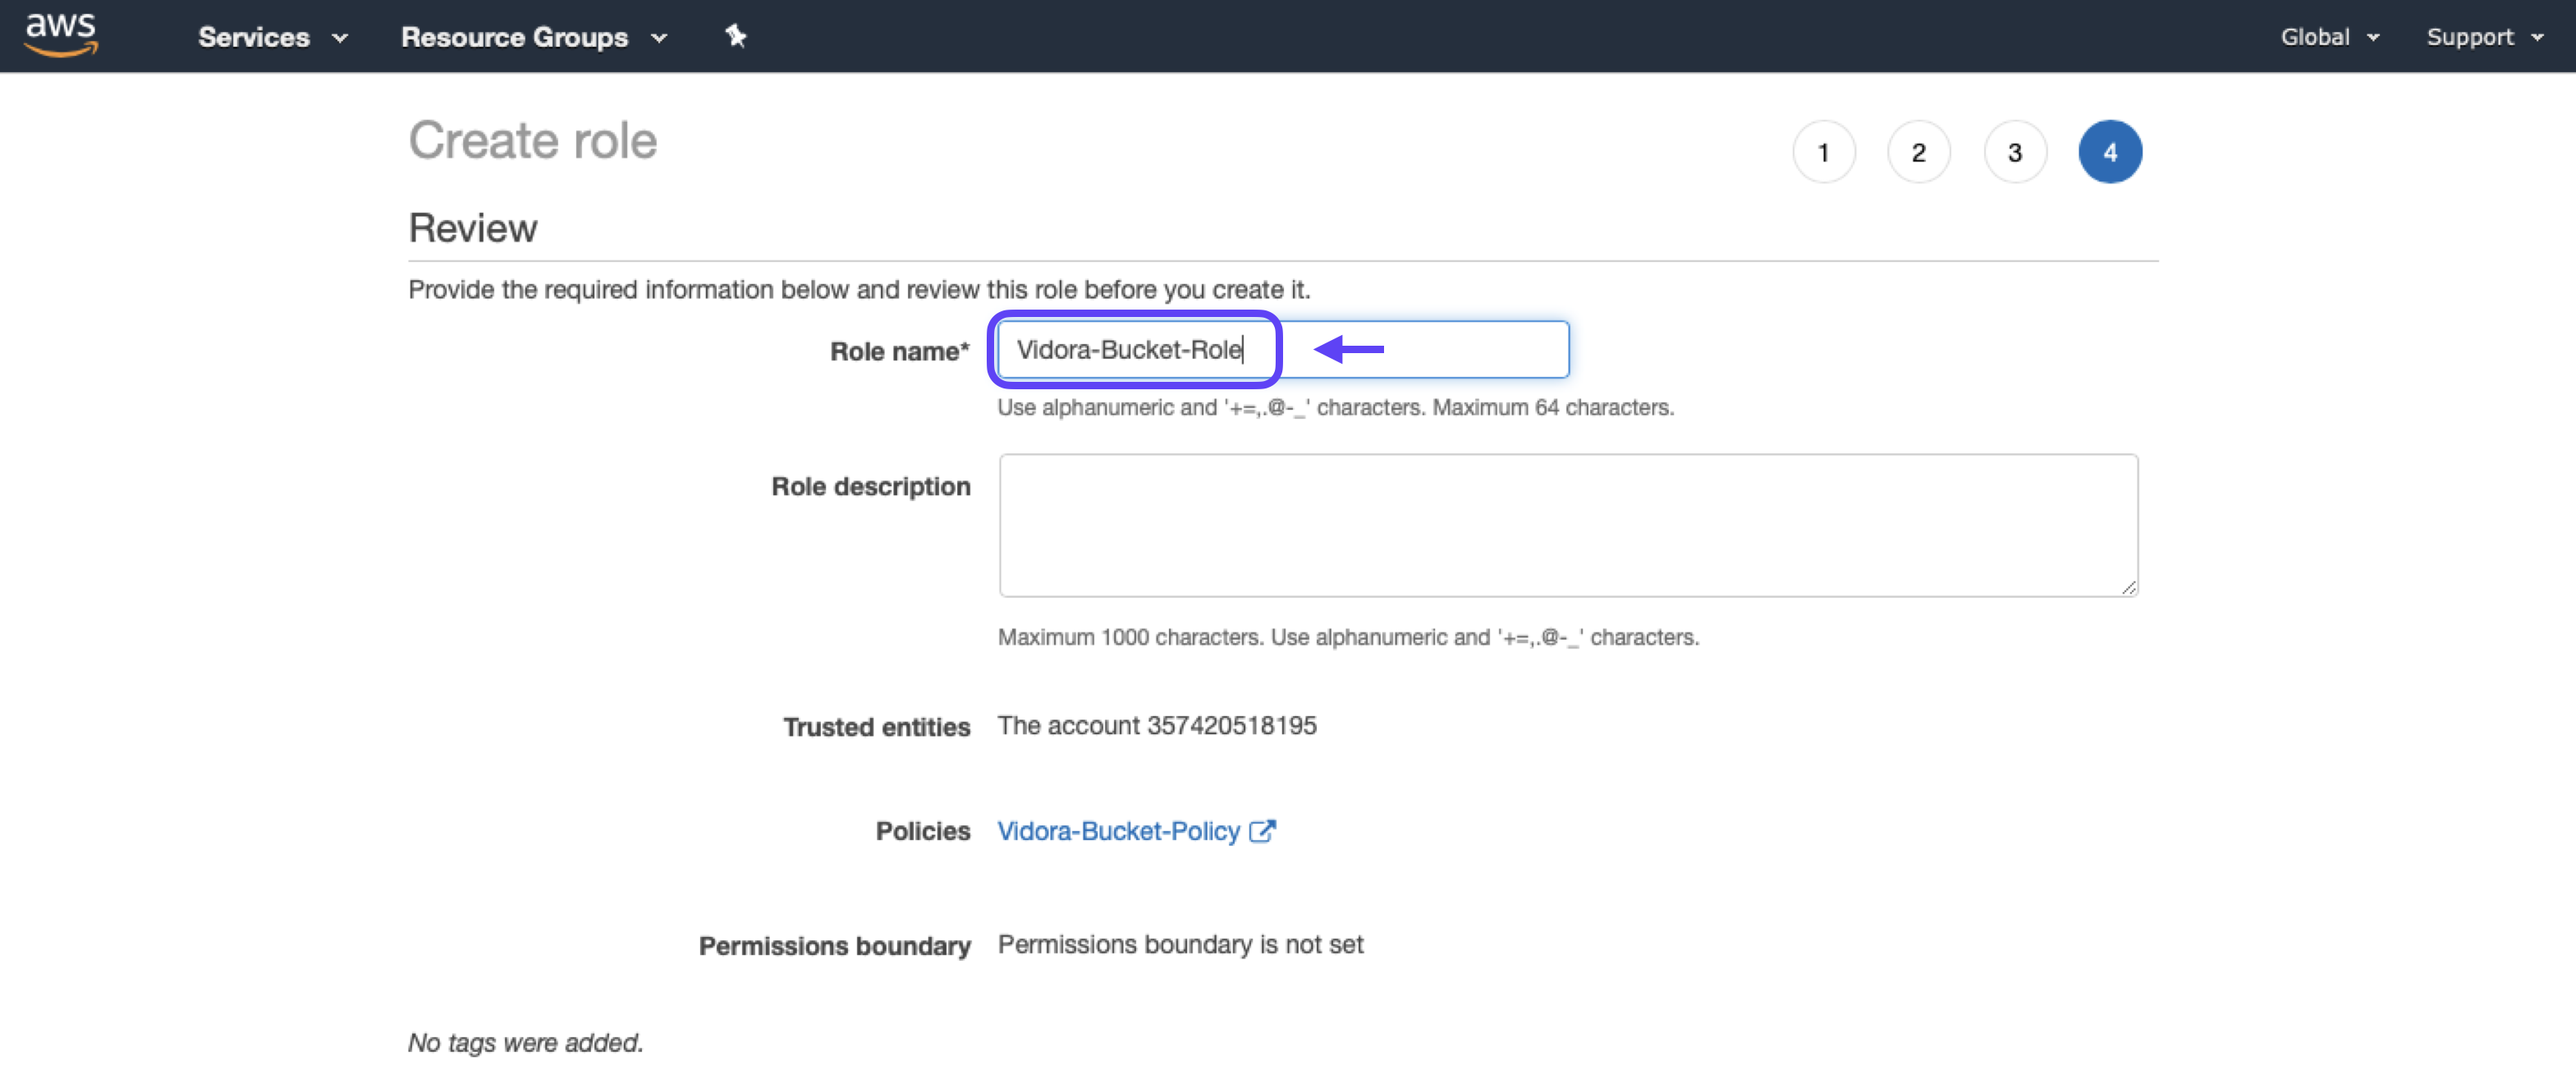
6. Name your new role (e.g. “Vidora-Bucket-Role”), then click Create Role.
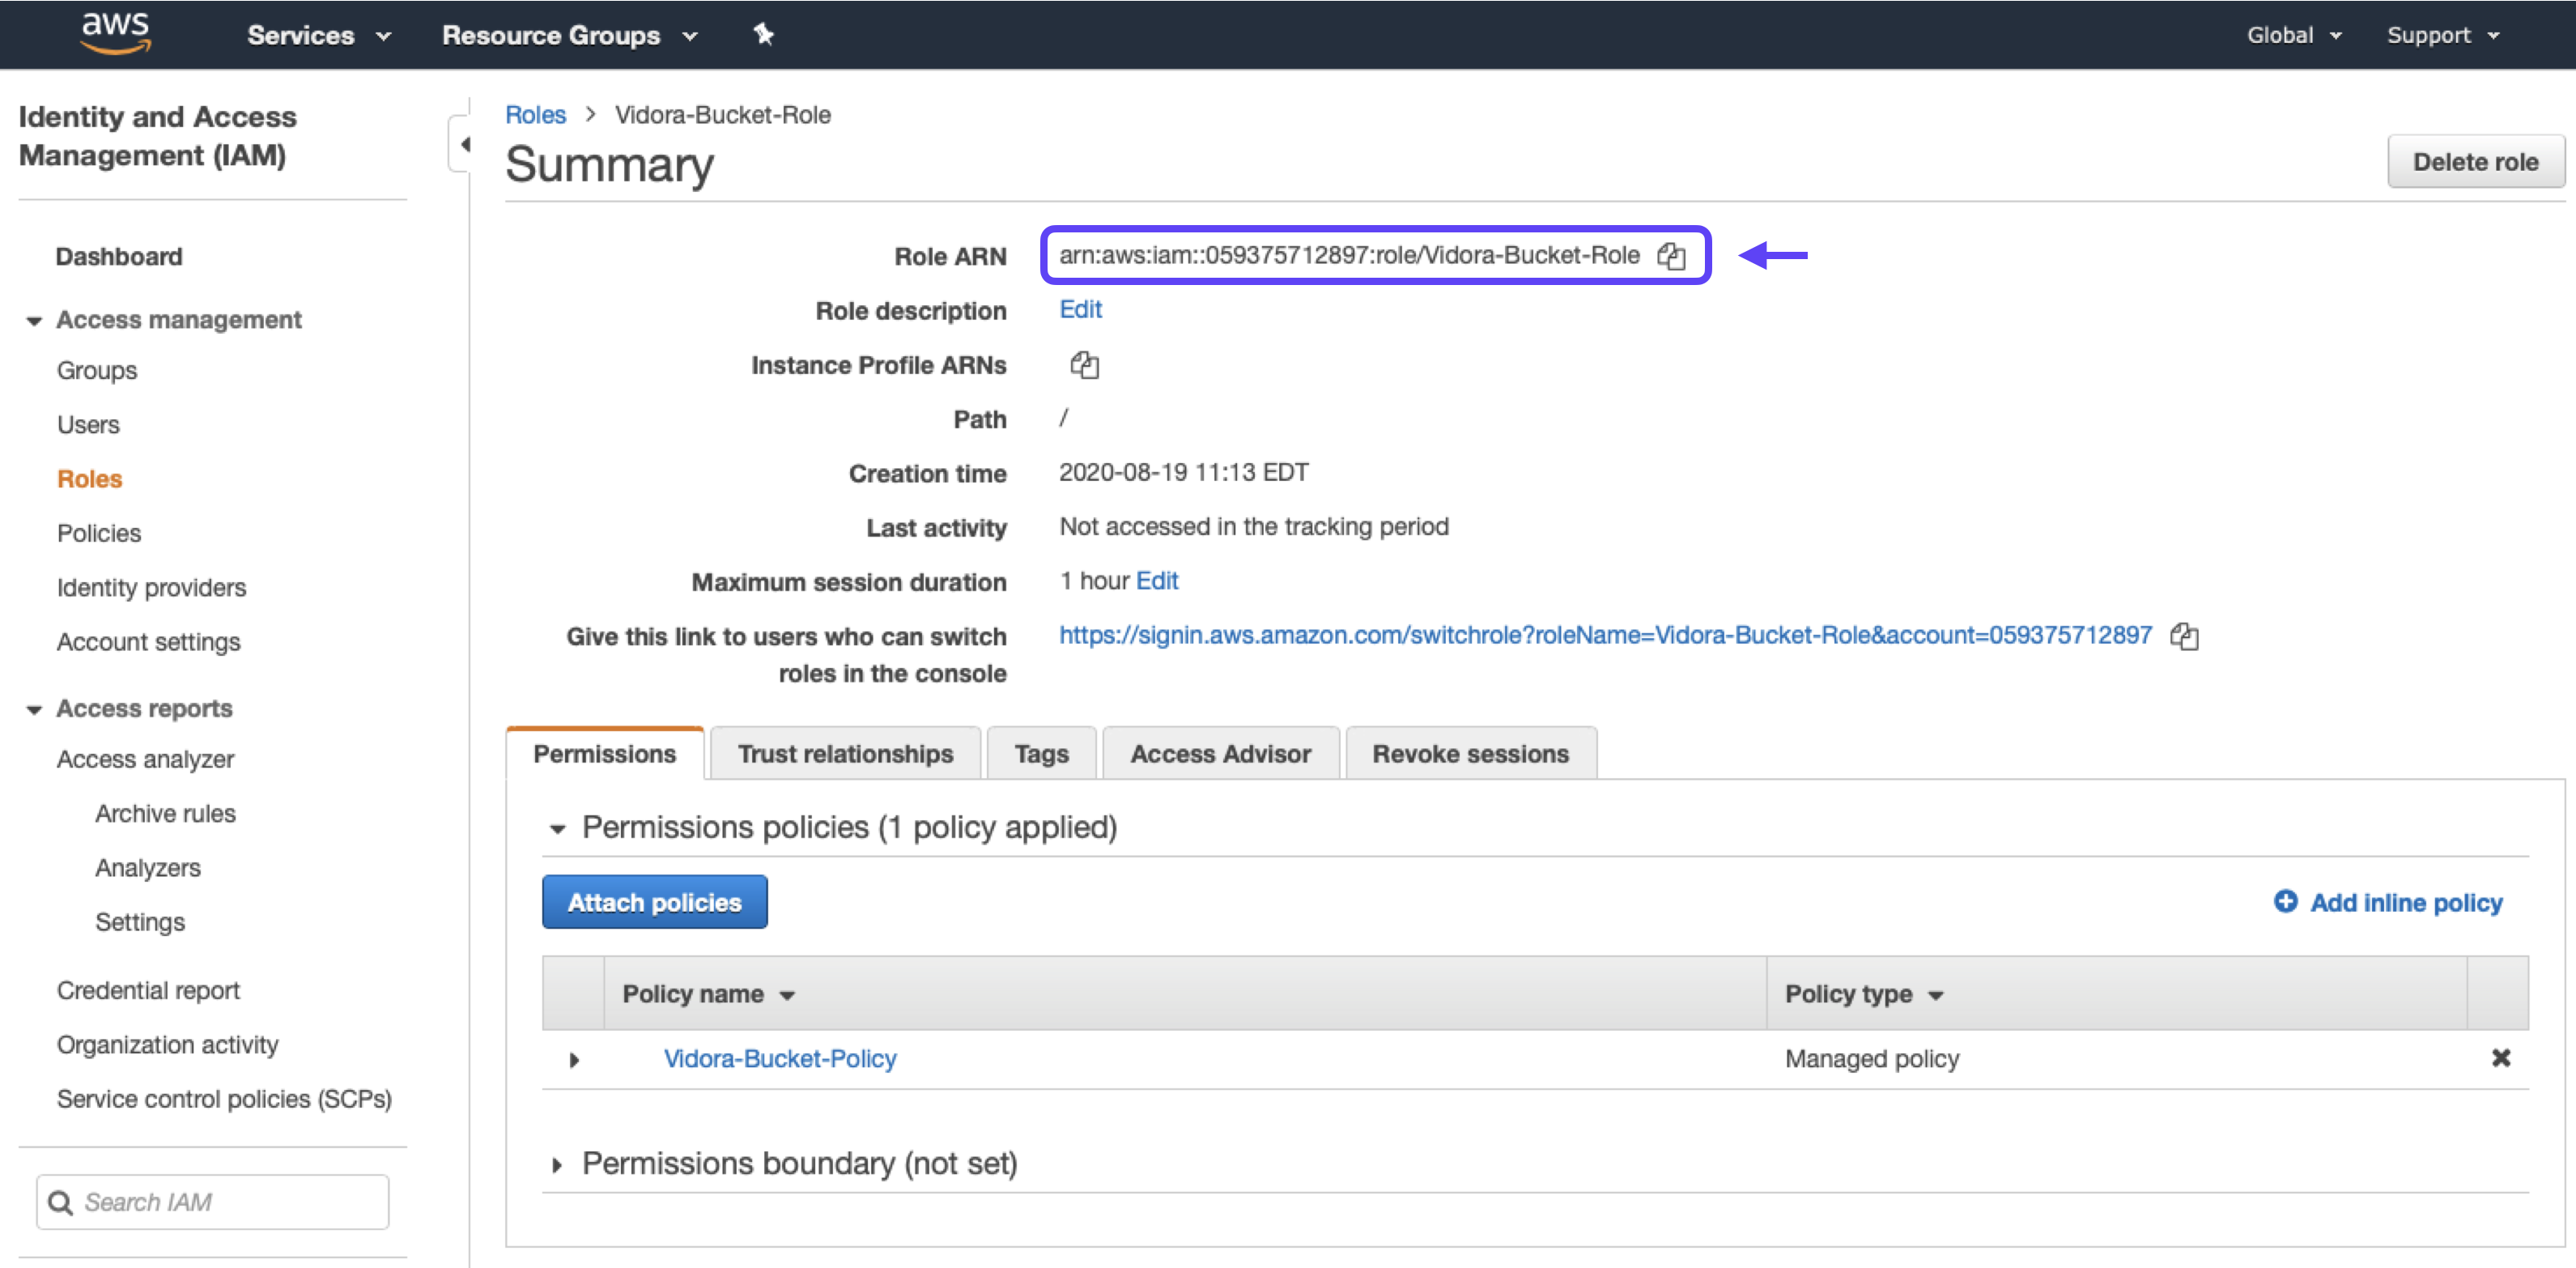
7. Click into your newly created role, and make note of the Role ARN – you will need to enter this in Cortex before activating your integration.
Step 5: Connect Your Bucket
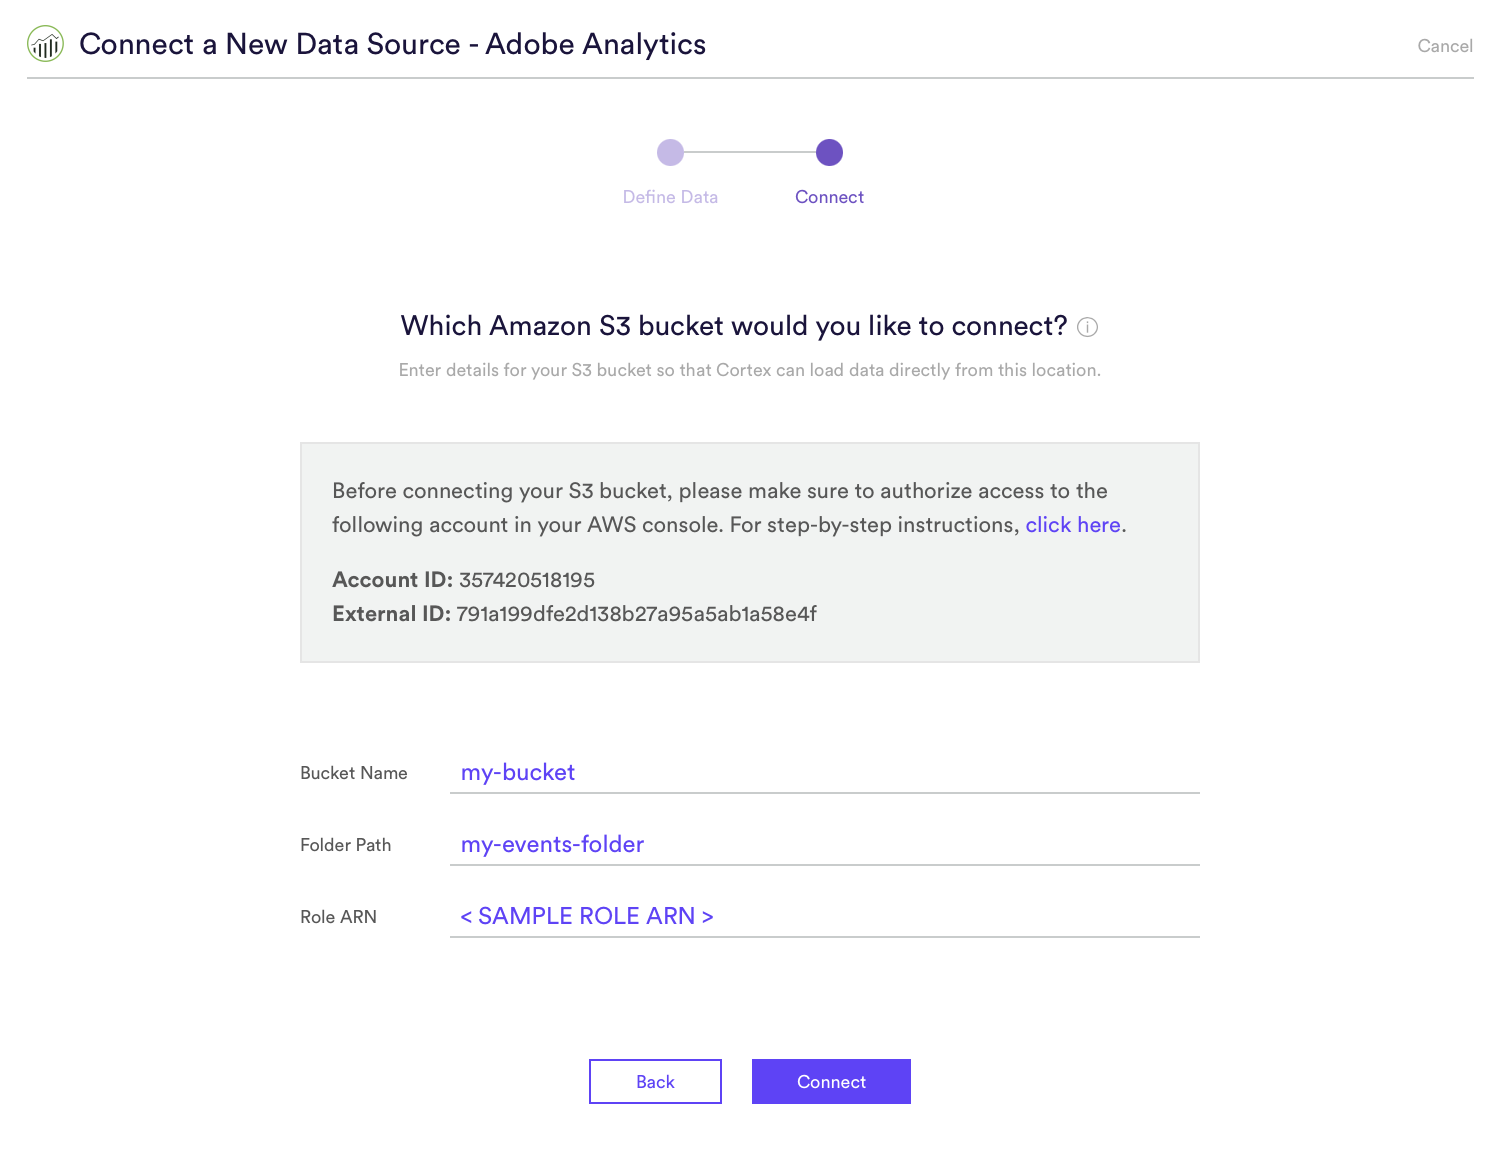
Once you’ve authorized Cortex to access the bucket, head back to your Cortex account and hit “Next” to proceed to the Connect step. On this screen, enter the name and folder path of your S3 bucket, as well as the ARN for the role that you just created. See below for an example.
Step 5: Activate the Connection
After you’ve entered your bucket details, hit “Connect” to activate the integration. Cortex will automatically test whether the connection is valid before creating the Data Source.
Once your Data Source is live, any valid file that is exported from Adobe Analytics into your S3 bucket will be ingested into Cortex. You may click into your newly created Data Source in order to view information about its schema, and a snapshot of sample data recently received by Cortex.
Related Links
Still have questions? Reach out to support@mparticle.com for more info!