How Can We Help?
mParticle
Once you’ve created a Machine Learning Pipeline, Cortex makes it easy to integrate the predictions into various third-party platforms, where they can be used to power automated workflows in intelligent ways. This guide covers Cortex’s export integration with mParticle.
mParticle is a leading customer data platform (CDP) designed to simplify your data infrastructure. An integration with mParticle allows you to deliver predictions from any Cortex pipeline directly into your mParticle account. This lets you add intelligent attributes to mParticle’s rich customer profiles, enabling you to target predictive audience segments for better, more data-driven customer interactions.
In this guide, we’ll walk through how to set up an mParticle export destination in Cortex, and discuss the functionality that this integration unlocks within your Cortex account. If you’re also interested in creating a Data Source integration so that customer events and attributes are automatically forwarded from mParticle to Cortex, click here to learn more.
Connecting an mParticle Export Destination
A Cortex Export Destination sets up an integration between your Cortex account and a third-party platform. Once the connection is live, you may export predictions from Cortex directly to this custom destination.
To connect your Cortex account to mParticle, create an Export Destination by following the steps below.
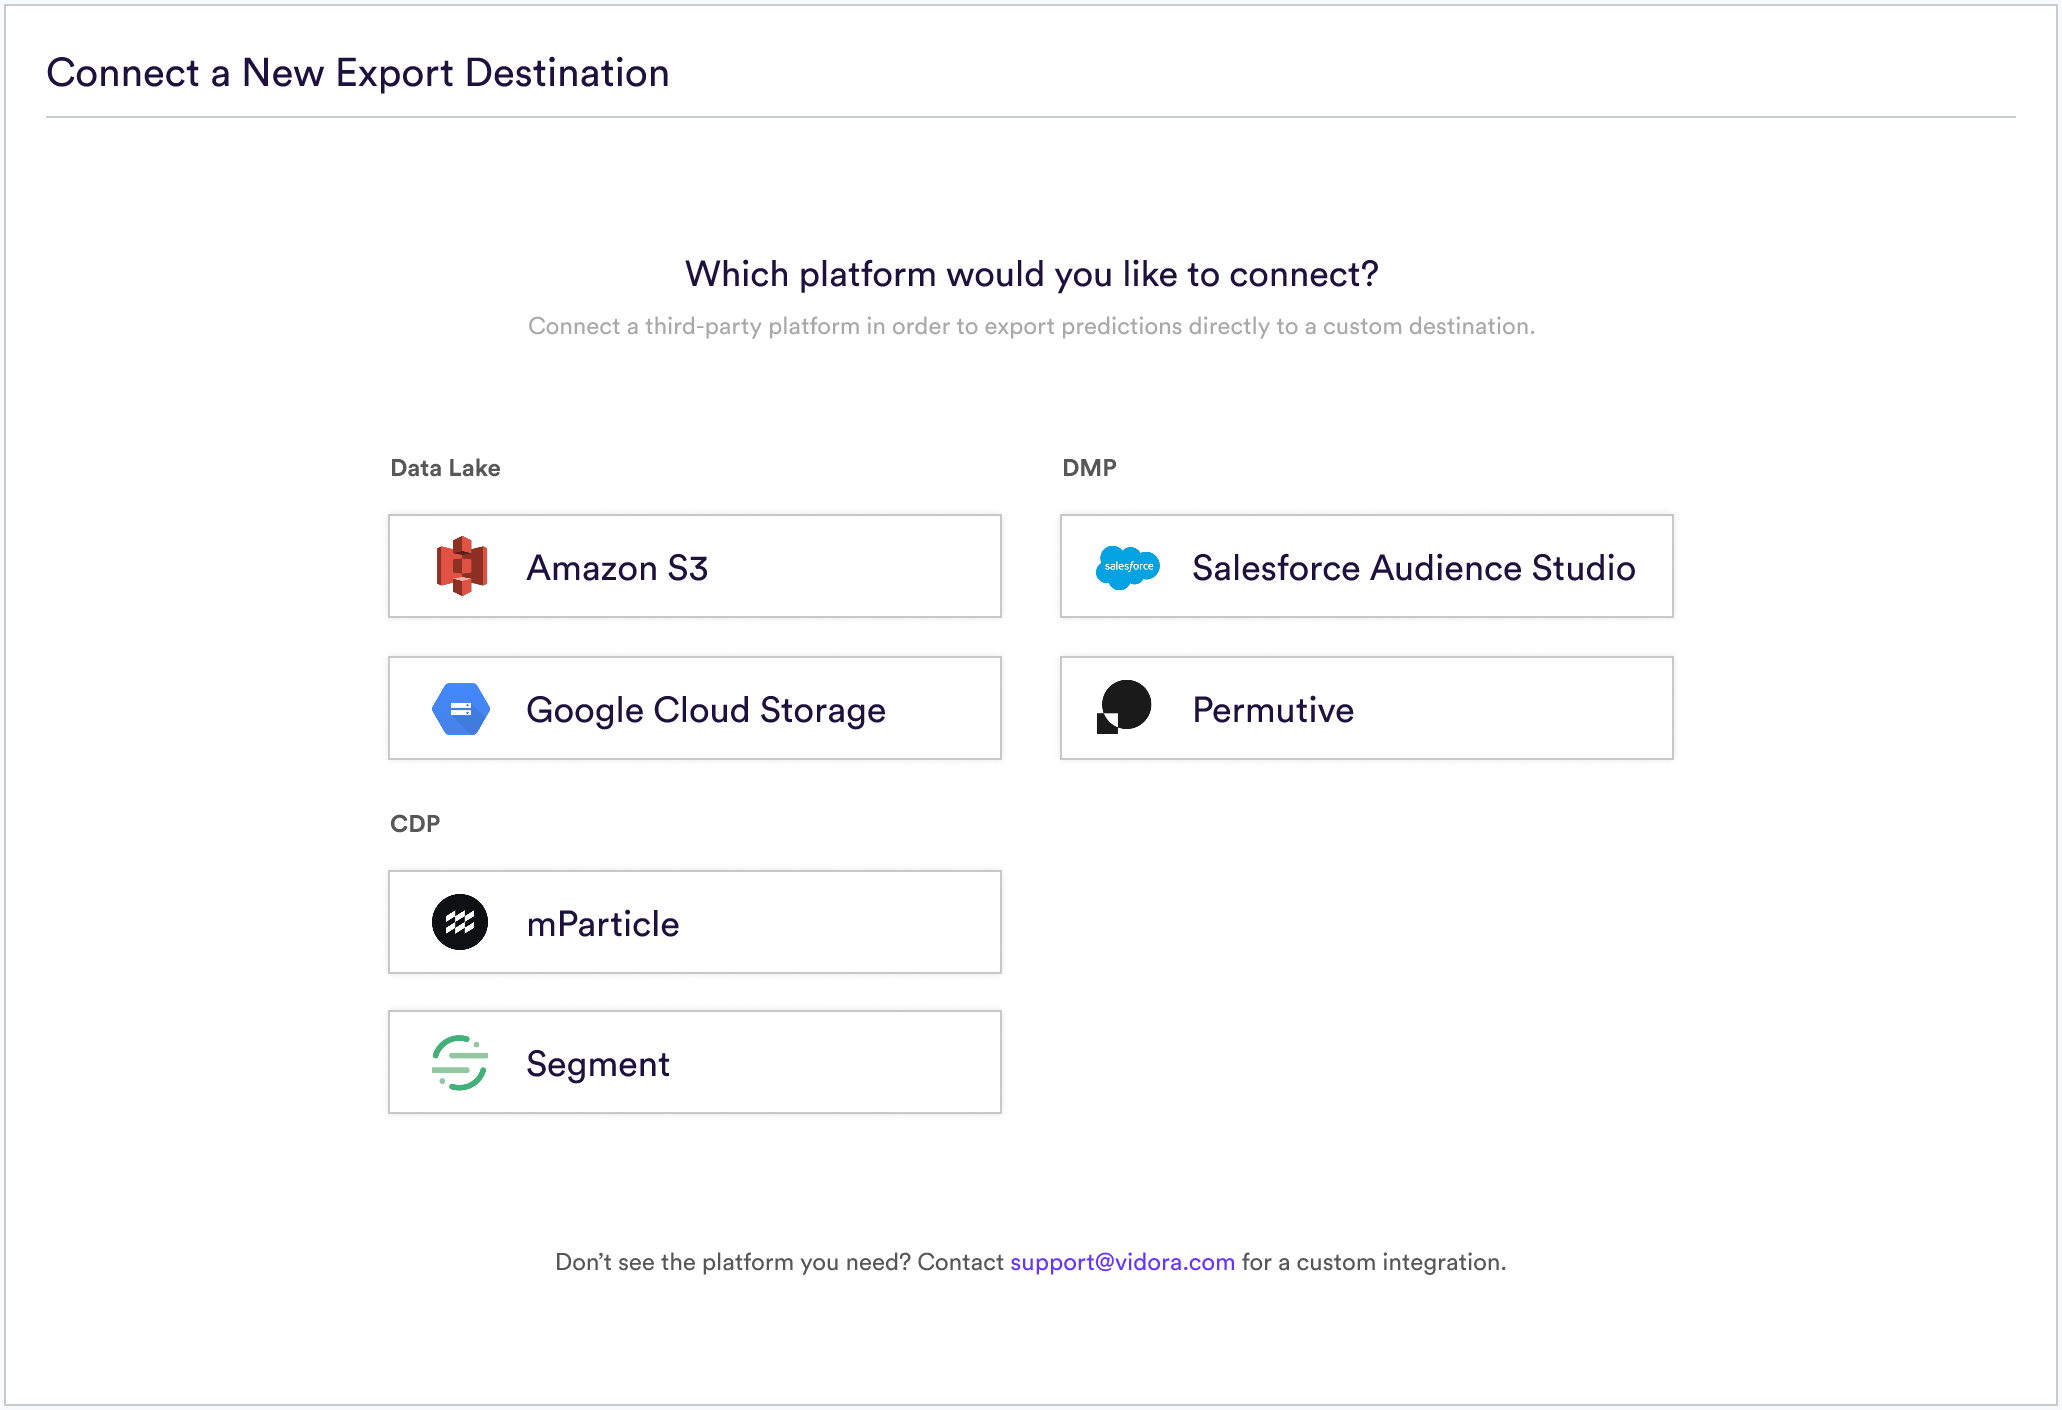
Step 1: Select Platform
First navigate to the Export Destinations area of the Data tab in Cortex, and select the “mParticle” icon from the list of available platforms.
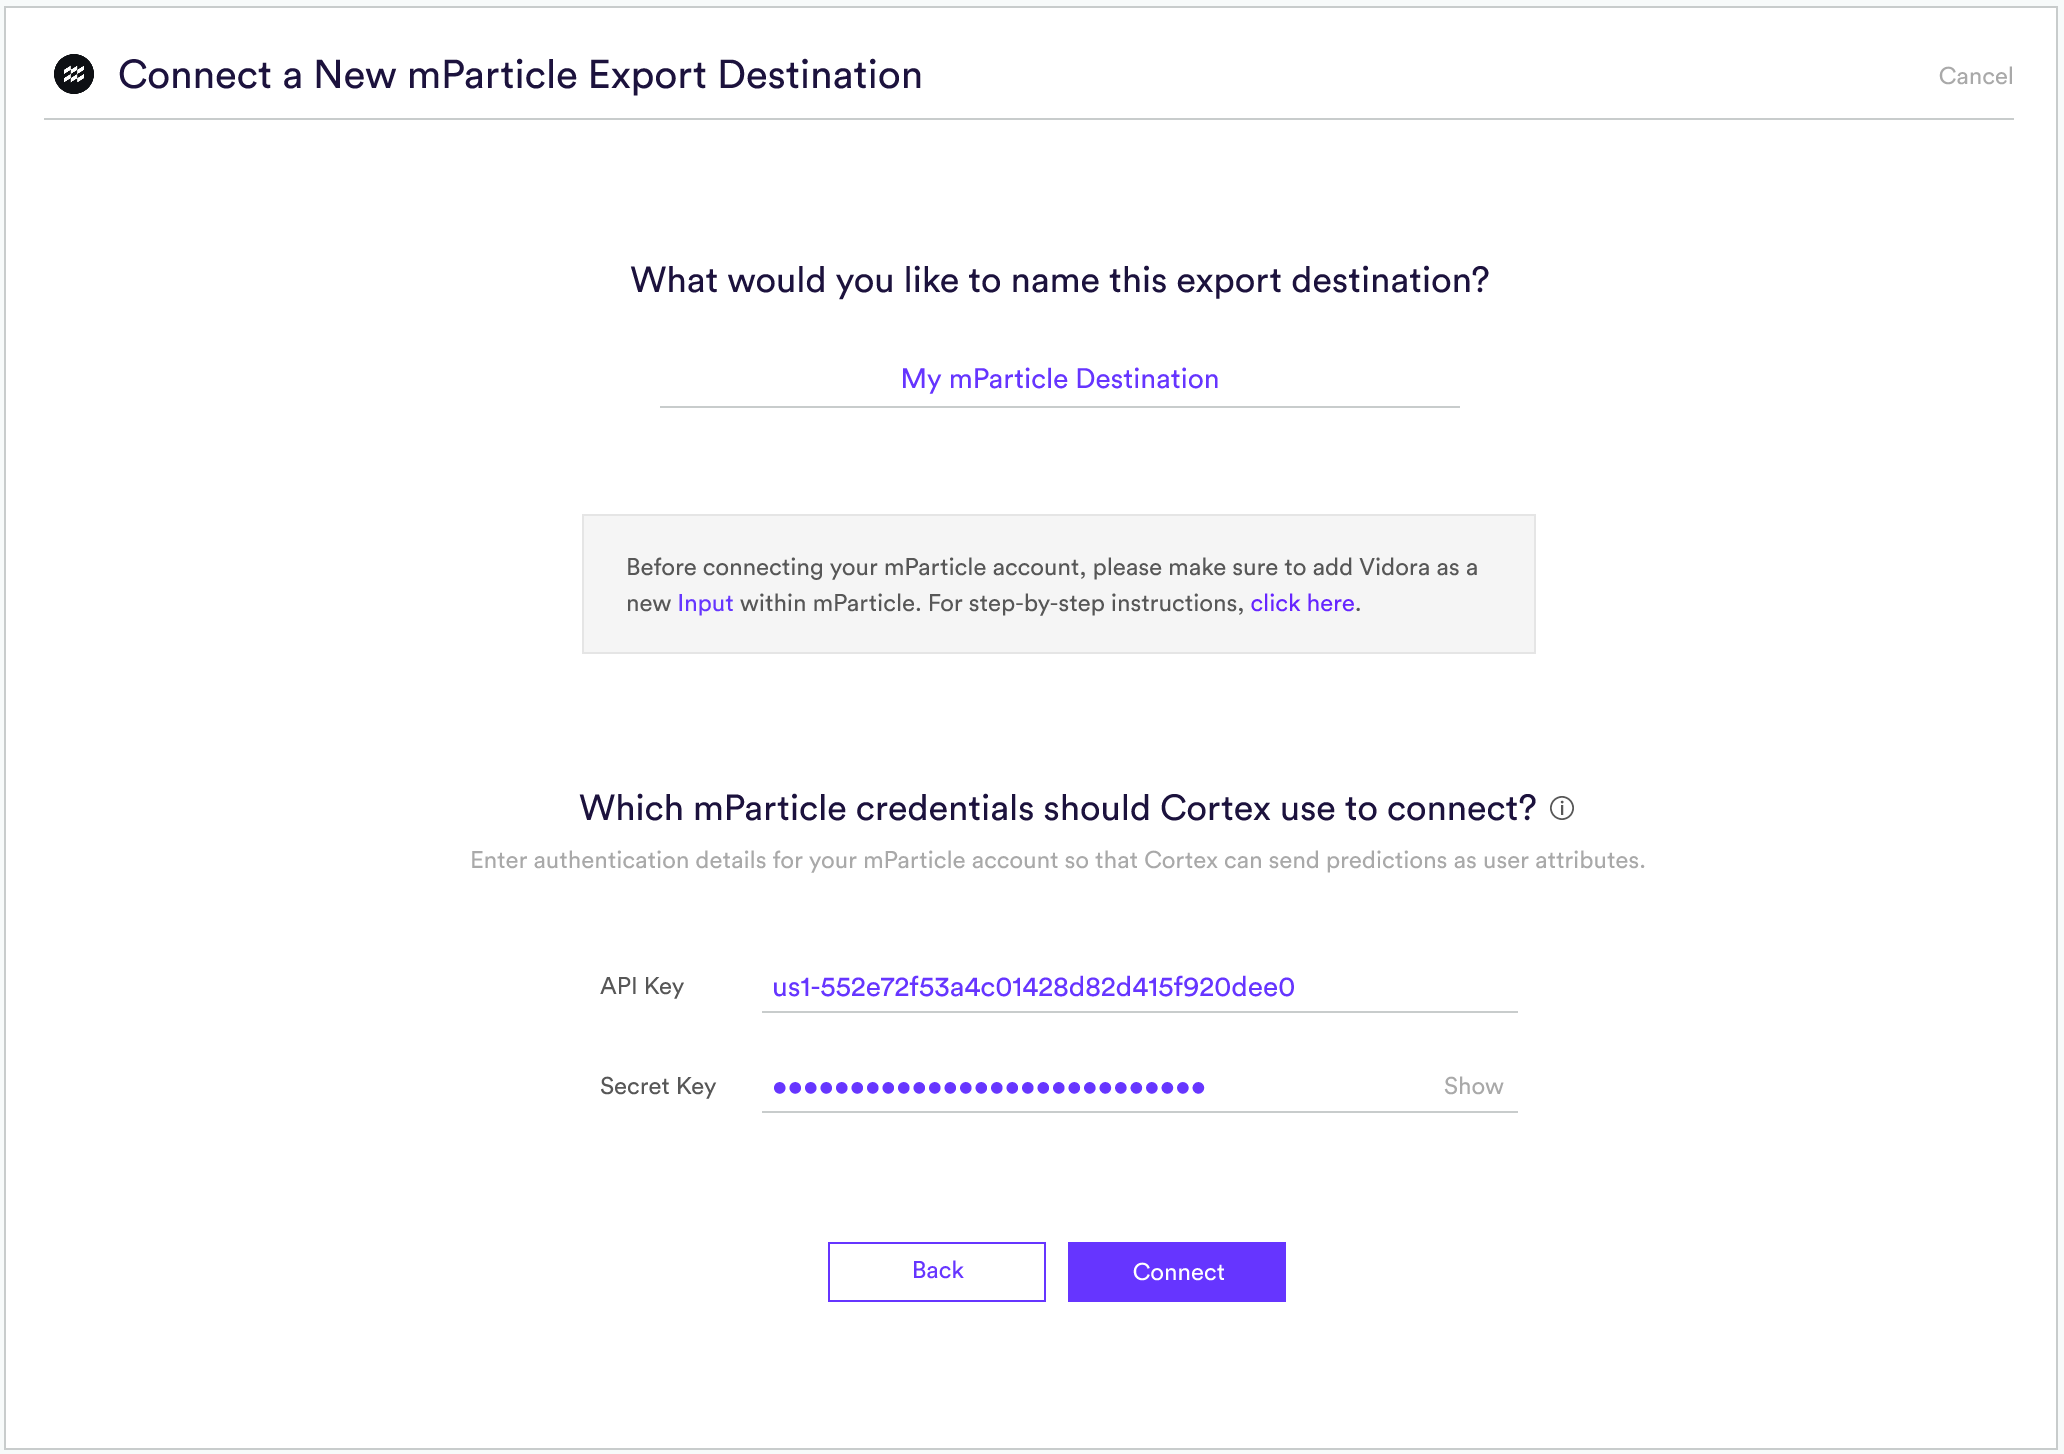
Step 2: Name Your Export Destination
Provide a name for your Export Destination so that you can reference it later when exporting predictions from a pipeline.
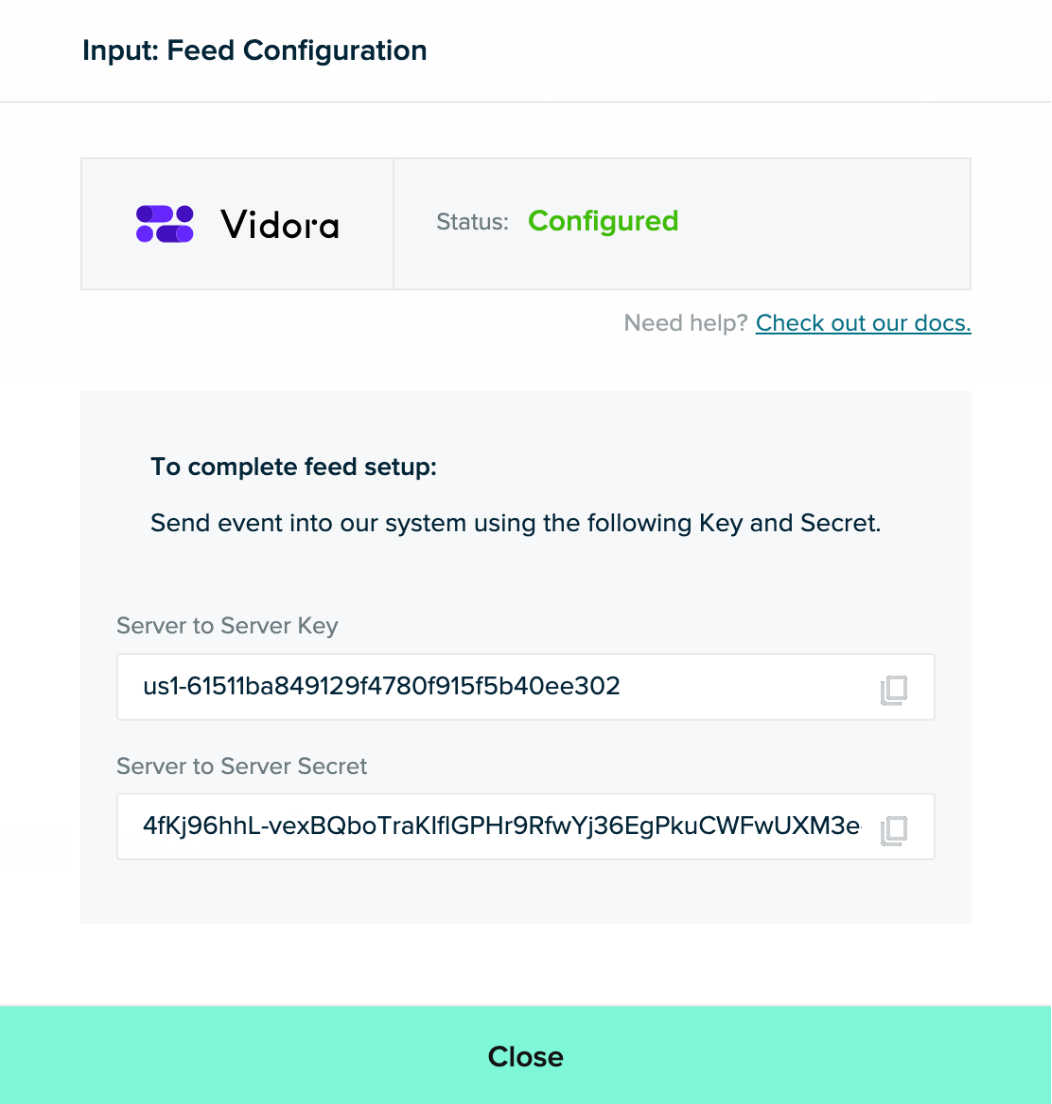
Step 3: Create a New Input Feed for Cortex within mParticle
An Input in mParticle serves as a source of information that will be streamed into your mParticle account. Head to the mParticle app and follow steps (A-D) below to create an Input Feed for Vidora.
- (A) Navigate to the Directory tab in the left and search for Vidora
- (B) Select Input Feed when asked to choose an integration type
- (C) Enter a name for your Input and make sure it’s set to Active before saving
- (D) Make note of the API key and secret. You’ll need these to finish setting up your Export Destination in Cortex
Step 4: Enter mParticle Credentials into Cortex
Next, head back to Cortex and enter the API Key and Secret for your new Input. These credentials allow Cortex to send predictions back into mParticle, where they will be imported as User Attributes.
Step 5: Activate the Connection
Hit “Connect” to activate the integration and create your Export Destination!
Exporting Predictions to this Destination
Once your Export Destination has been connected, predictions from any Machine Learning Pipeline may be exported directly into your mParticle account. To do this, create a Prediction Export and specify that results should be copied to your mParticle Export Destination.
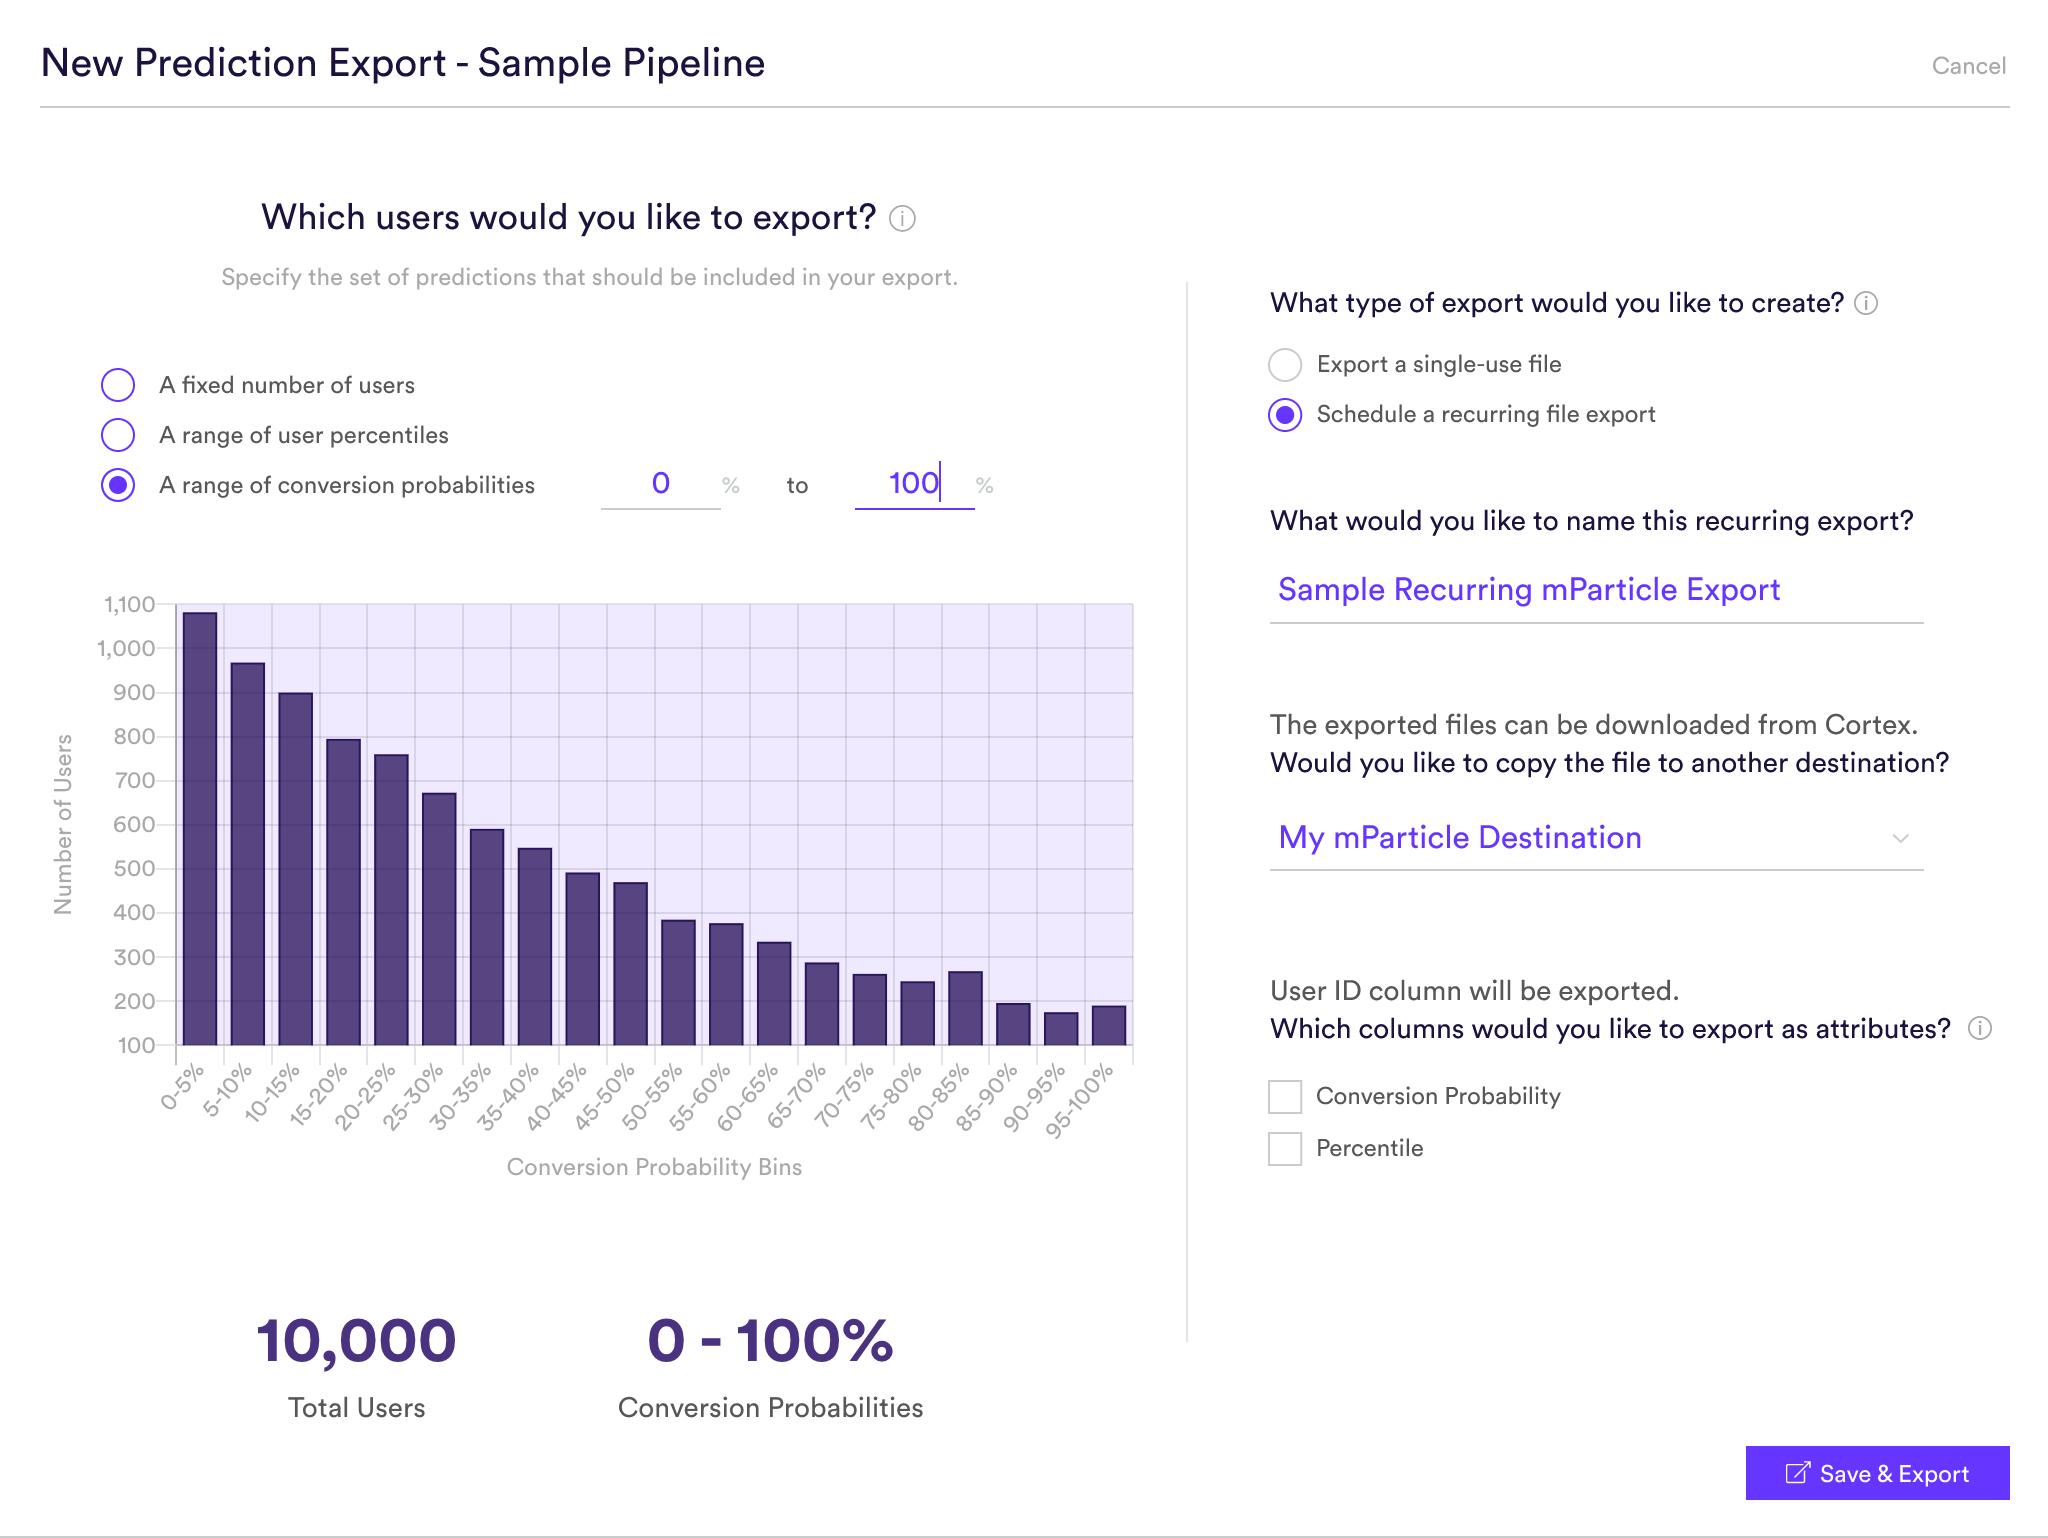
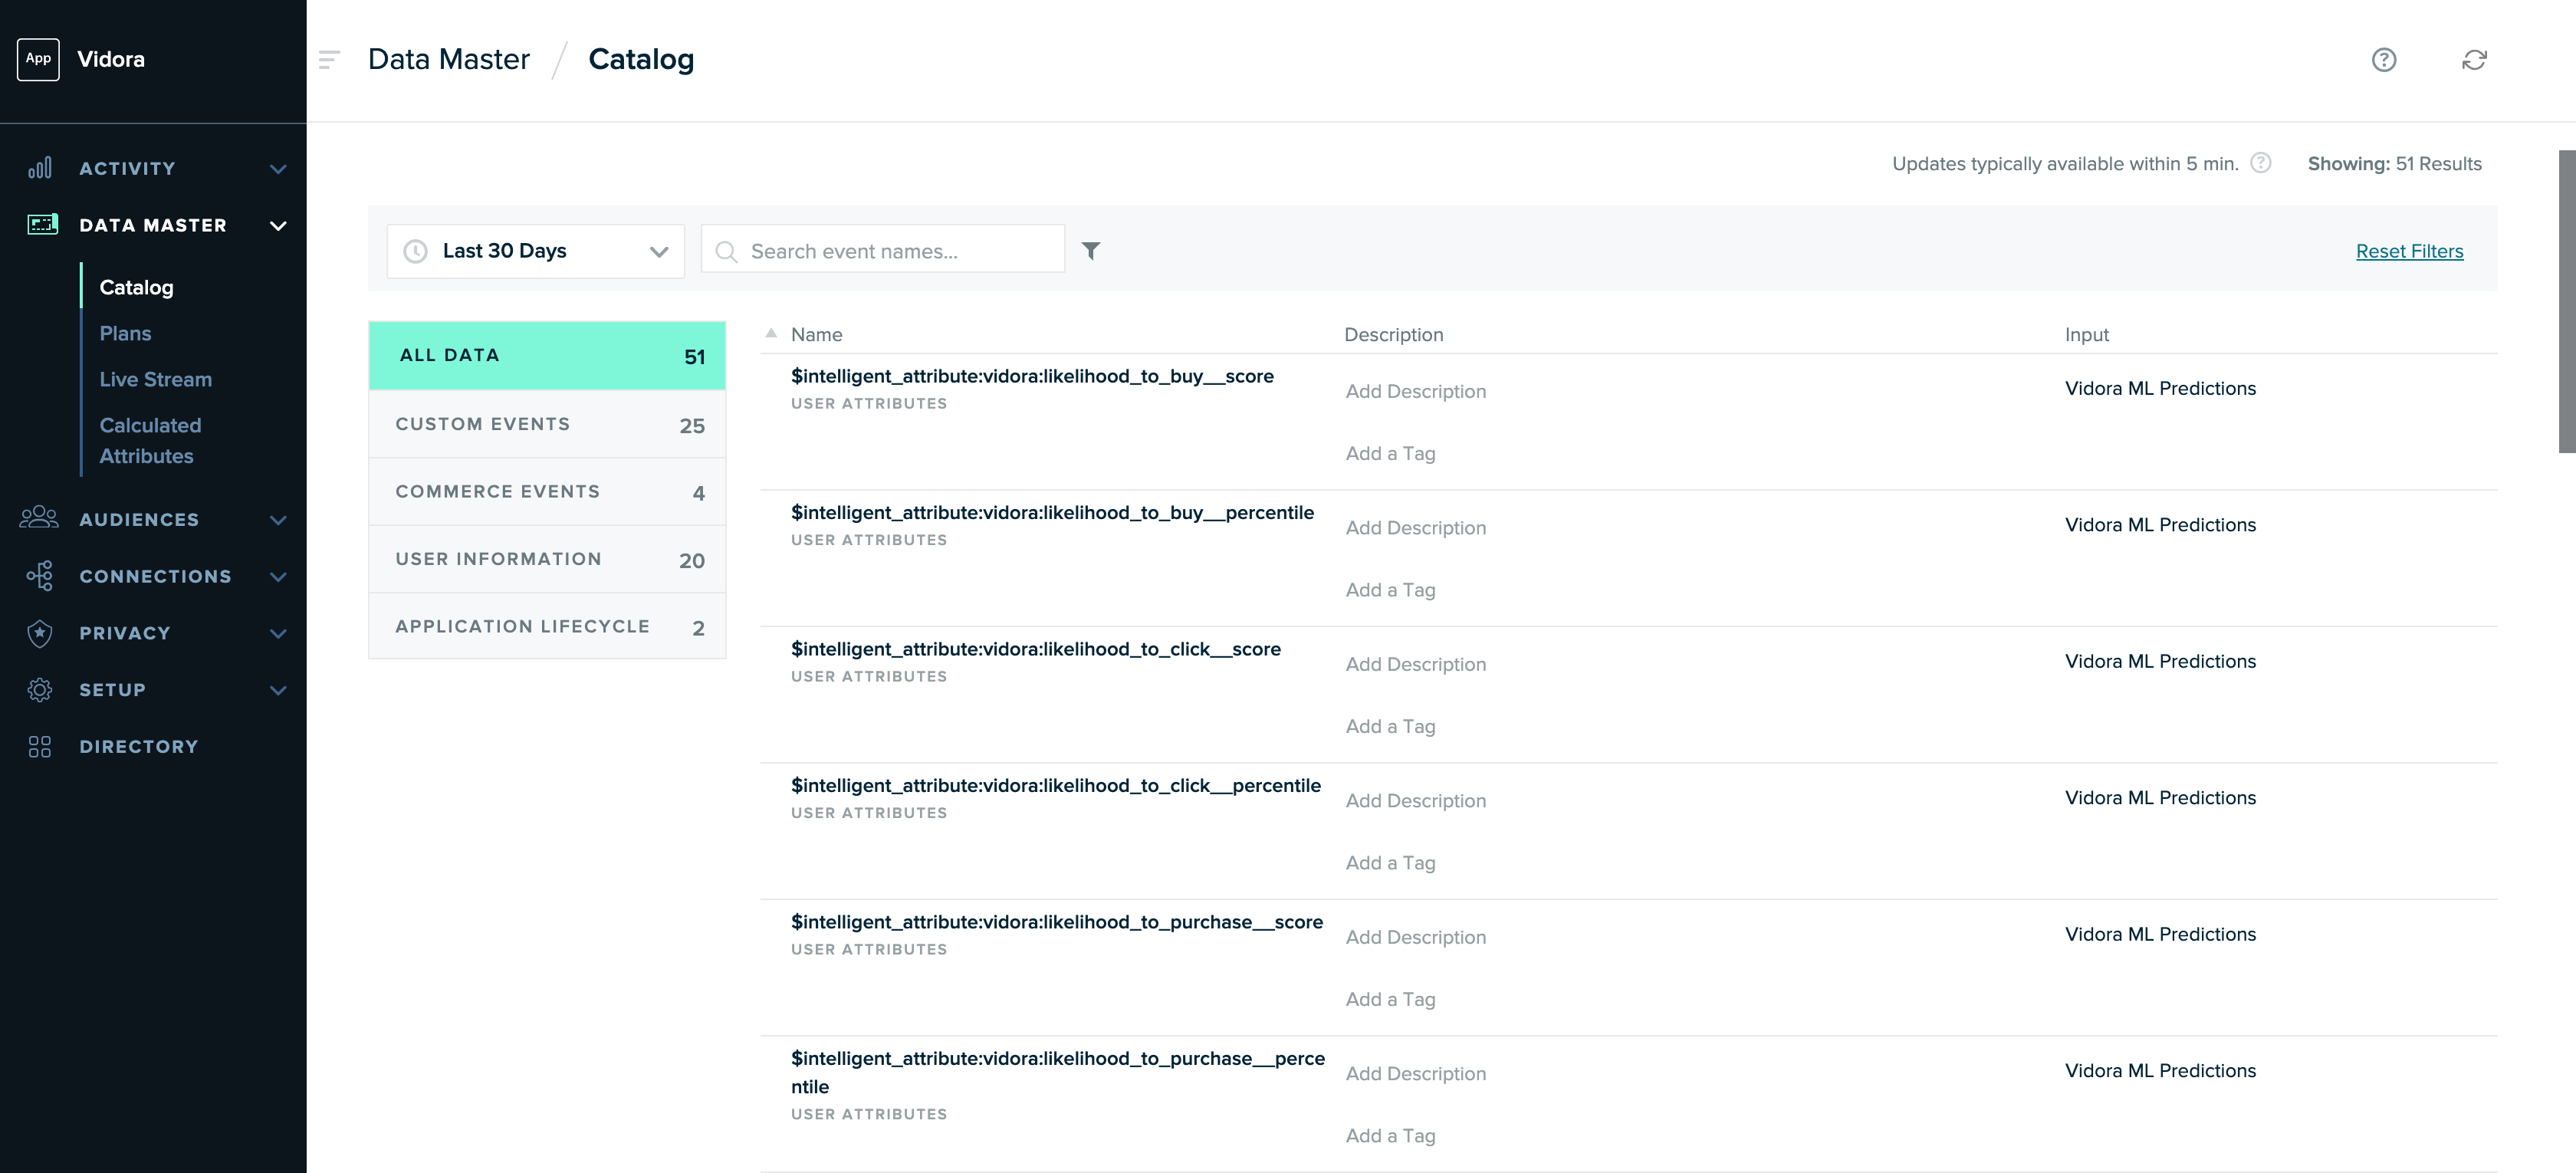
Once you’ve selected mParticle as your destination, specify one or more prediction columns that you’d like to send to mParticle. The prediction columns that you export will appear in mParticle as User Attributes, with a naming convention that indicates both the pipeline and column name. Note that the prediction itself (e.g. conversion probability for a Future Events pipeline, predicted value for a Regression pipeline, etc.) will be mapped to “score” within the attribute name. For example, the following attributes would be available to export from a Future Events pipeline called “Churn Pipeline”.

Back in mParticle, you can verify that these attributes have been received by navigating to DataMaster > Catalog.
Related Links
Still have questions? Reach out to support@vidora.com for more info!