How Can We Help?
Google Cloud Storage
Once you’ve created a Machine Learning Pipeline, Cortex makes it easy to integrate the predictions into various third-party platforms, including Google Cloud Storage.
An integration with Google Cloud Storage allows you to deliver predictions from any Cortex pipeline directly into your own Cloud Storage bucket. This gives you complete control over how your predictions are deployed, making it easy to move them through data workflows across your business.
In this guide, we’ll walk through how to set up a Google Cloud Storage connection in Cortex, and discuss the functionality that this integration unlocks within your Cortex account.
Connecting a Google Cloud Storage Export Destination
A Cortex Export Destination sets up an integration between your Cortex account and a third-party platform. Once the connection is live, you may export predictions from Cortex directly to this custom destination.
To connect your Cortex account to Google Cloud Storage, create an Export Destination by following the steps below.
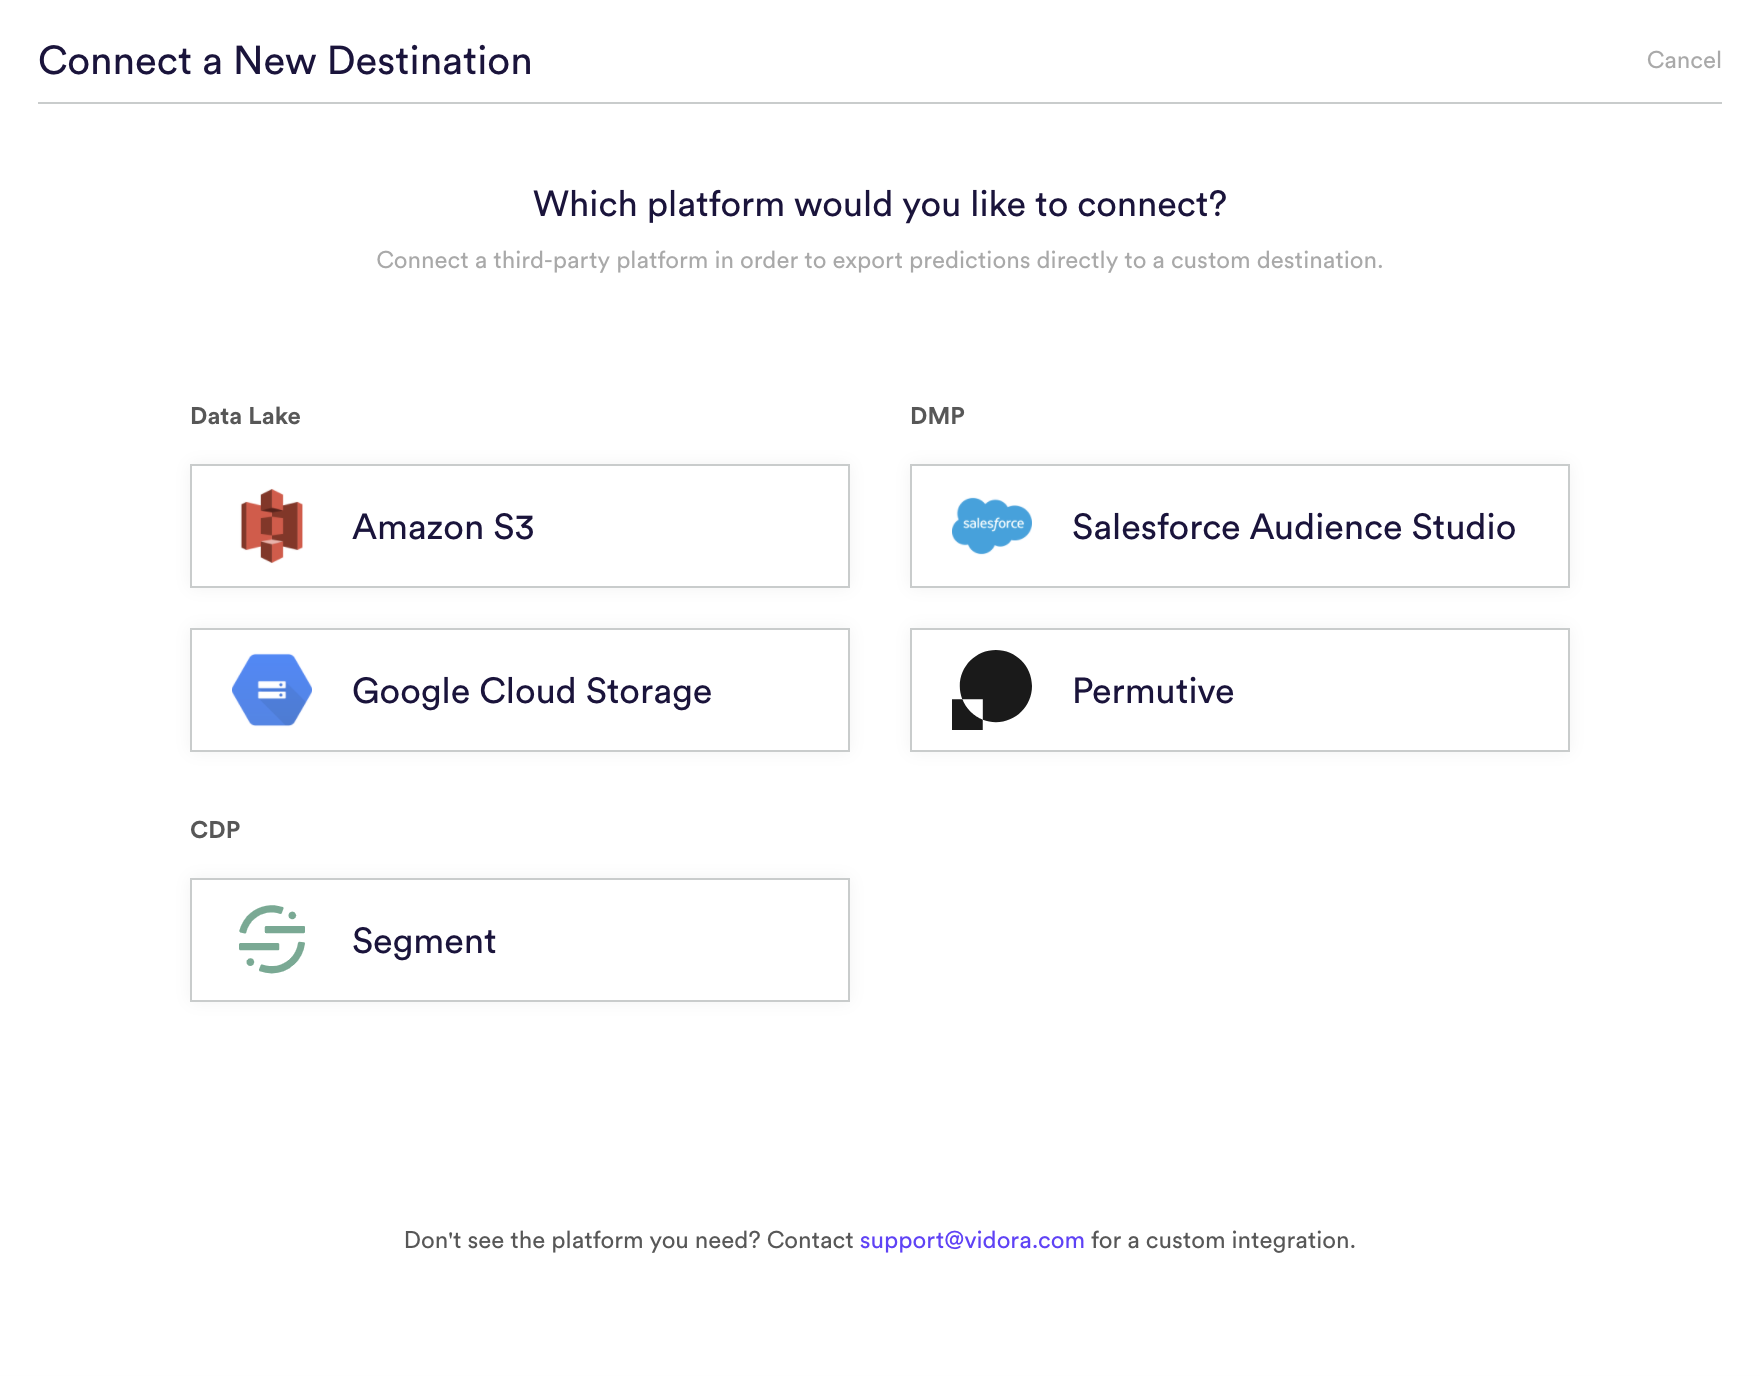
Step 1: Select Platform
First navigate to the Export Destinations area of the Data tab in Cortex, and select the “Google Cloud Storage” icon from the list of available platforms.
Step 2: Name Your Export Destination
Provide a name for your Export Destination so that you can reference it later when exporting predictions from a pipeline.
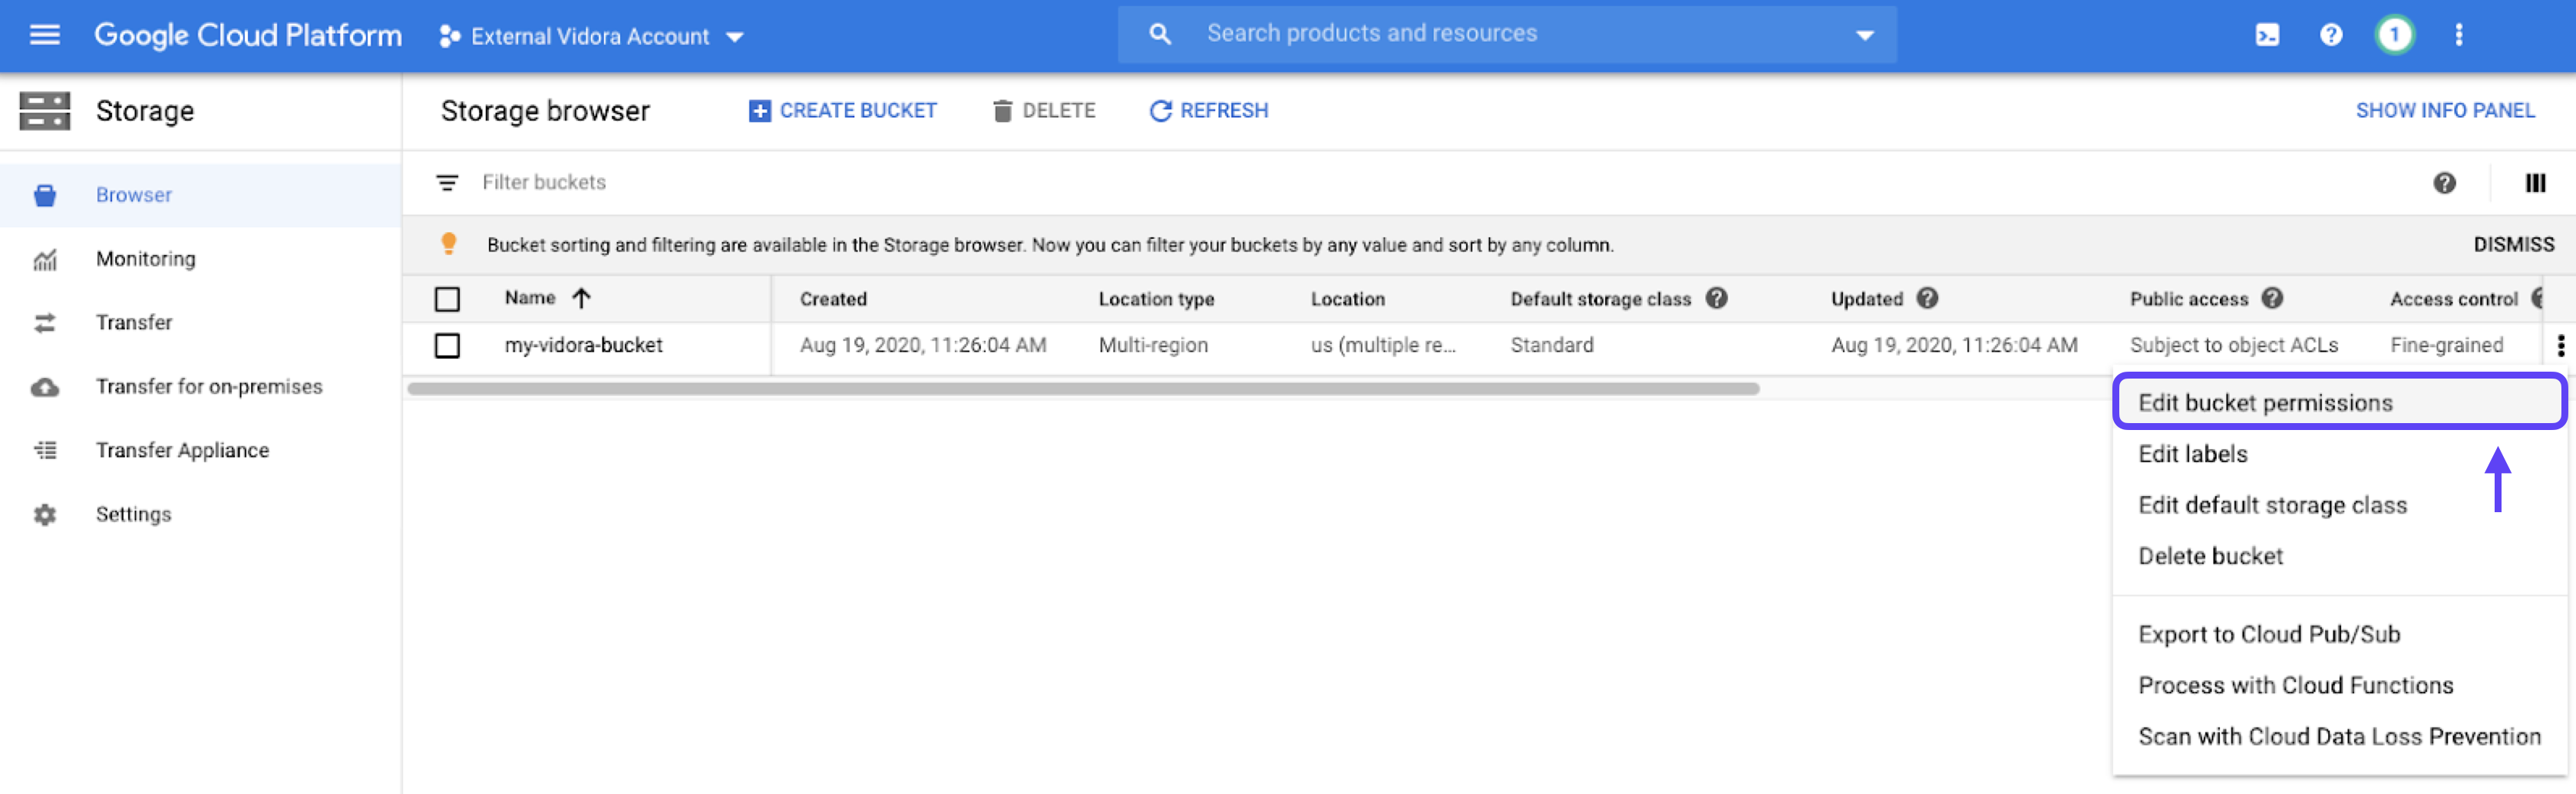
Step 3: Authorize Cortex to Access the Bucket
Before connecting the export destination, you must first authorize Cortex to access your Cloud Storage bucket. This can be done by logging into your Google Cloud Storage console in a new browser window, and taking the following steps.
1. Find the bucket that you’d like to connect to Cortex. Click the three vertical dots to the right of the row, and select Edit bucket permissions from the list of options.
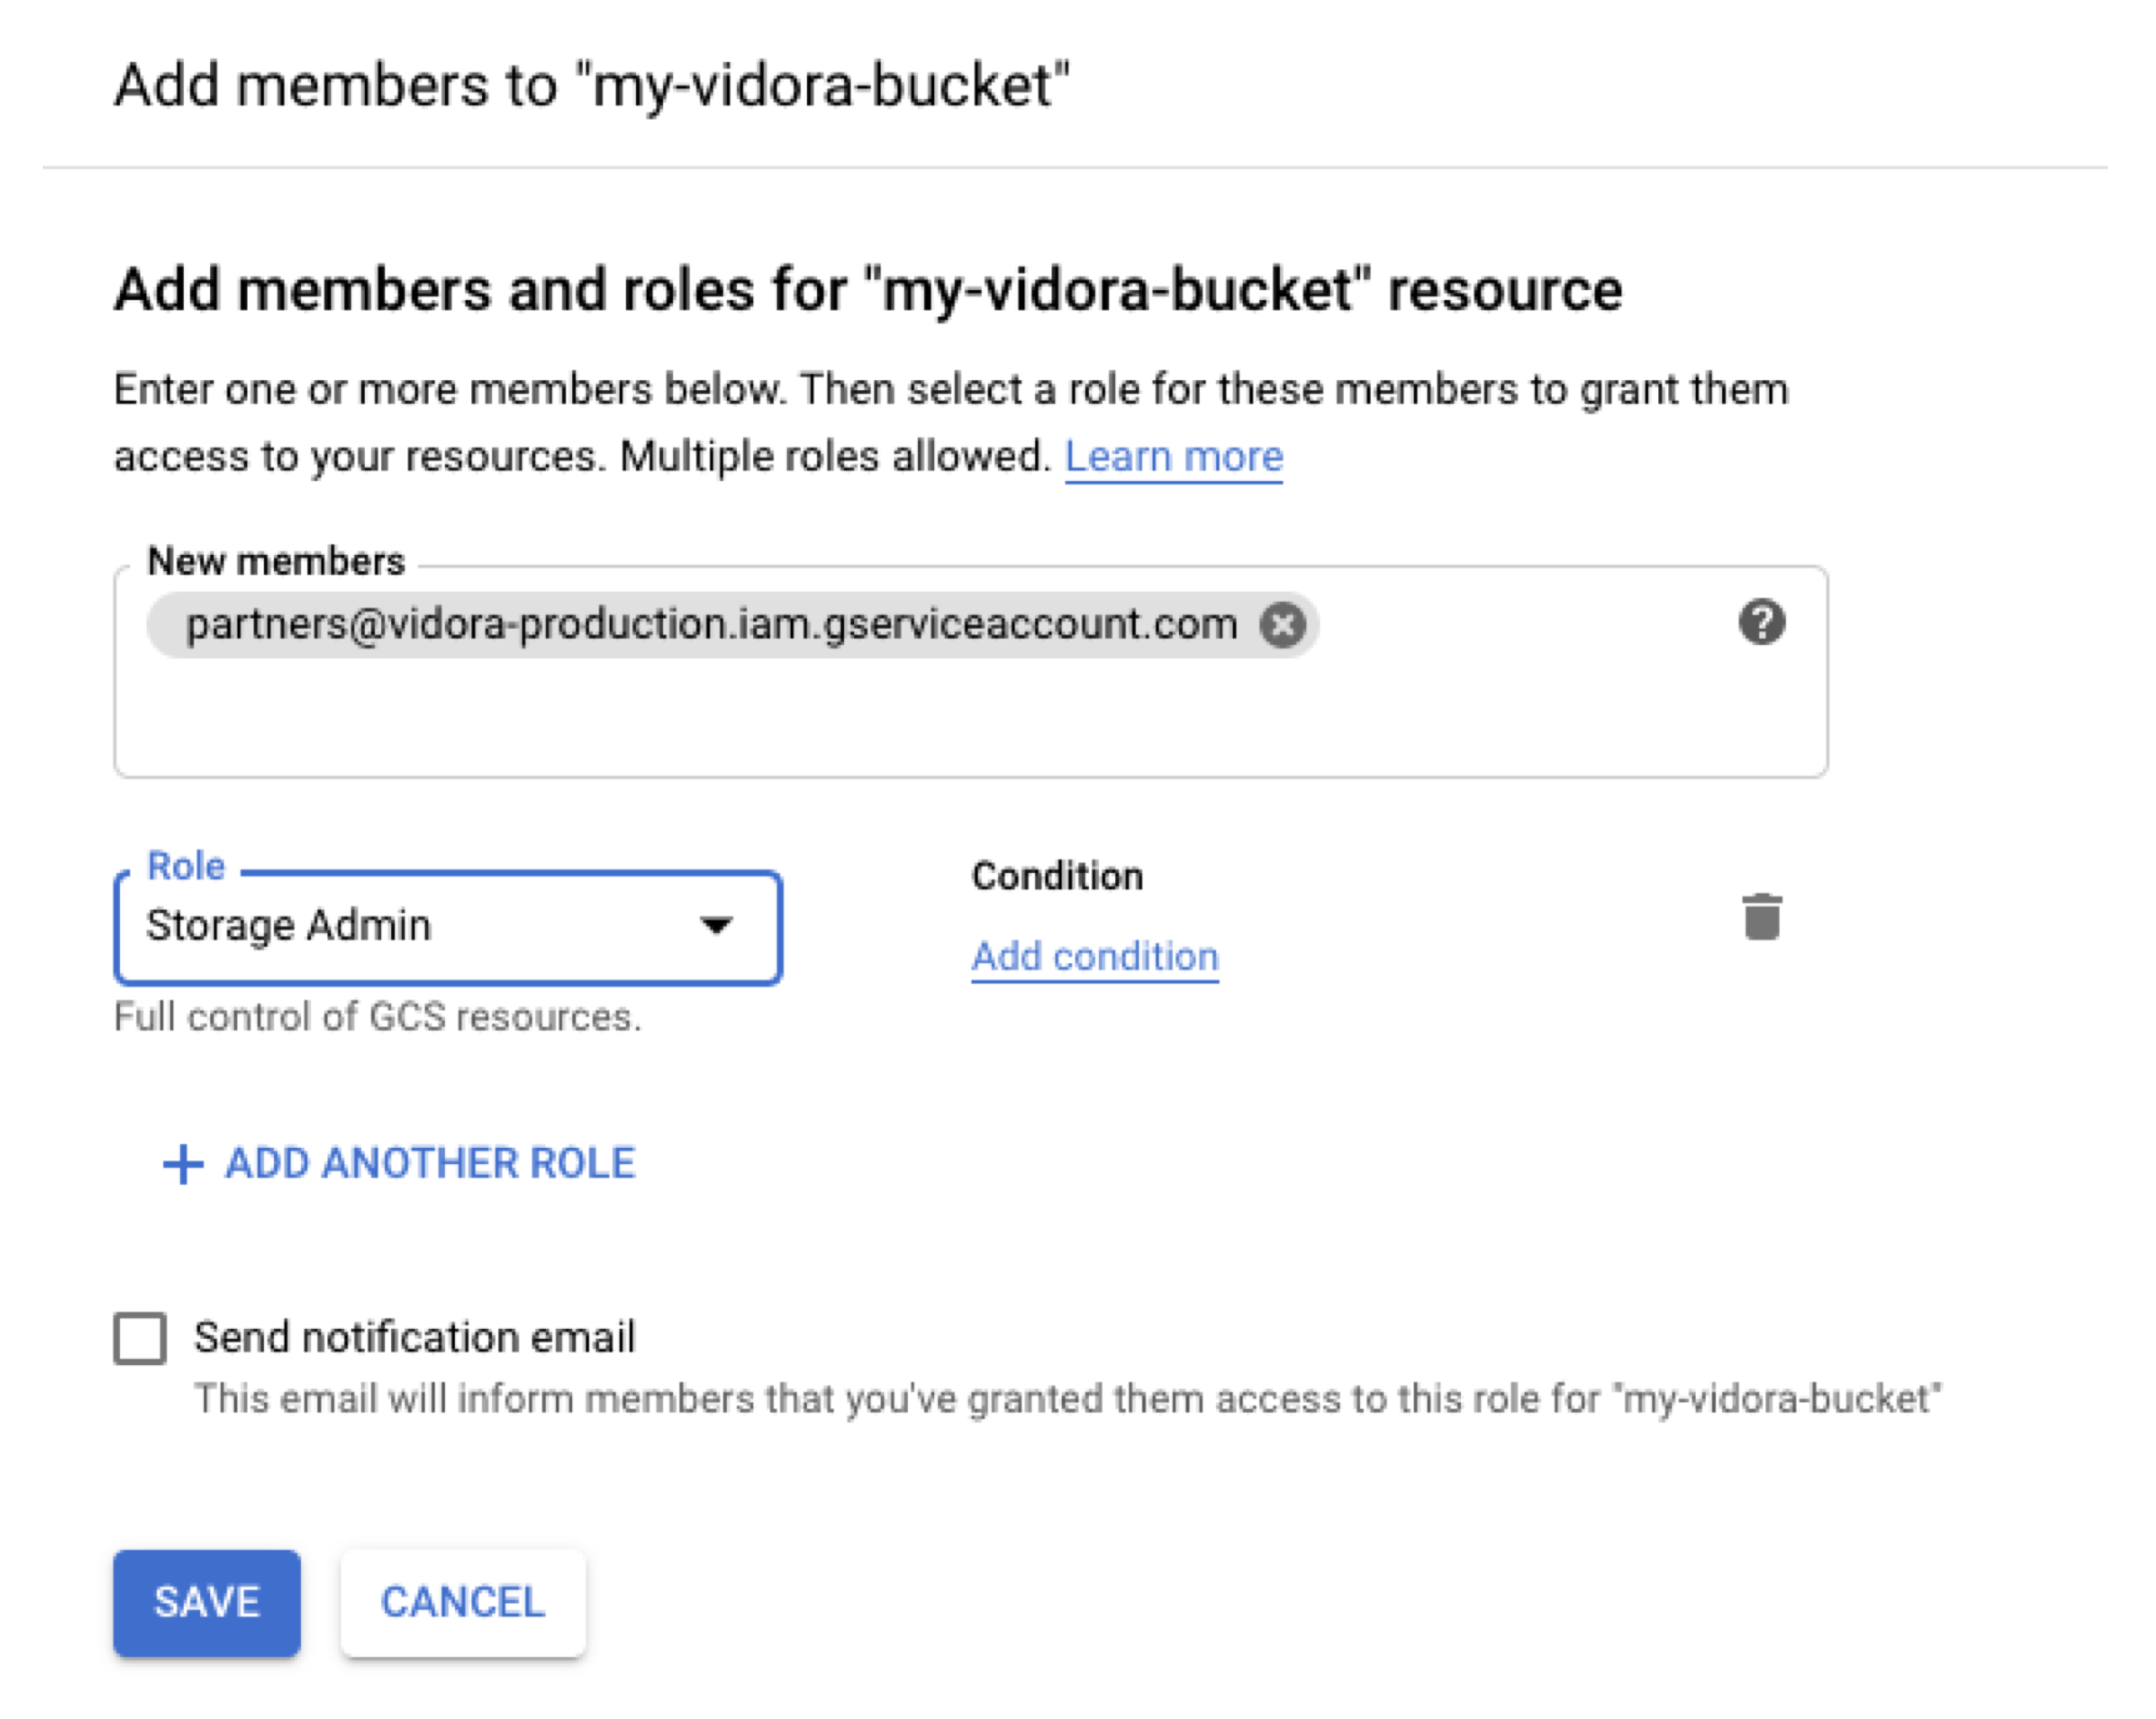
2. Paste email address partners@vidora-production.iam.gserviceaccount.com into the “New members” field, and select the “Storage Object Admin” role from the dropdown at right. Click “Save” when done.
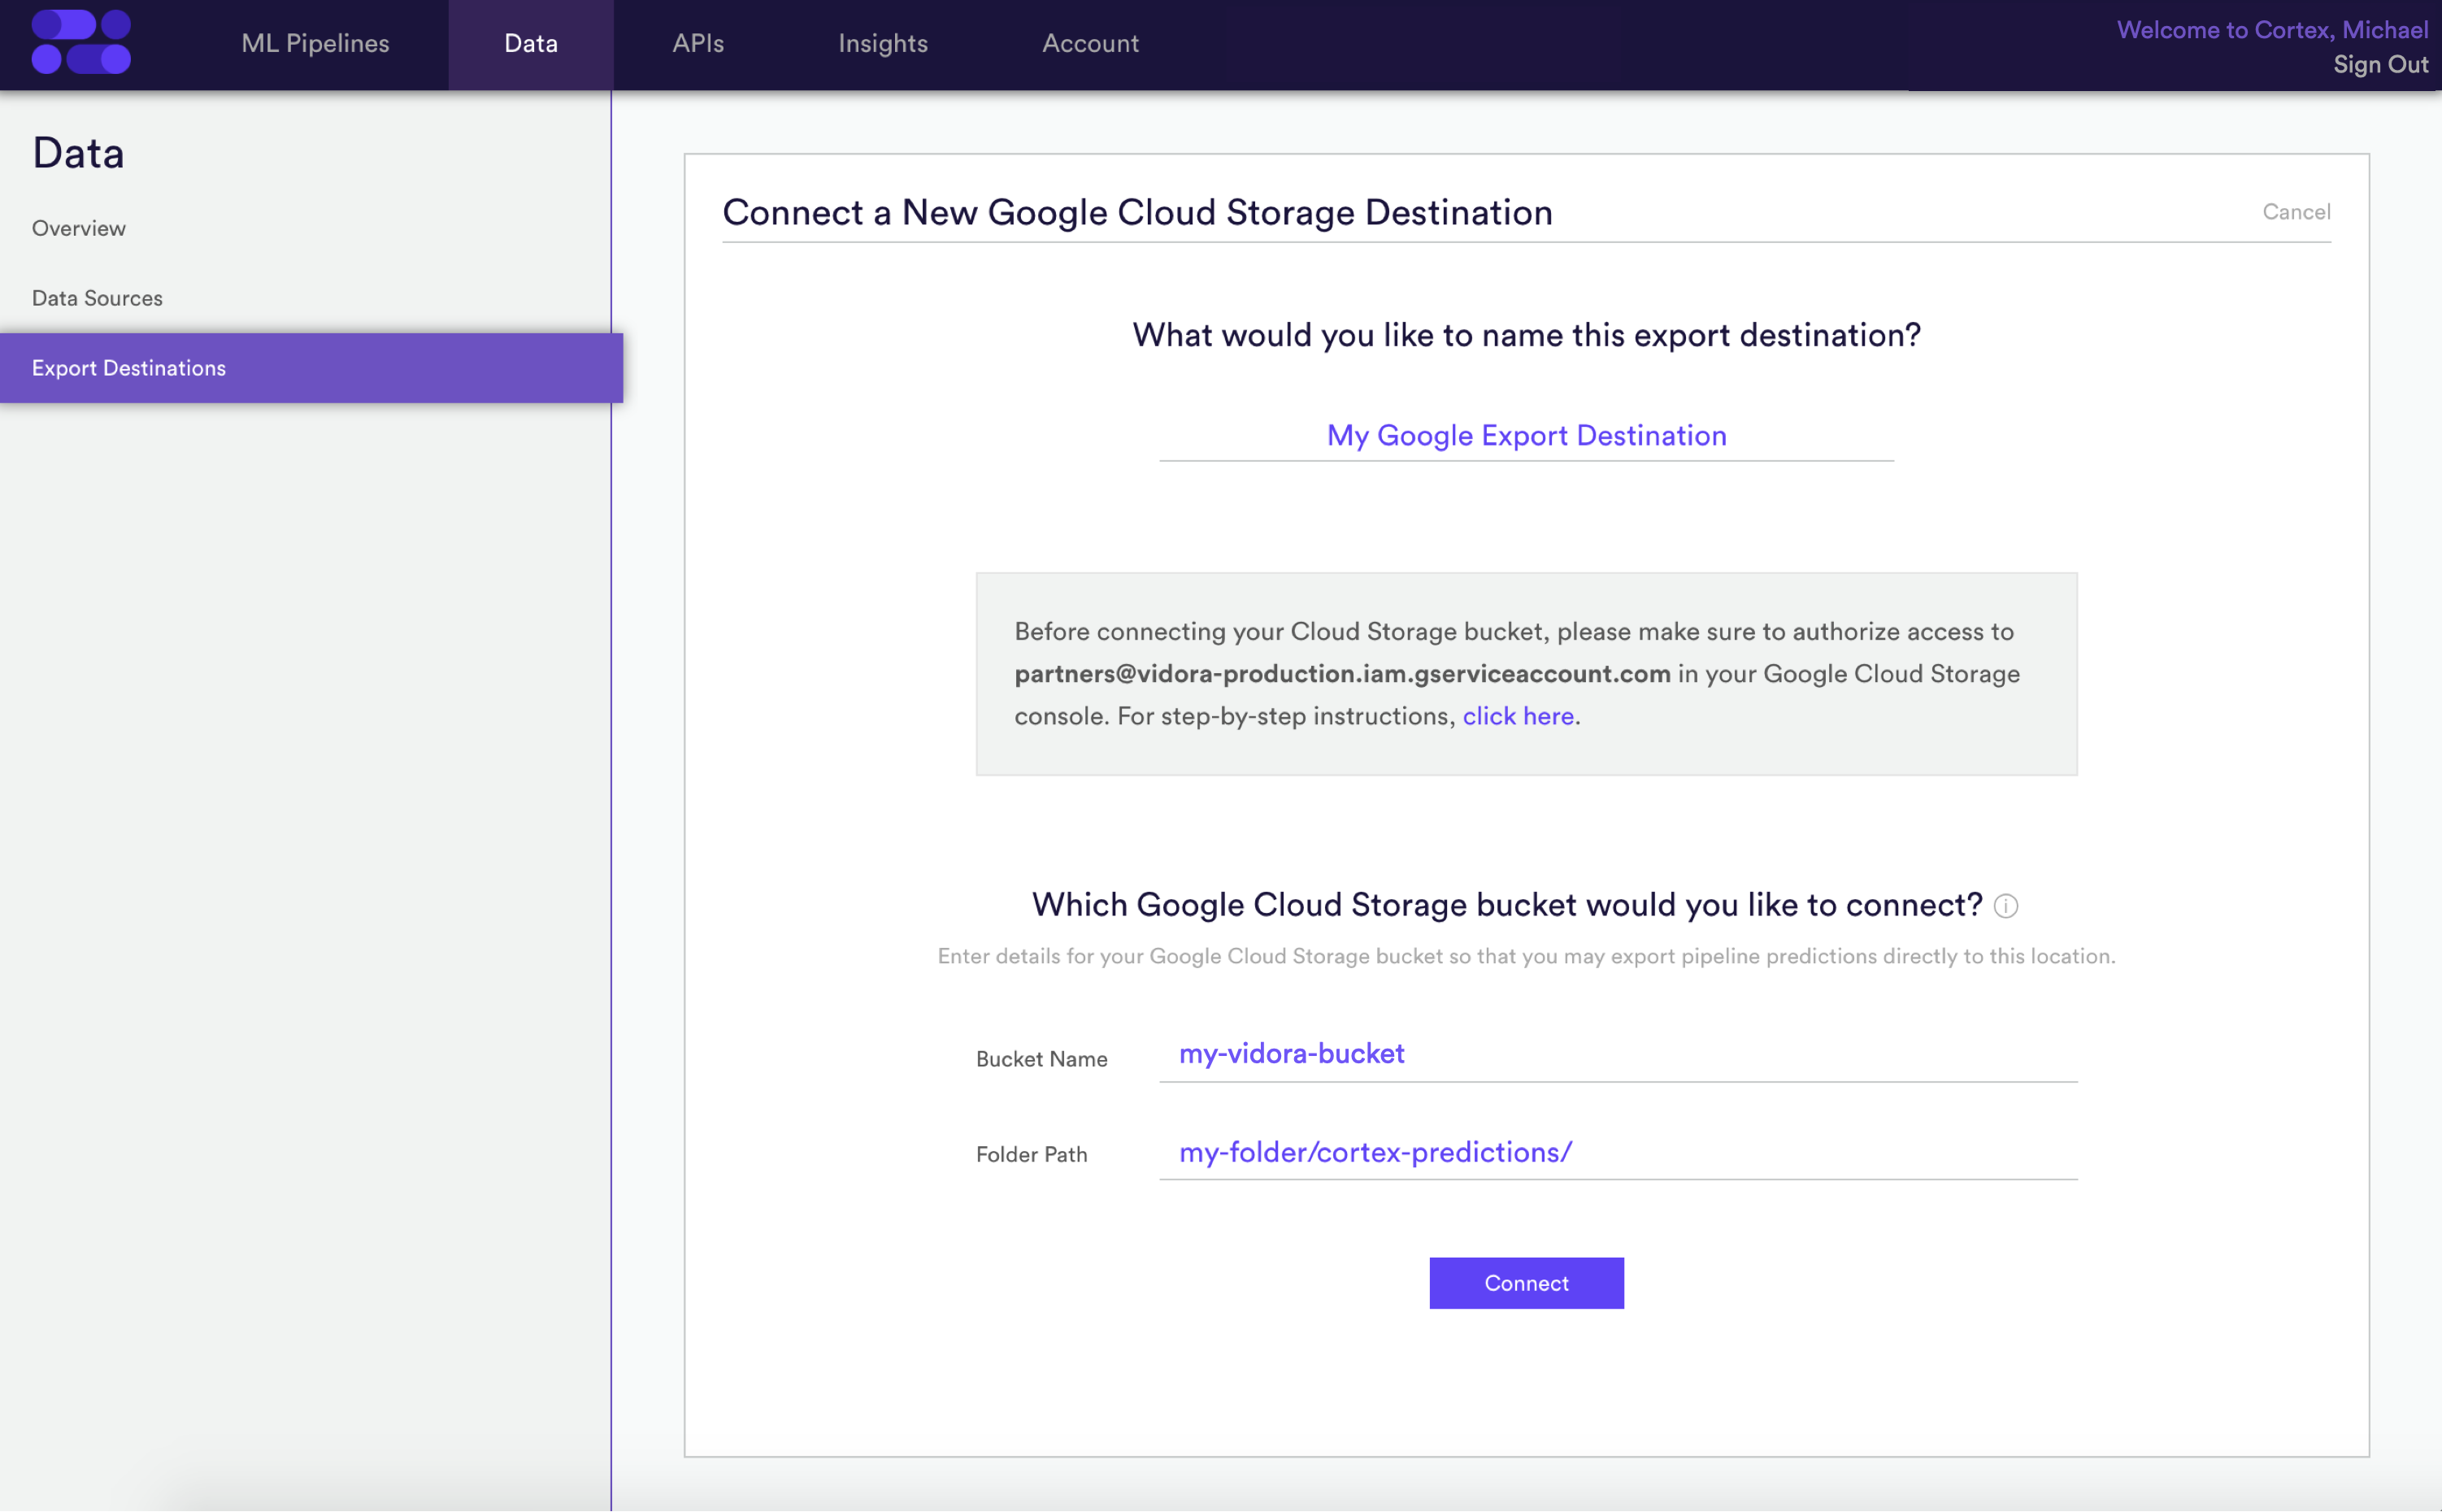
Step 4: Enter Bucket Details
Once you’ve authorized access for Cortex, head back to your Cortex account and enter the name and folder path of your Cloud Storage bucket.
Step 5: Activate the Connection
After you’ve entered your bucket details, hit “Connect” to activate the integration. Cortex will automatically test whether the connection is valid before creating the Export Destination.
Exporting Predictions to this Destination
Once your Export Destination has been connected, predictions from any Machine Learning Pipeline may be exported directly into your Cloud Storage bucket. To do this, create a Prediction Export and specify that results should be copied to your Cloud Storage Export Destination.
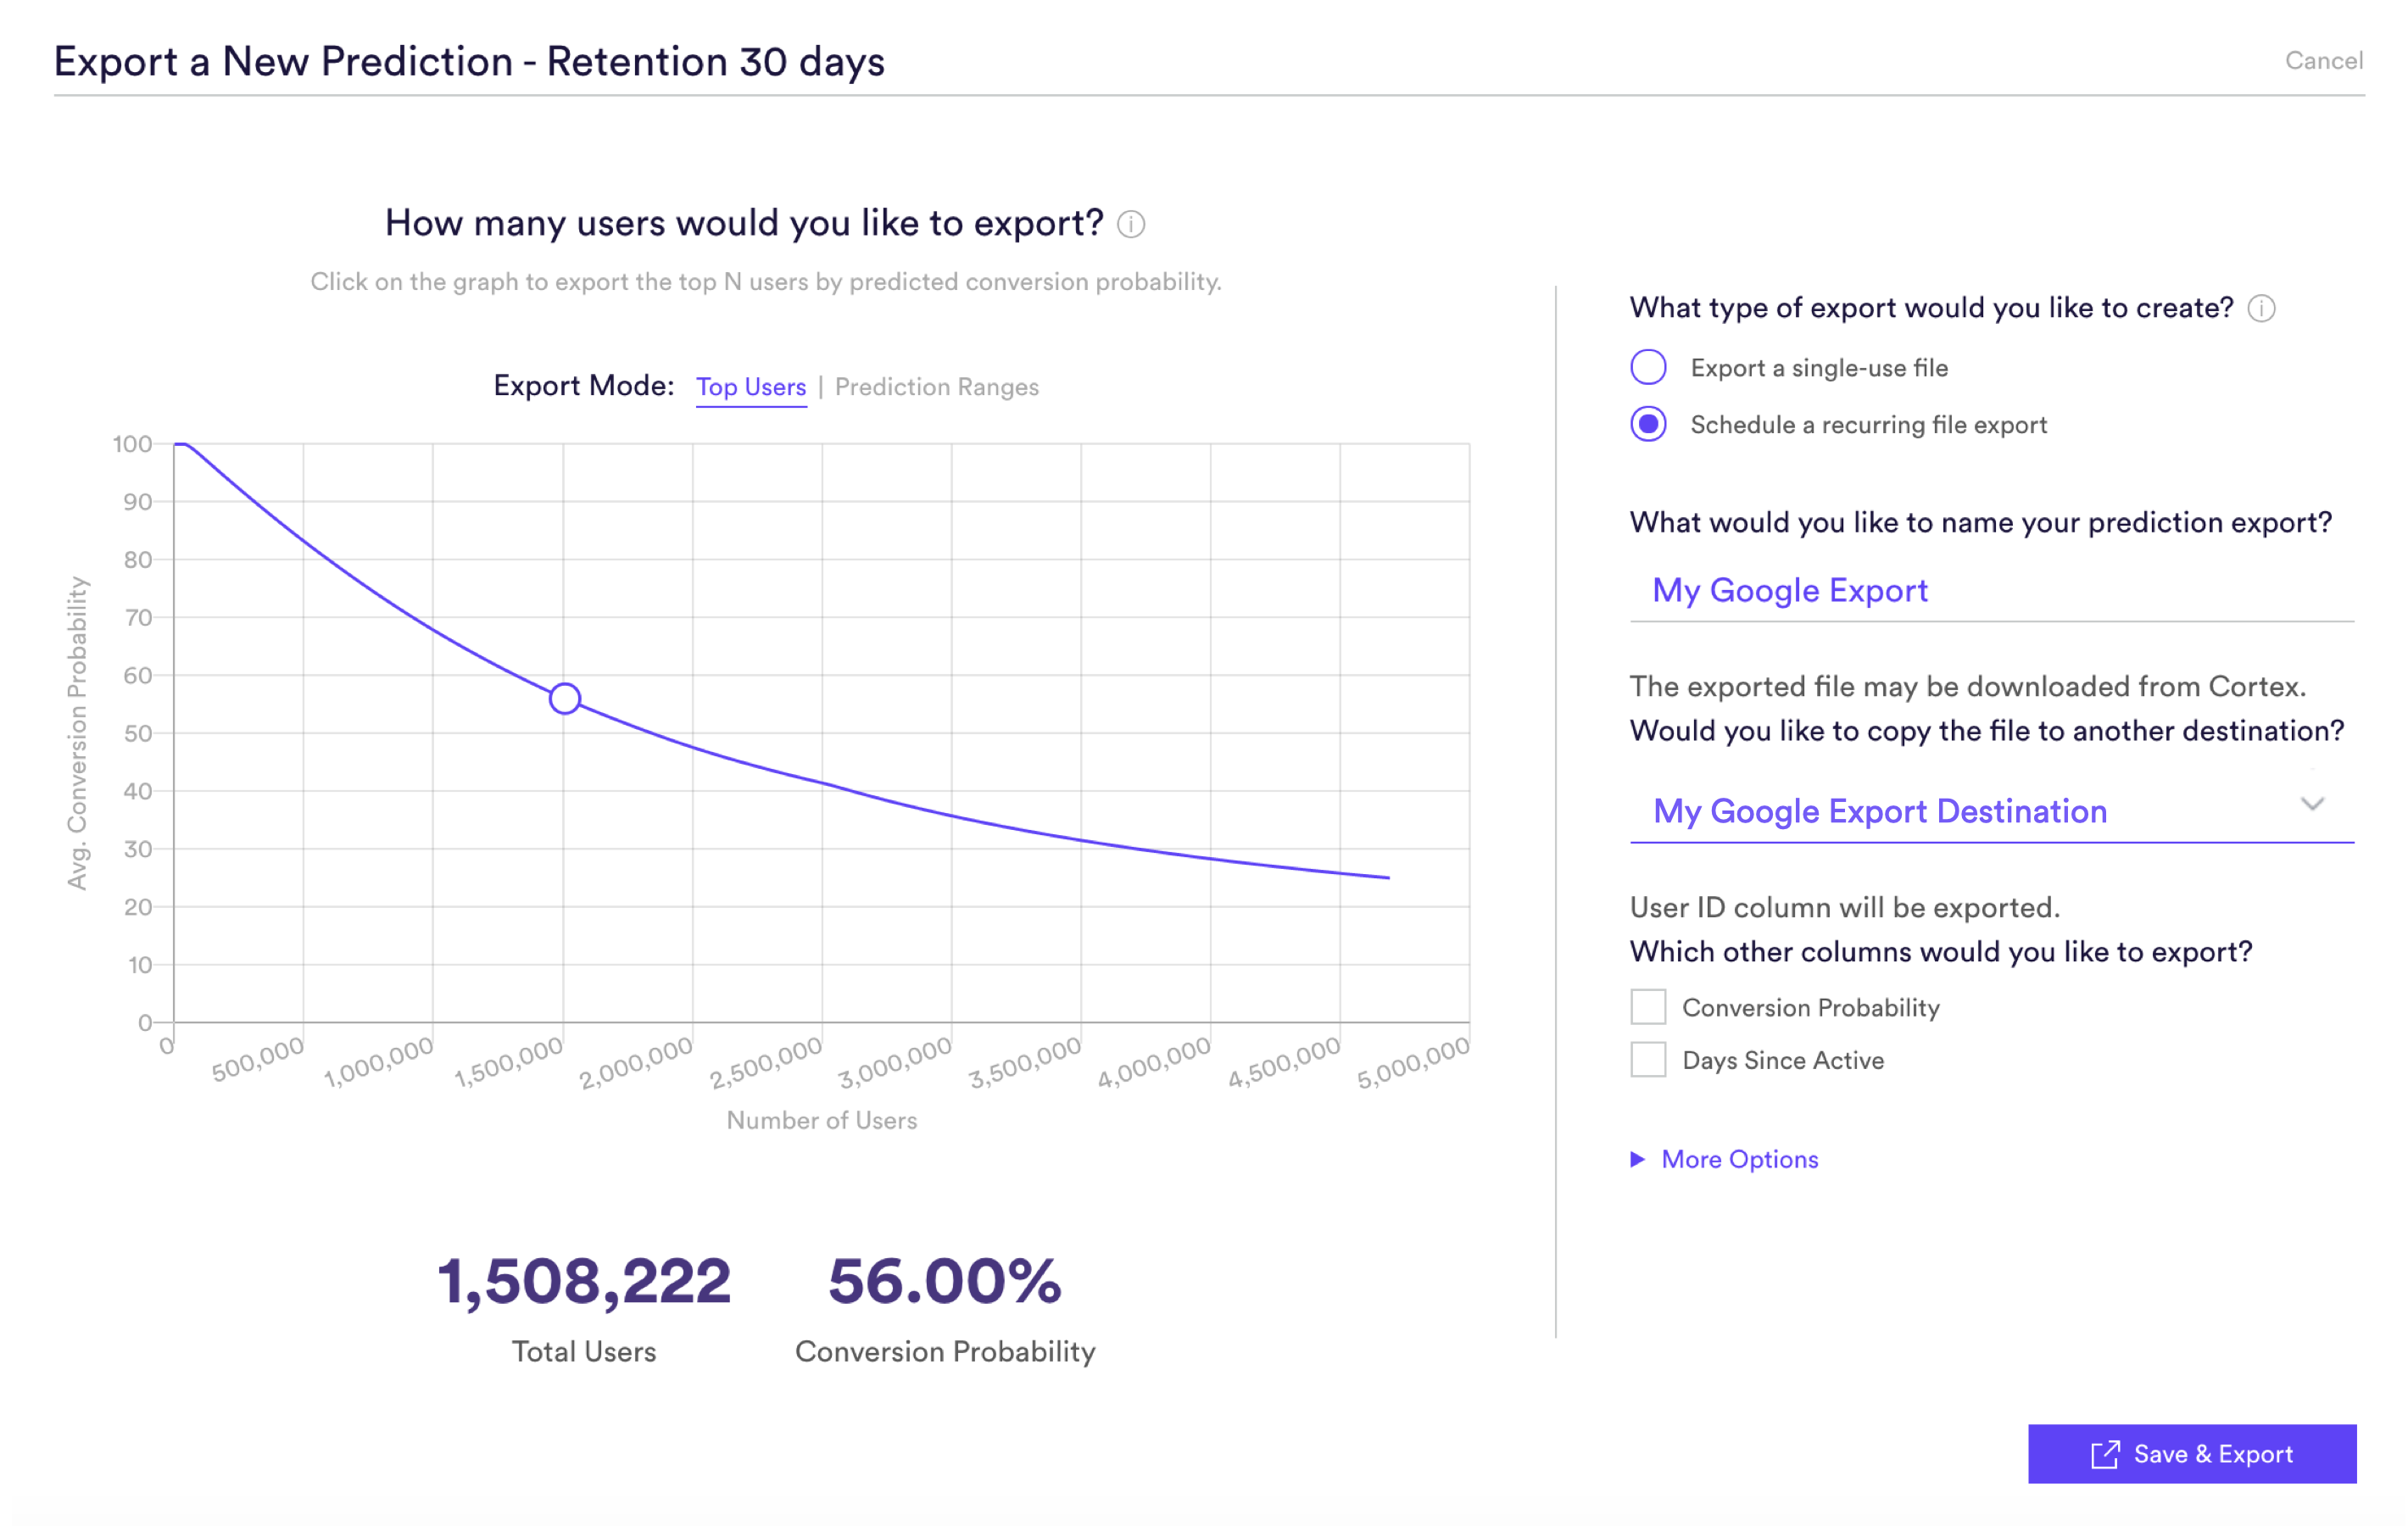
Predictions will be delivered to this Cloud Storage bucket in a sub-folder named using the Pipeline ID, while the file itself will be named using the Prediction Export ID. You may use the Pipelines API to match these IDs to their corresponding Pipeline and Prediction Export in Cortex.
Upload Template:
gs://<Bucket Name>/<Folder Path>/pipeline_<Pipeline ID>/export_<Prediction Export ID>.csv.gz
The below example shows what a final upload location might look like. The predictions file uploaded to this location will always contain results from the most recent export.
Example Upload:
gs://my-vidora-bucket/my-folder/cortex-predictions/pipeline_f90819314266a344/export_vrhmjwf10b66zl9k.csv.gz
Related Links
Still have questions? Reach out to support@mparticle.com for more info!